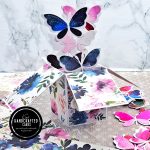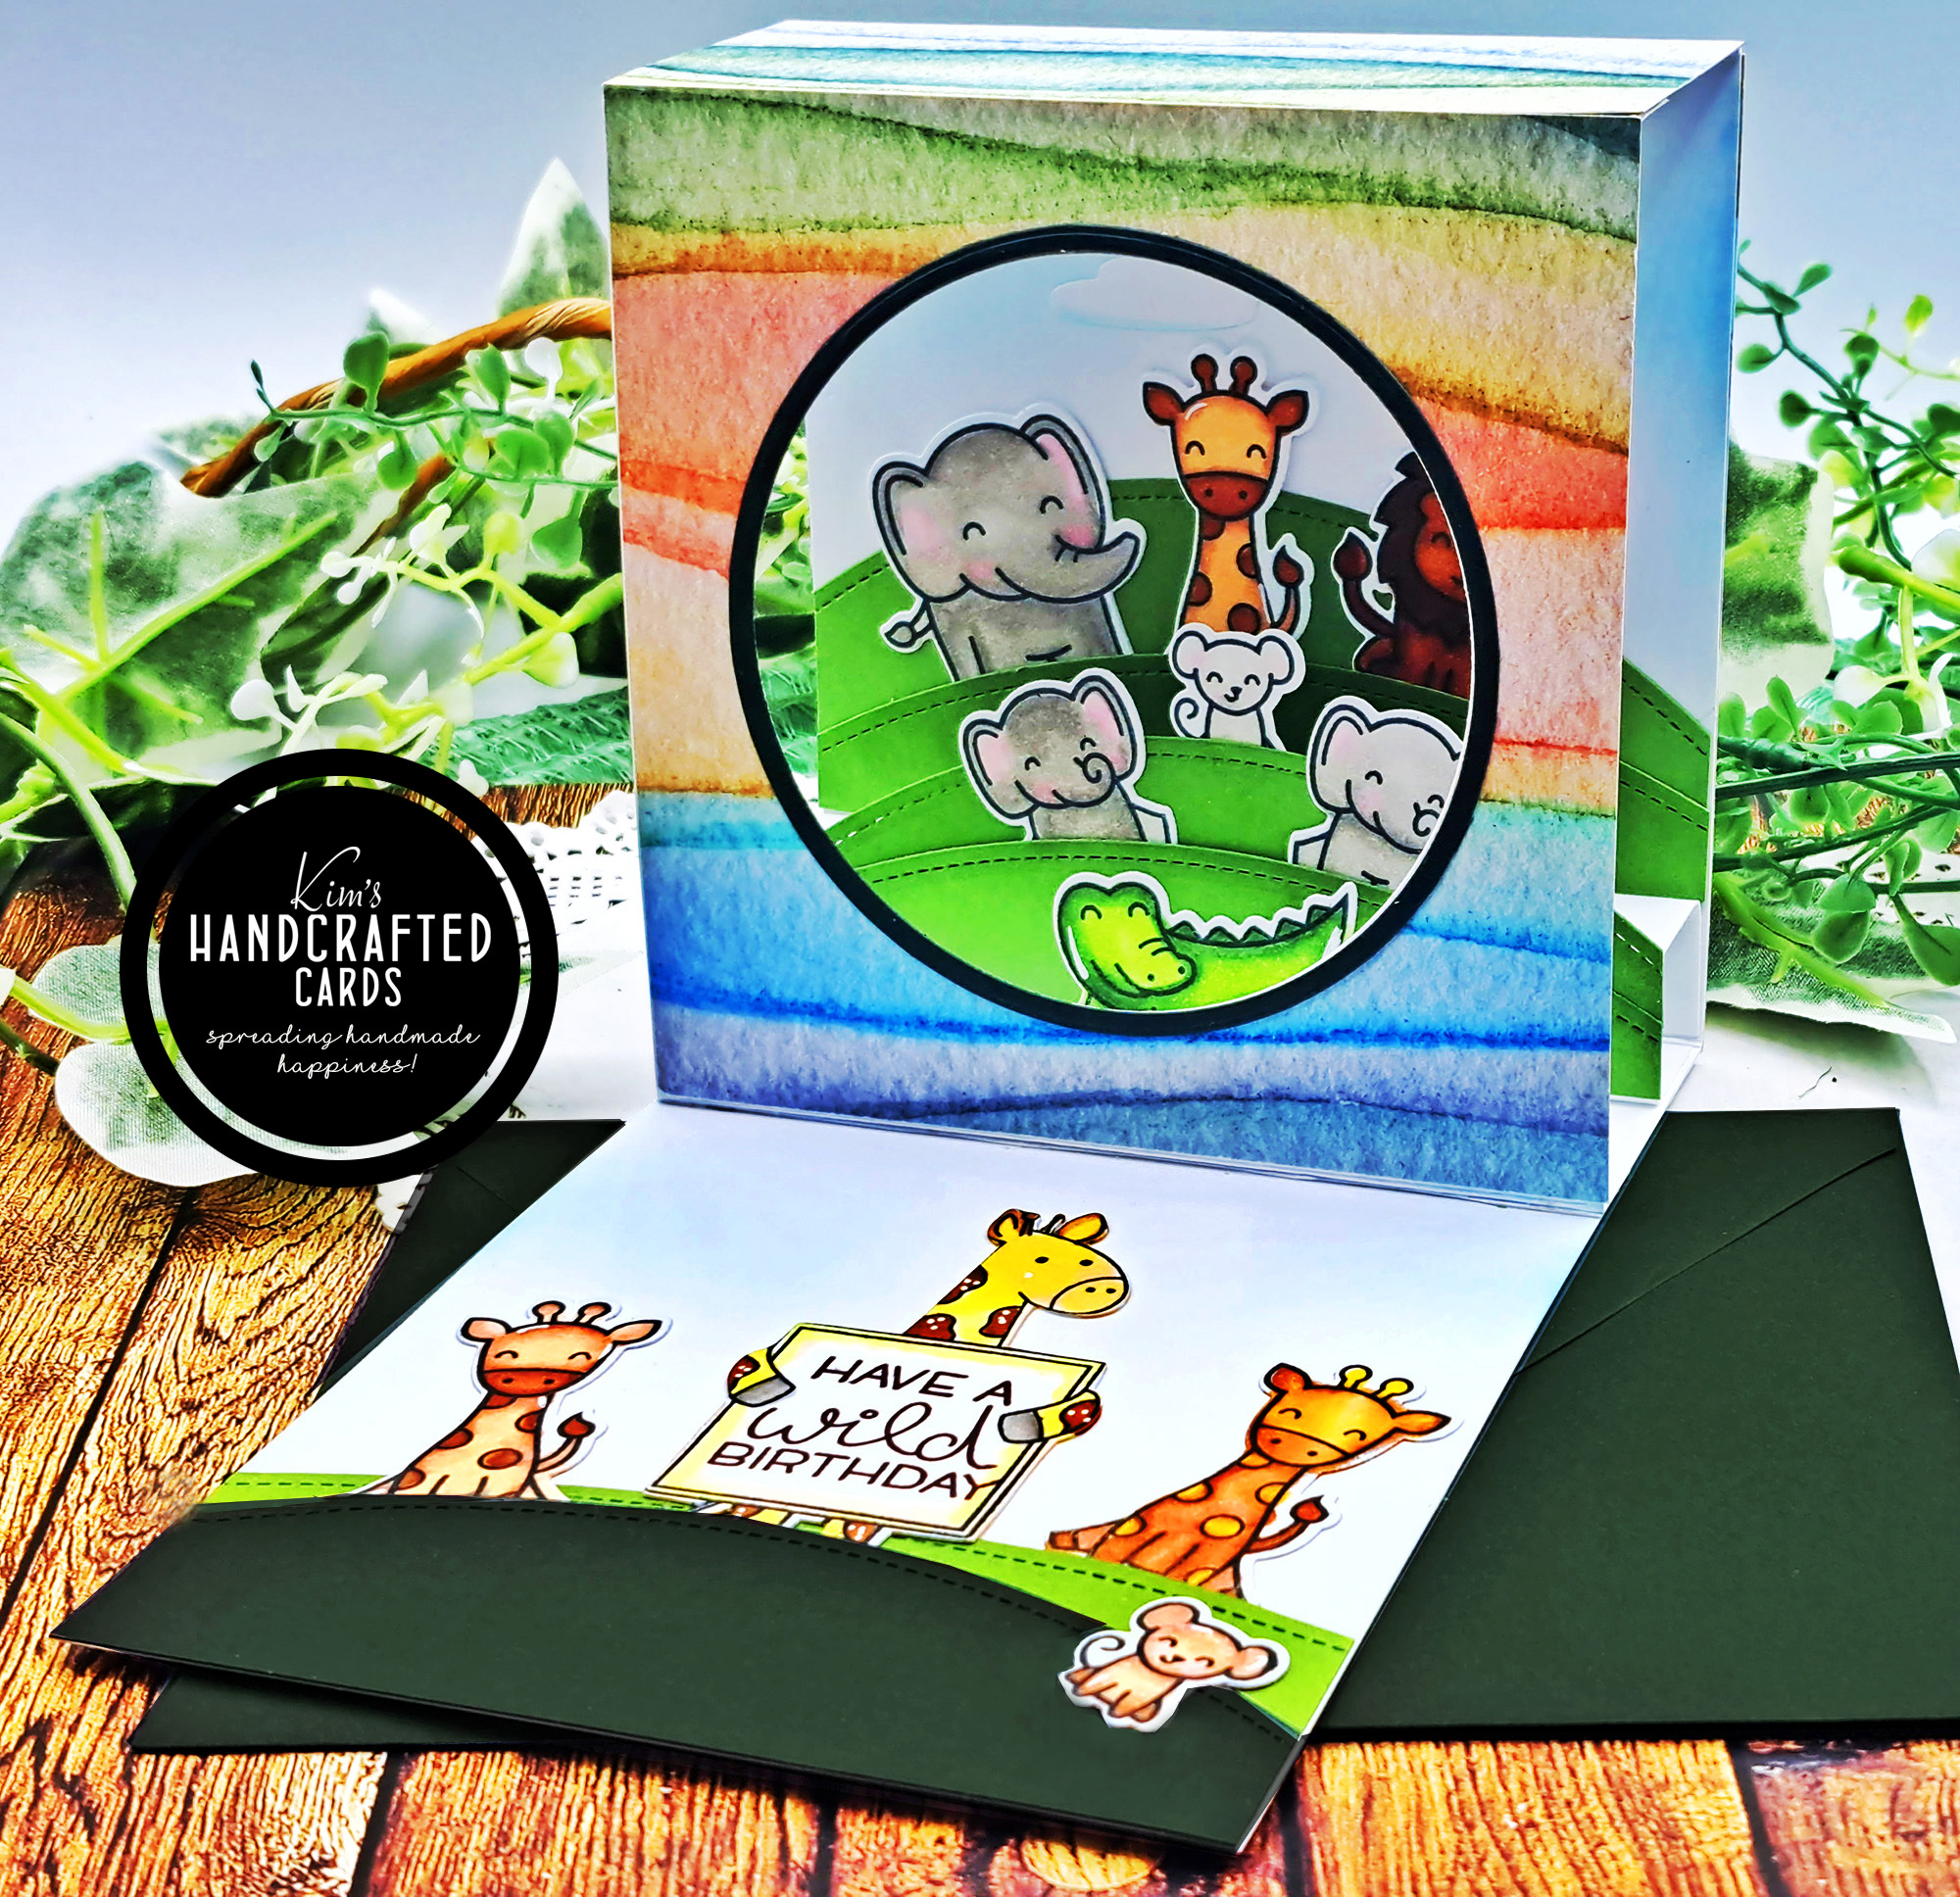
Hi my friends! I’m really happy about today’s card because it is a NEW design for me. Lately, I’ve been really drawn to more 3D-type cards like easel cards, pop-up box cards and even shaped easel cards. So, I wanted to make use of critters that I had colored and saved in my envelope and in searching, came across Jennifer McGuire’s YT video, “New Display Frame Cards, No Specialty Dies Needed“. She made a couple of 5″ x 7” cards that when opens display a shadow box feature. I tried it and boy was it fun!
I highly recommend watching her video especially if you want to make a similar card. I followed her instructions for the 2nd card cause I wanted a 5″ x 7″ portrait card. However, I altered my card by creating 2 pop up boxes I guess you can call them for the inside to hold up my hills. Jennifer used acetate to float her decor. I skipped the acetate.
After I put my cardbase together, time for the fun stuff: Decorating!
Putting it all together
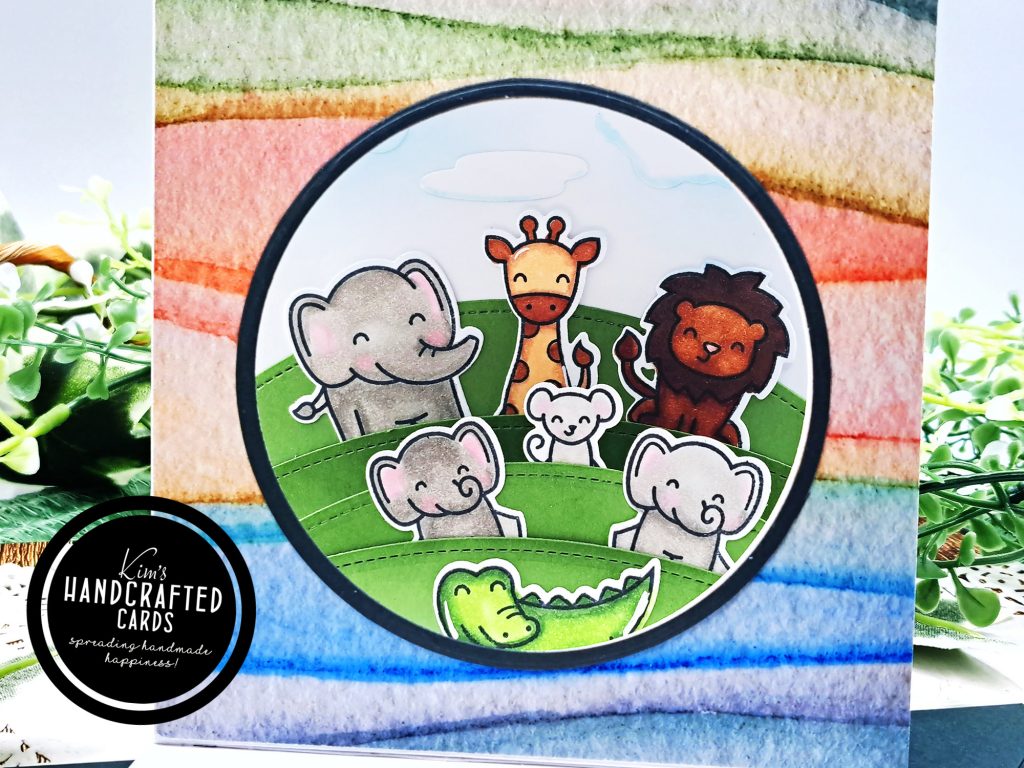
To decorate the outside of my card, I used Paper Rose Studio’s “Sunny Days” pattern papers. I used a circle die to make the window opening and I die cut a border around the circle.
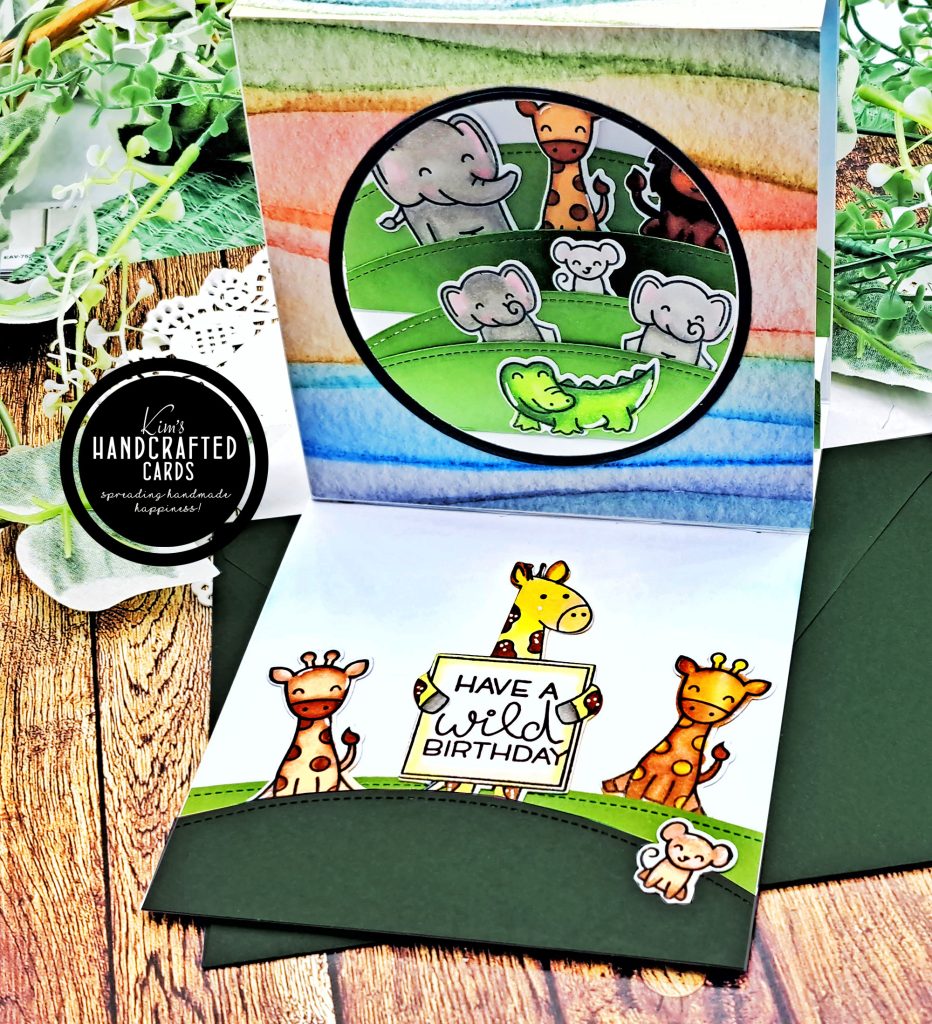
The pattern paper covers the front top and inside of the card. I added two tiers of grassy hills on the inside and adhered more hills for the piece that sits when the card is standing up. I did a little ink blending for interest with Pinkfresh’s “Sky Blue” color. Time to add my critters to complete my scene!
Create the Scene
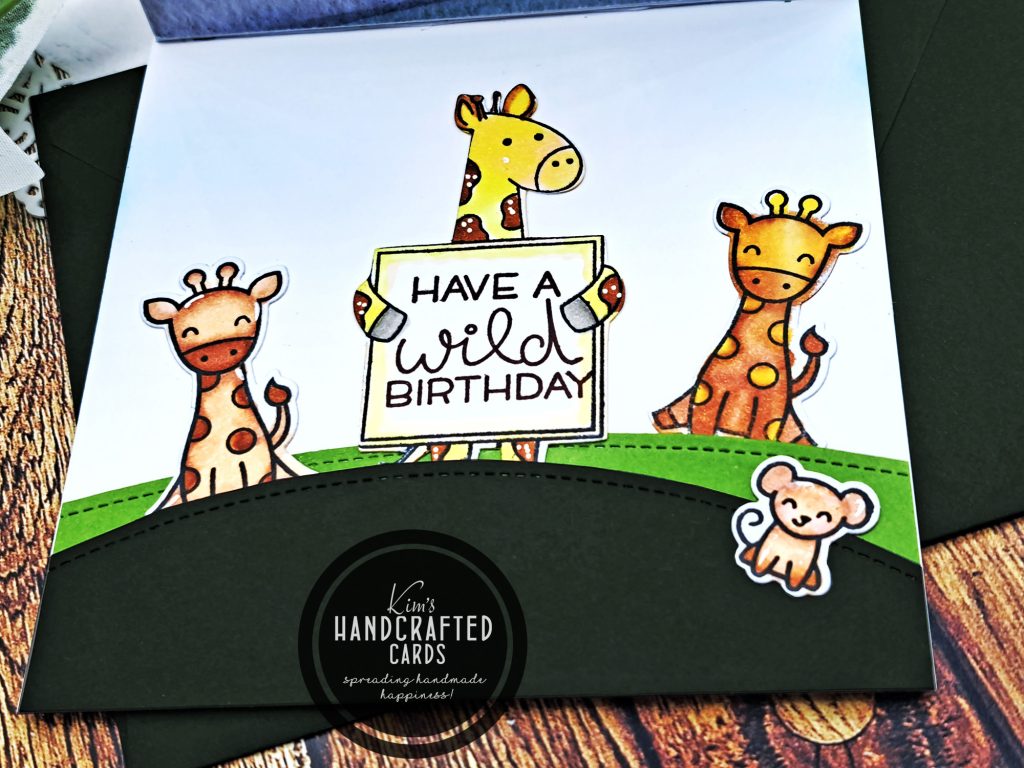
The critters I used to decorate my card are Lawn Fawn’s “Wild for You”, if you want the specifics of my color choices, then check out this post. I made a bunch and saved them for future cards. One of my critters, the giraffe on the inside of the card is from Pretty Pink Posh’s “Animal Signs” stamp set. I don’t have the coordinating dies so I used my Brother Scan ‘N Cut to die cut it out. The sentiment is also from the Wild for You set that I inked with Pinkfresh’s Ink “Doe” color.
The grassy hills are also from Lawn Fawn, I die cut these with Simon Says Stamp green cardstock and ink blended over them using Pink Fresh Studio’s “Olive” ink pad.
I placed all my critters on the hills in different areas by gluing them down. This part is the best, I love seeing these critters looking at me!
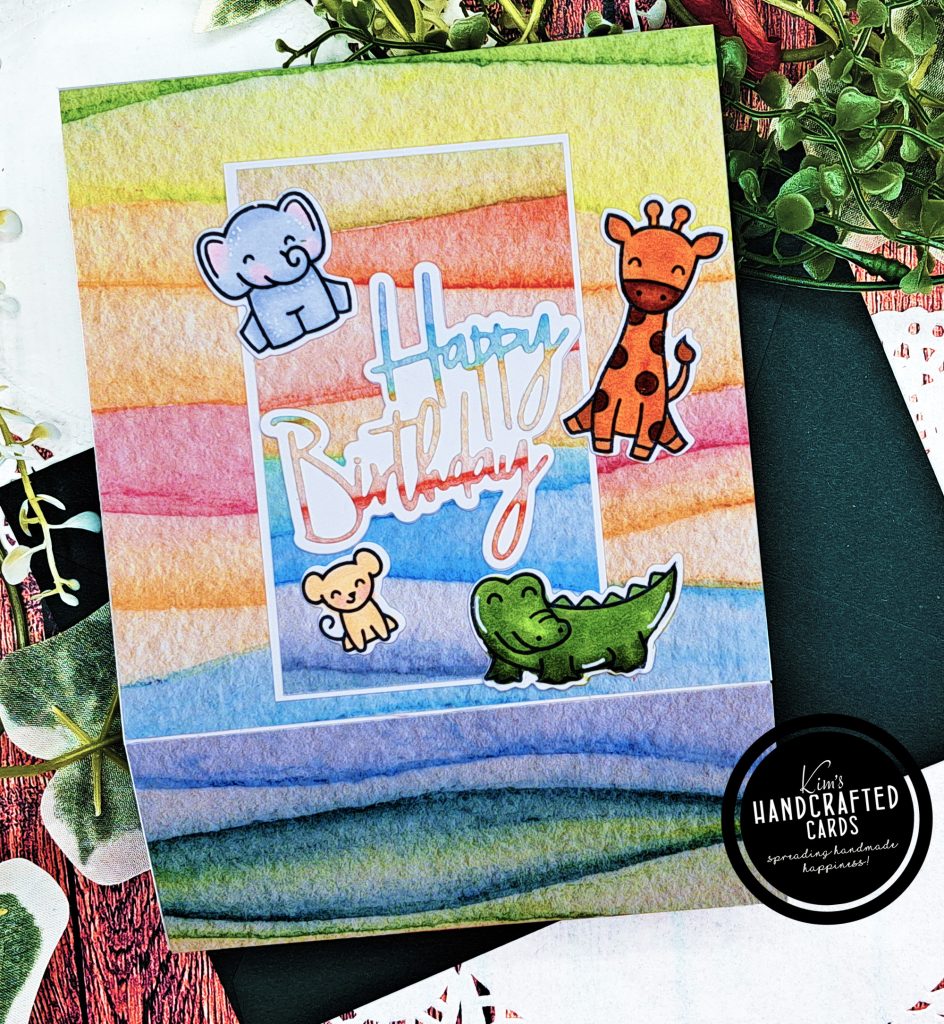
Dressing up the Front of the Card
To decorate the front of the card when it’s flat, I just trimmed a piece of pattern paper to about 2-1/2″ x 3-3/4″ and I trimmed some white cardstock just a bit larger to create a border.
I used Pinkfresh’s word die set “Happy Birthday” die cutting the letters with the same pattern paper and the shadow on white cardstock. I glued that down and added some extra critters! This card fits perfectly inside a 5 x 7 envelope!
This card took a full day to make but let me tell you it was the best fun!! In fact, I have another cardbase ready to decorate for another frame display card. I so appreciate cardmakers who inspire us to create and when you don’t need additional supplies, that’s extra special!
Thanks for Reading!

Some of the links to the products I used are affiliate links which means that when you shop with them, I’ll receive a small commission at no extra cost to you. Your support helps me run my small crafty business. Thank you so much!
- Lawn Fawn “Wild for You” Stamp Set
- Lawn Fawn “Wild for You” Coordinating Die or get the bundle here
- Lawn Fawn’s “Hillside” die set
- Pretty Pink Posh “Animal Signs” Stamp set
- Pinkfresh Studio Essentials “Classic Word Dies”
- Brother Scan ‘N Cut SDX125 or here or see the full list of Scan ‘N Cut Machines
- Copic Sketch Markers here, here or here
- Copic #0 Colorless Blender here or here
- Simon Says Stamp “Intense Black” ink pad
- White #10 Gelly Roll Pen
- Pinkfresh Studio Inks
- Blending Brushes, large size here, tiny size here
- Spellbinders Platinum 6 Die Cutting/Embossing Machine here or here
- Stamp Positioner: Misti here, here, here or here
- Accents 100 lb. White Cardstock
- Bearly Art Glue
- White #10 Gelly Roll Pen
- Craft Reverse Tweezers by EK Tools (great for picking up die cut pieces)
- Glassboard Craft Mat → Use my Code → KIMCARDS20 at checkout