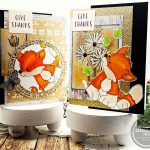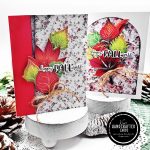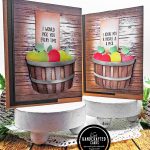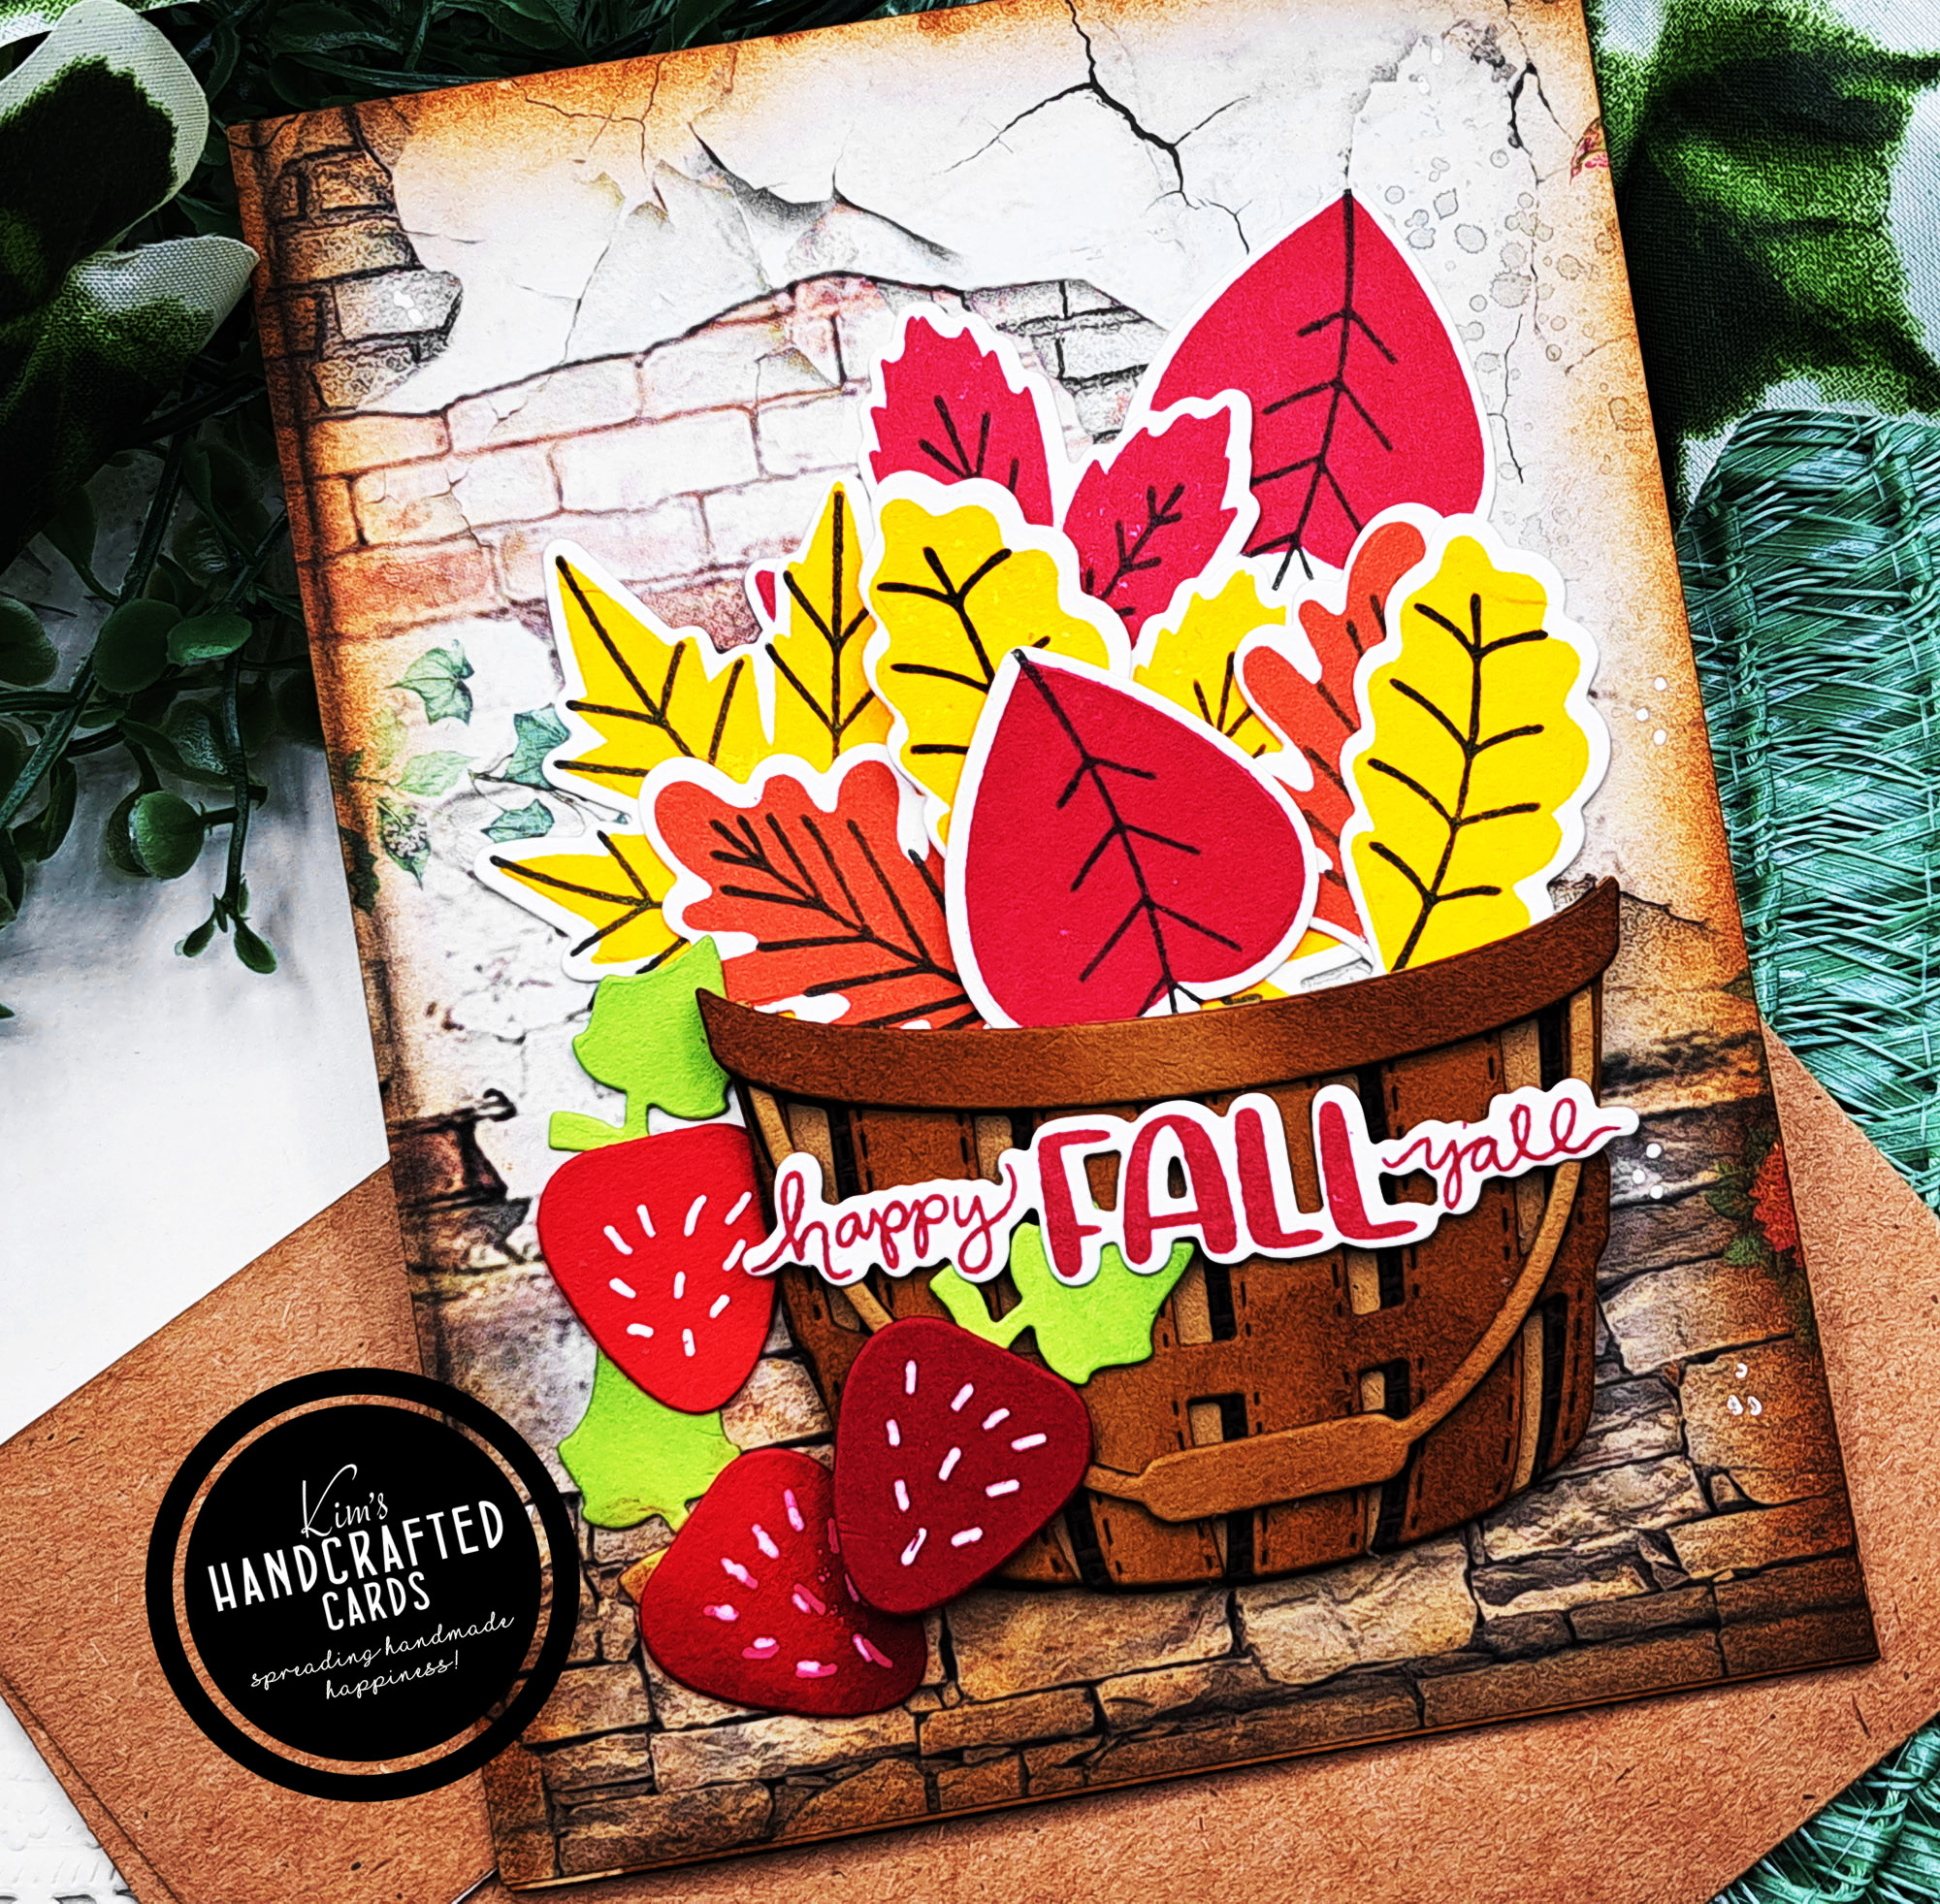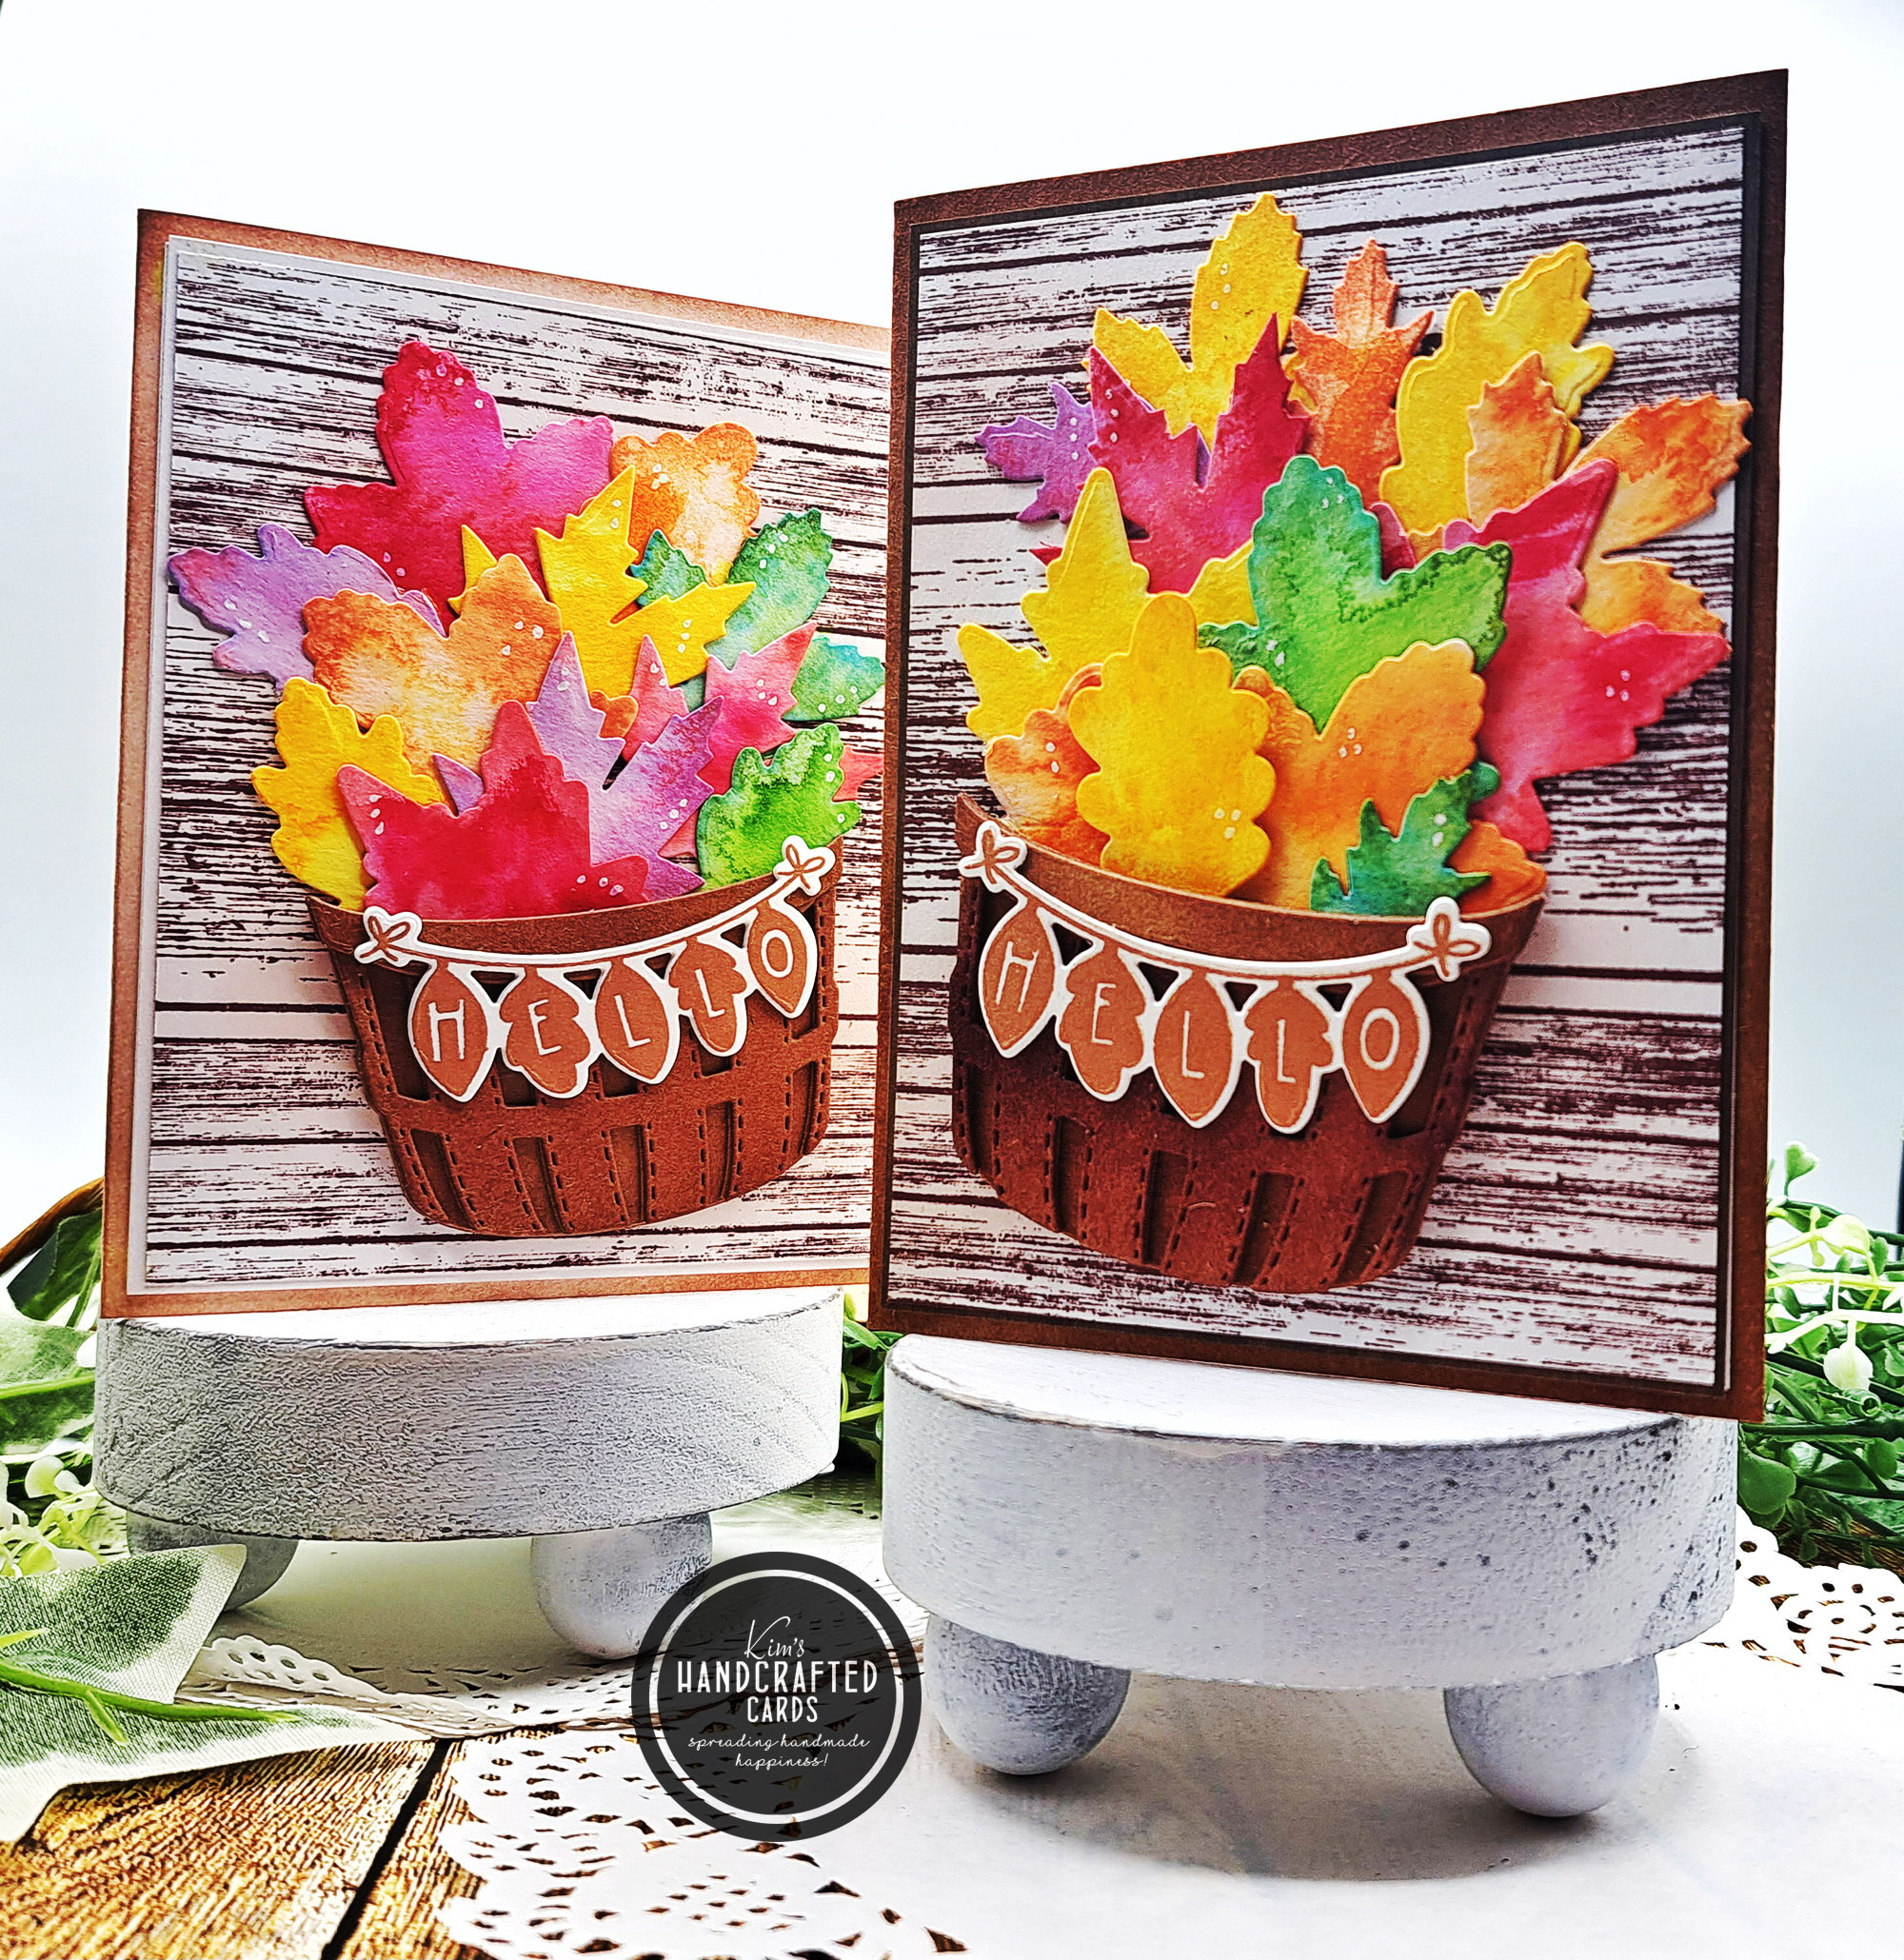
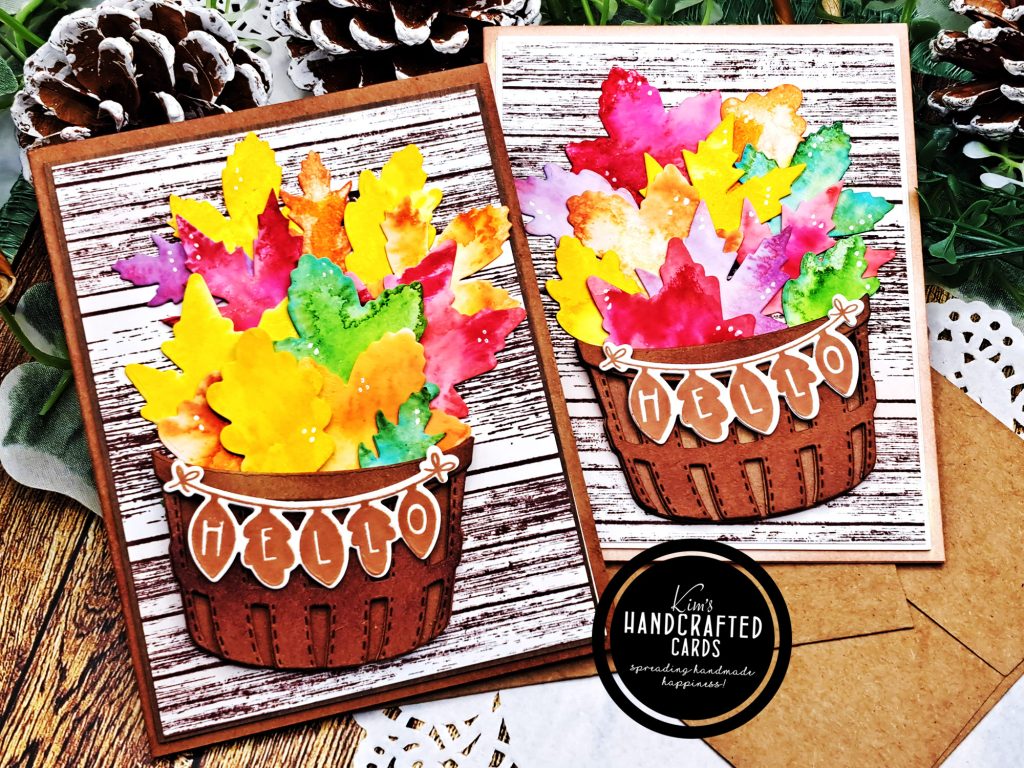
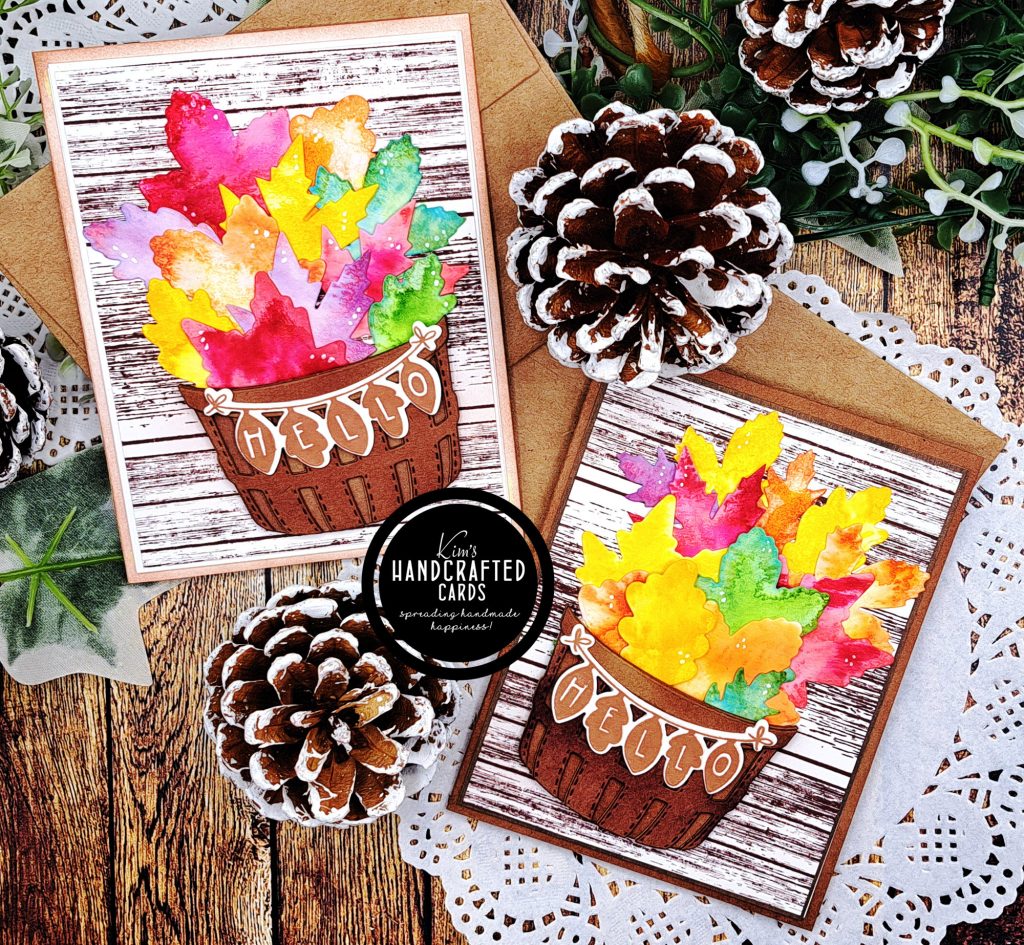
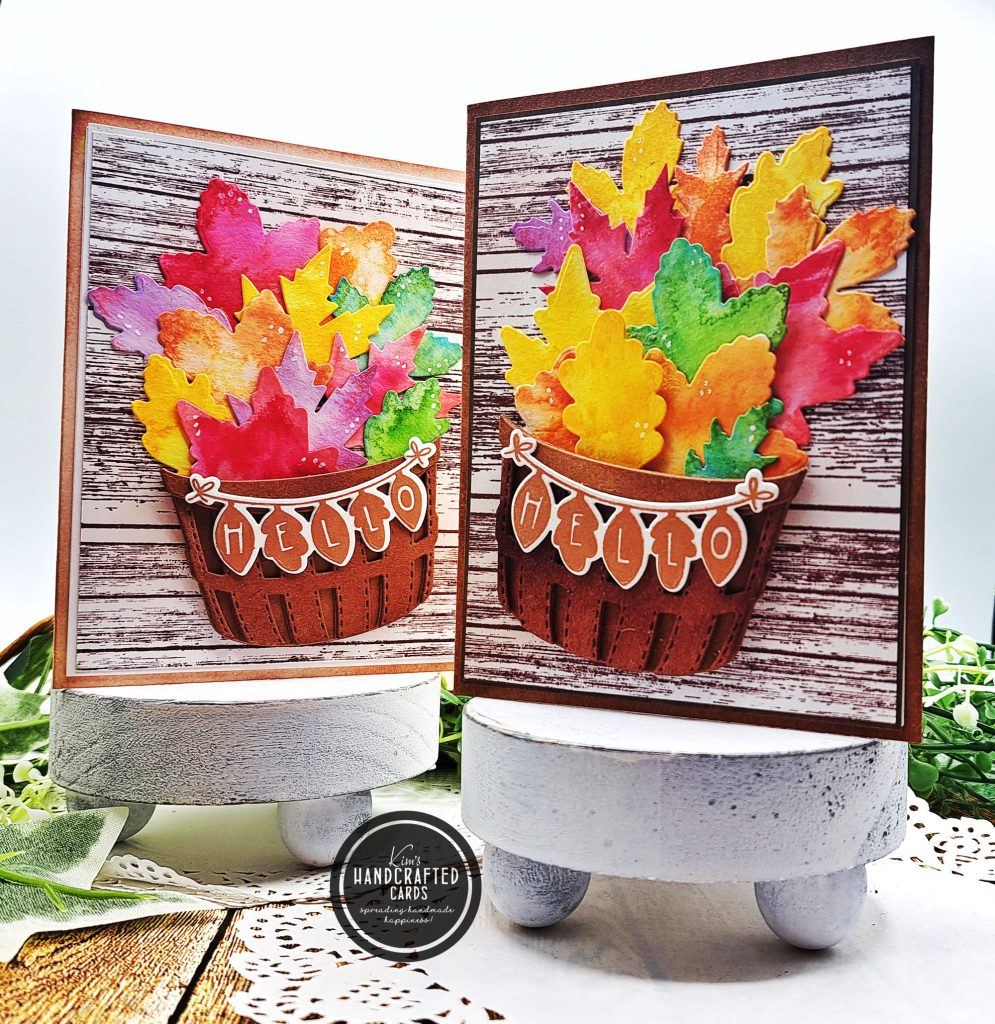
Hi my friends! Hope your day is going well 🙂 Today, I’m sharing 2 cards again using Concord & 9th’s basket die from the “Freshly Picked” collection. I love how there’s so many things you can fill this basket with. In this post, I filled with it fall leaves that were simply die cut but this time I ink blended all my leaves on watercolor paper, spritized them with water and even highlighted them with my Zig clean color markers.
Coloring Die Cuts
The leaves comes from Honey Bee Stamp’s “Hello Fall” die set. There are so many different shapes and sizes of leaves in this set. I used several Pinkfresh Studio inks to color them:
- Apricot & Persimmon
- Olive & Emerald City
- Candy Apple & Passion Fruit
- Sweet Mustard & Marigold
- Regal Kiss & Soft Lilac
After doing all my ink blending, I spritzed them heavily with water and let them air dry. I went back in with my Zigs to put some highlights in and again just spritzed with water but not heavily. I let them sit again to dry.
Zig colors I used were: Carmine Red, Yellow, Olive, Orange and Yellow.
While my leaves were done, I die cut the basket several times with Kraft cardstock and with Pinkfresh’s “Doe” ink, I colored the basket pieces. I really enjoy ink blending over Kraft cardstock. It’s that rustic look I’m always reaching for.
My backgrounds features Honey Bee Stamps’ Farm Fresh pattern paper (but I only used it as a border). I ink blended around the edges of both cardbases.
For my card panels, I used the “Wood Planks” stamp set from WPlus9. I used all 3 stamps in this set for the panels on white cardstock because I wanted to fill the entire page.
Putting it All together
After getting all my pieces done, I trimmed down the pattern papers to 4″ x 5-1/4″, adhered it to my cardbases. Then trimmed down the card panel to 3-3/4″ x 5″ and glued that over the pattern paper.
Then it was time to play around with placement with the leaves and basket. Took me awhile to decide on a design but after that I used Press ‘N Seal to keep it together while I started gluing it all together. There’s a few foam squares behind some leaves for added dimension.
Lastly was the sentiment and for this I used Waffle Flower Crafts “Fall Greeting” stamp/die set. I kept using “Doe” as my brown color (my absolute favorite) throughout these card designs. I also die cut the sentiment again from white cardstock to give it more dimension and I glued it on top of the baskets.
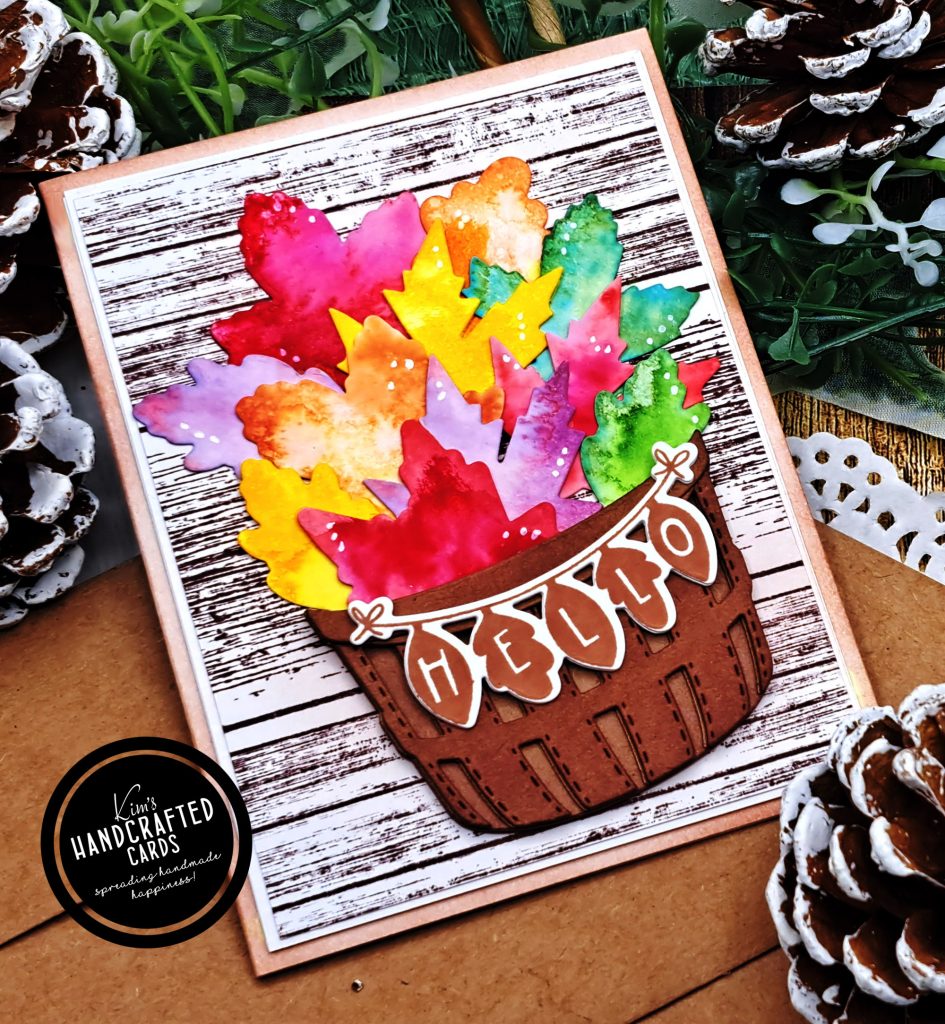
I did also add some touches to the leaves with my white gelly roll pen. And my cards were done! So much fun especially coloring the die cuts (leaves). It’s one of my favorite things to do in cardmaking!
Be sure to check out my Fall 2023 collection of cards!
Thanks for Reading!

Some of the links to the products I used are affiliate links which means that when you shop with them, I’ll receive a small commission at no extra cost to you. Your support helps me run my small crafty business. Thank you so much!
- Honey Bee Stamps “Hello Fall” Die Set here, “Hello Fall” Stamp Set here
- Waffle Flower Crafts “Fall Greetings” Stamp/Die Combo, stamp set here, die set here
- Concord & 9th Freshly Picked Bundle
- WPlus9 “Wood Planks” Stamp Set
- Honey Bee Stamps Farm Fresh Pattern Paper Pack here or here
- Ranger Distress Watercolor Paper
- Zig Clean Color Markers (60-set)
- Pinkfresh Studio Inks
- Blending Brushes, large size here, tiny size here
- Spellbinders Platinum 6 Die Cutting/Embossing Machine here or here
- Stamp Positioner: Misti here, here, here or here
- Accents 100 lb. White Cardstock
- Bearly Art Glue
- White #10 Gelly Roll Pen
- Craft Reverse Tweezers by EK Tools (great for picking up die cut pieces)
- Glassboard Craft Mat → Use my Code → KIMCARDS20 at checkout
- Paper Trimmer: Tim Holtz here (Ranger), here (Scrapbook.com) or here (AZ)
- Glad Press ‘N Seal (3-pack)
- White double-sided foam squares
- Mini White Wood Risers (2-pack) – AZ