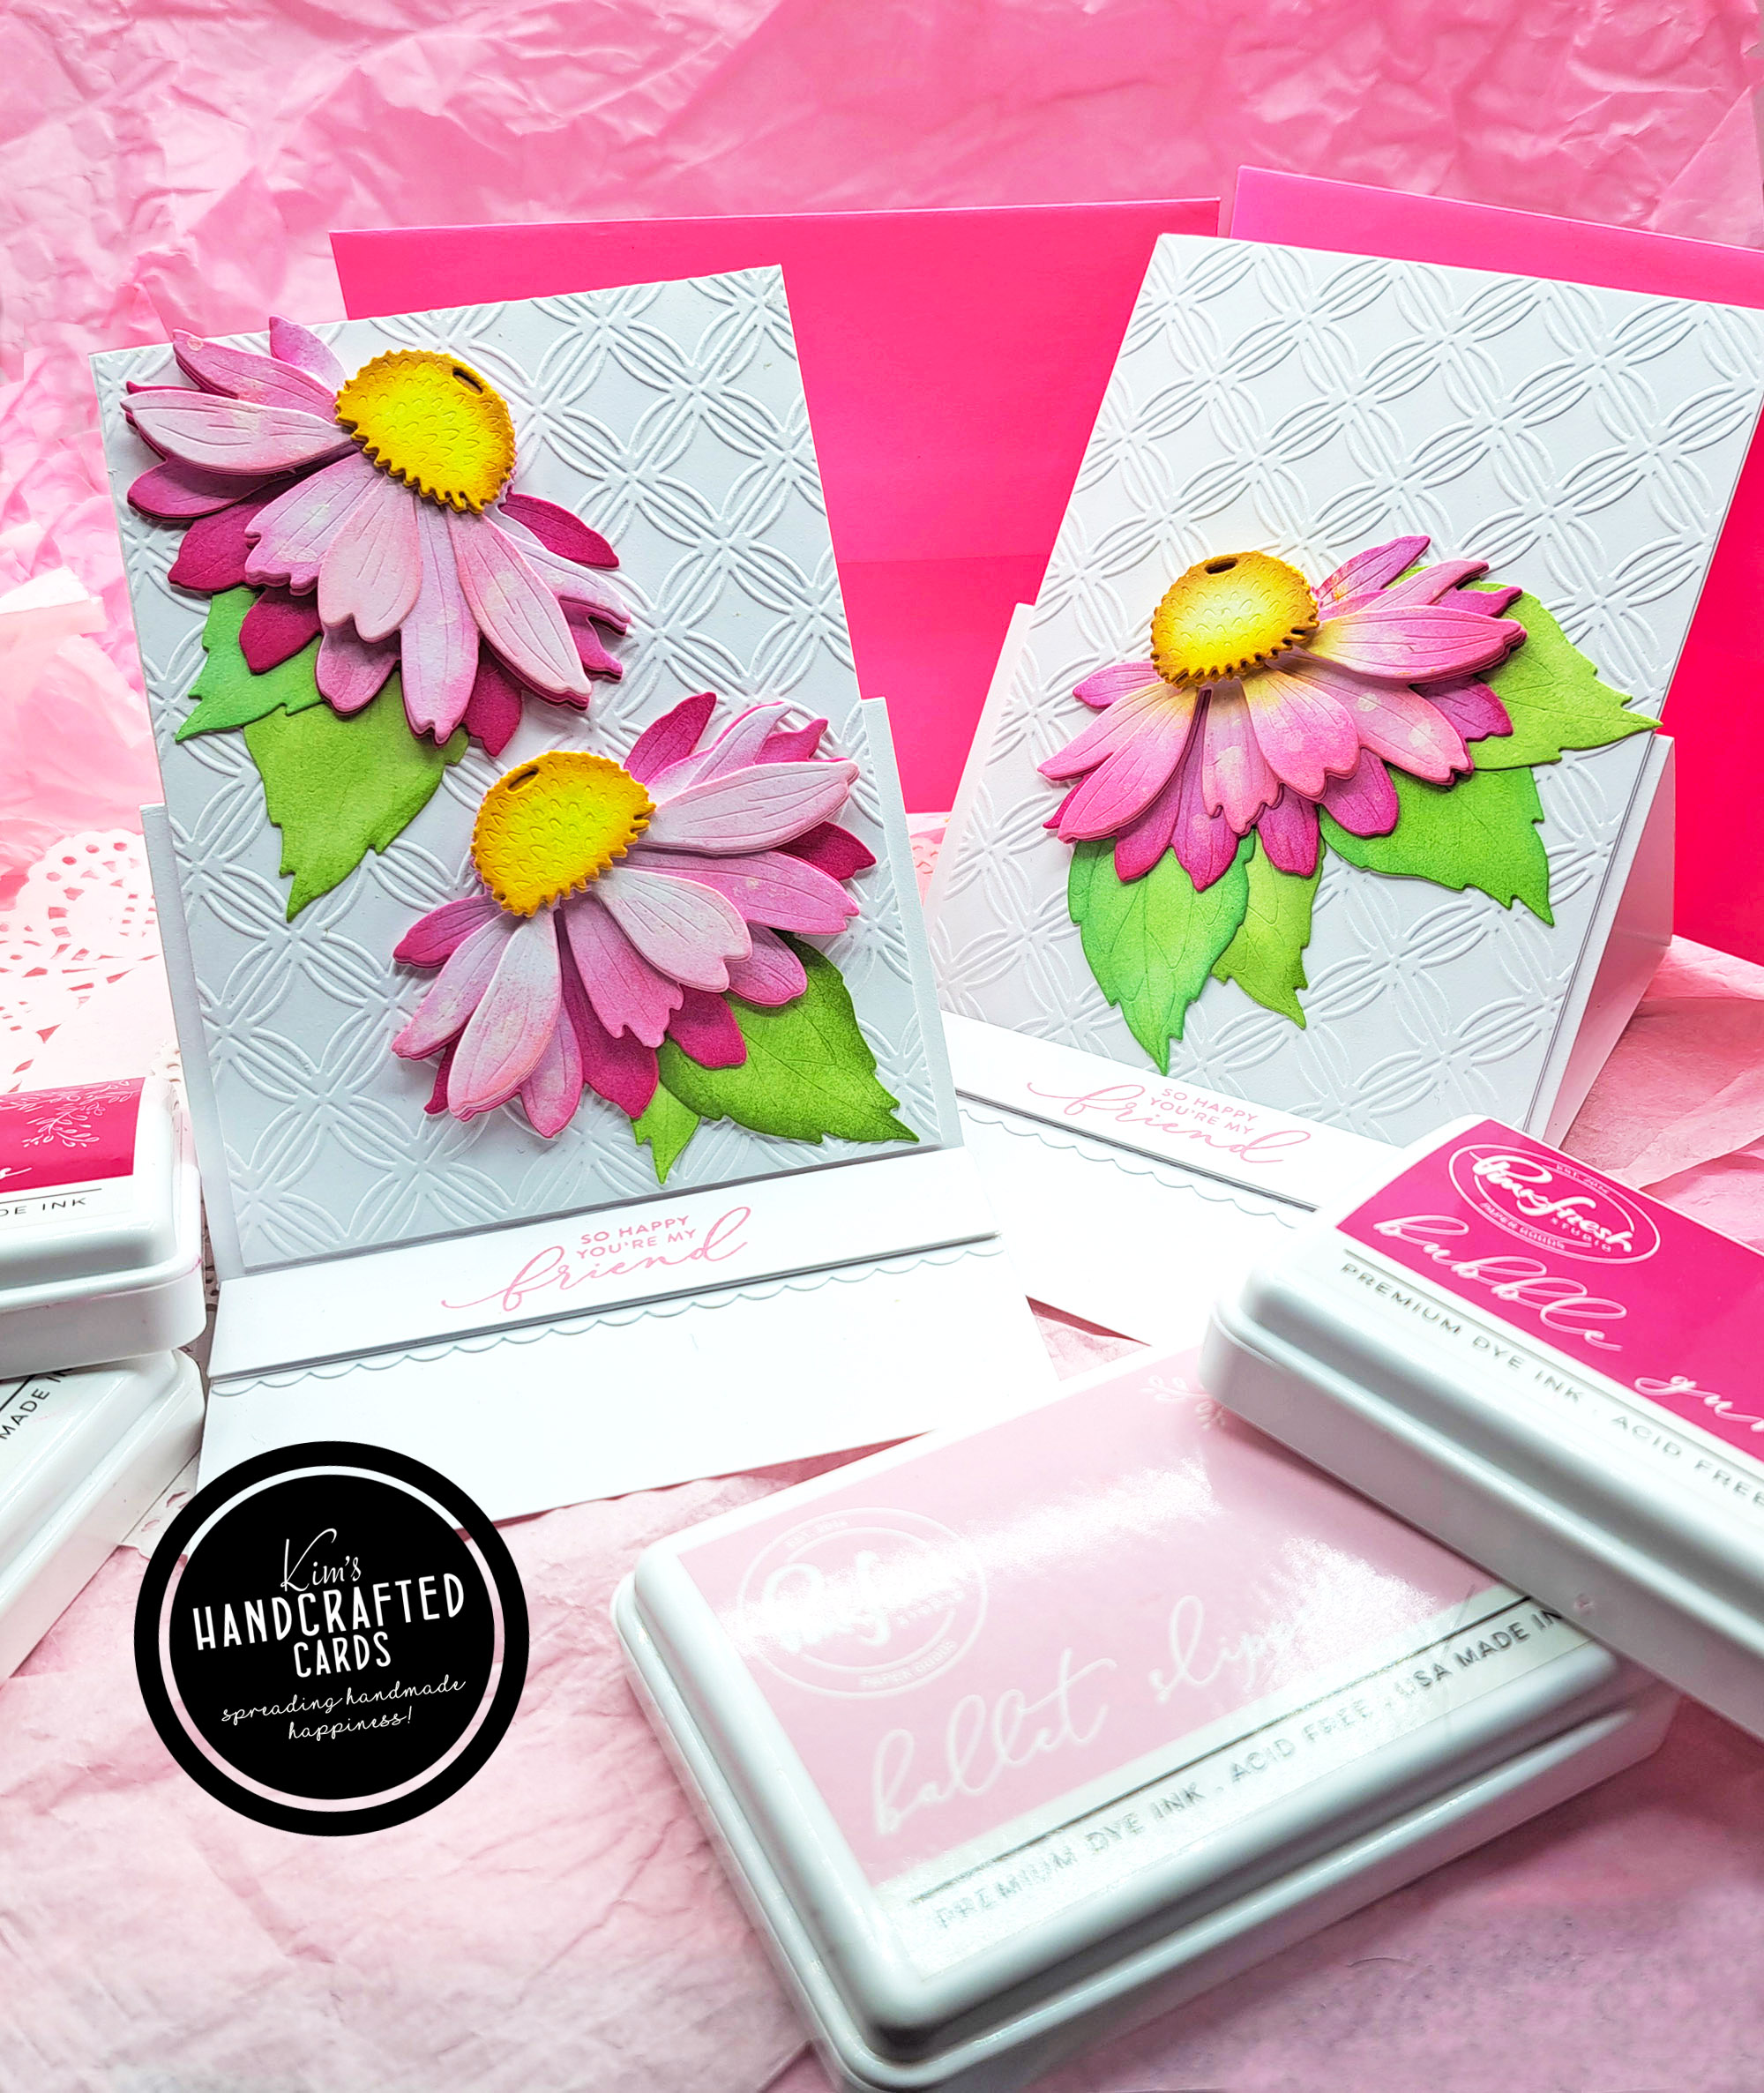
Hey Crafties! Ink blending die cuts has become an absolute Favorite for making cards and with Honey Bee Stamps “Lovely Layers” collection, it’s easy and fun! When I saw their peony die set, I didn’t even hesitate purchasing it!
Today, I’m sharing a card I made with the set using Pinkfresh Studio Inks for all my ink blending. I’ve seen other beautiful cards with the peony set and I looked up what colors these flowers come in and opted to do it in pink (my favorite color!)

I paired my flowers with Sunny Studio Frilly Frames “Herringbone Frame” die that I dry embossed. I made a bunch of Lovely Layers cards by dry embossing this die and you check out that post here. To see it as a die, check out the cards in this post.
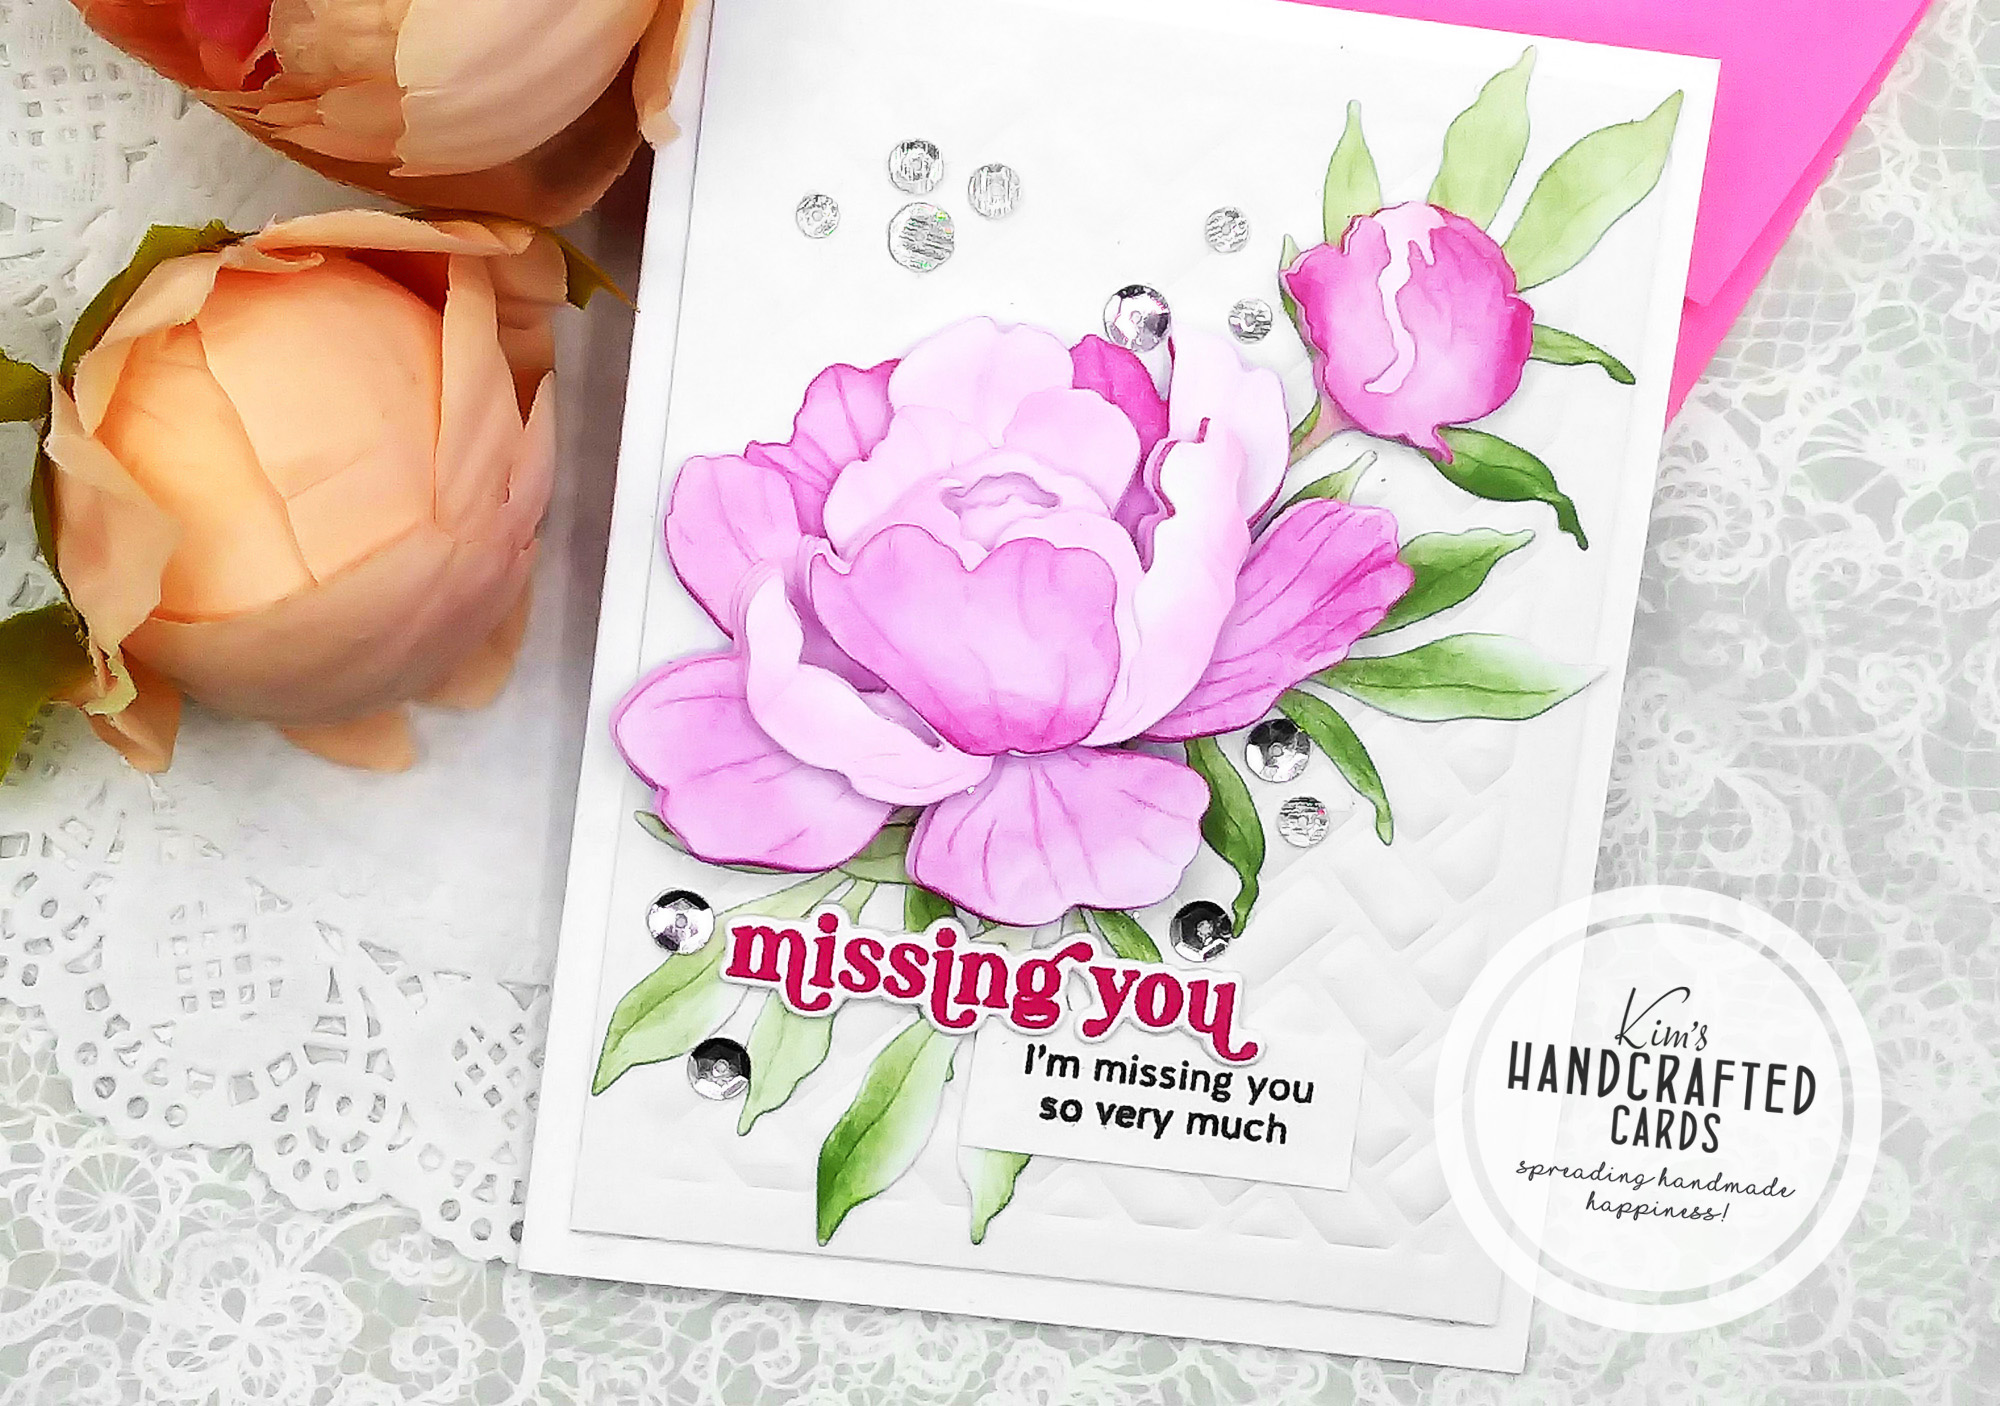
For my ink blending, I went with 3 shades of the Pinkfresh inks from darkest to lightest: “Raspberry Bliss”, “Sparkling Rose” and I used “Soft Lilac”. For the leaves, I just colored with “Olive” (my favorite color for foliage). I wanted my petals to have a mix of shades to make the florals more interesting. So, some of my petals I went with darker edges and lighter in the center and other petals the exact opposite.
I put some foam squares behind 2 of the petals and glued the rest because this die will add dimension as you layer the petals. I didn’t want my flower to be too bulky. I won’t be mailing this card in a regular envelope, I’ll save it to give to a friend!

For my sentiments, I went with Simon Says Stamp’s “Hibisicus” stamp set. The larger sentiments have coordinating dies so I stamped the “Missing You” with “Raspberry Bliss” and die cut it out. I also die cut it once more with white cardstock for just a little dimension. The secondary sentiment I stamped with Simon’s black ink.
I began playing with placement as the peony certainly fills up an A2 card panel nicely. I trimmed down my herringbone frame to 4″ x 5-1/4″ first and adhered it to my card base and then placed my leaves and the flower and bud on top. Next I placed my sentiment and tucked the secondary sentiment right underneath.
Lastly, I added sequins and this card was done! So much fun playing with this Lovely Layers die set and I still have others in stash that I need to play with, my goal is have all these florals in my collection!

- Honey Bee Stamps “Lovely Layers” Peony Die Set here, here or here
- Honey Bee Stamps “Lovely Layers” Collection
- Sunny Studio Frilly Frames “Herringbone frame” die
- Pinkfresh Studio (Pinks) “Fairy Dust” ink bundle here or separately here
- Pinkfresh Studio (Purples) “Soul of Provence” ink bundle here or separately here
- Pinkfresh Studio Olive Ink pad here or here
- Simon Says Stamp “Hibiscus” Stamp set
- Simon Says Stamp “Intense Black” ink pad
- Accents 100 lb. White Cardstock
- Bearly Art Glue
- Sequins
- Spellbinders Platinum 6 Die Cutting/Embossing Machine here or here