Hey friends! I don’t know about you but for me, it’s been a rough journey these past days with all that’s going on around in the world. My thoughts turn to Ukraine often and I’ve cried my share of rivers.
I’m praying for peace, resolution and safety for those folks and I’m especially concerned about our cardmaking friend, Yana Smakula and her family. With that said, there’s has to be some time for escape and that’s when I craft.
Creating for me is my therapy for PTSD, nervous anxiety and just to escape the stresses in my world. There’s many techniques I like doing and so when Jennifer posted a video on using Distress products to color die cut images with water, I was all in!
My distress stash consists of a lot of the traditional and oxide inks. I have a small selection of Spray Stains. But, I stuck with the traditional inks with water and went absolutely crazy! I made 5 cards in one day!
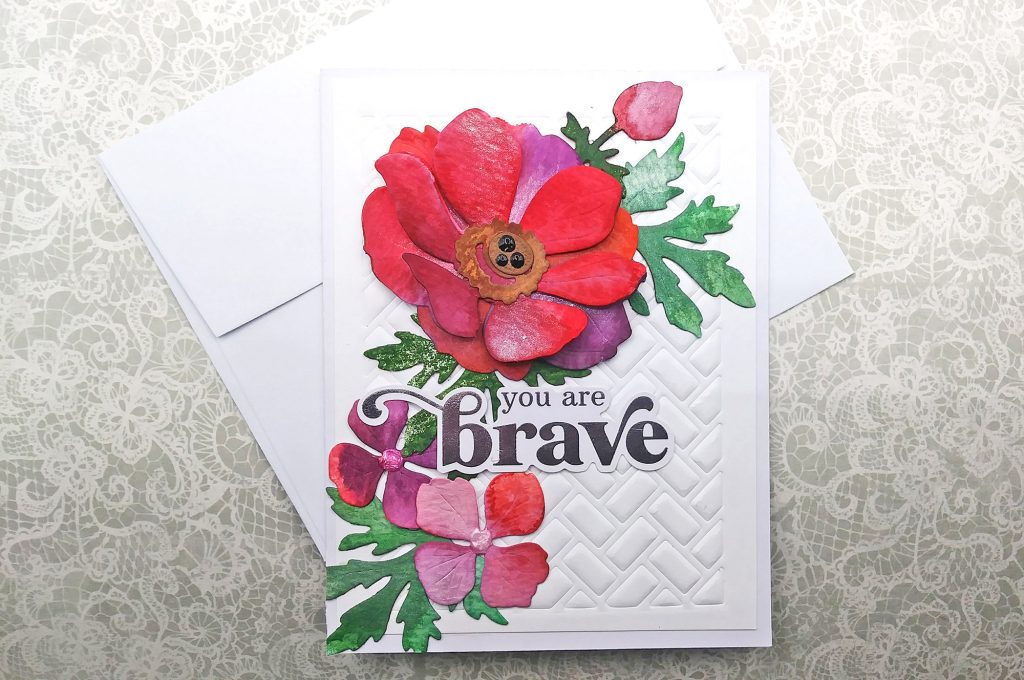
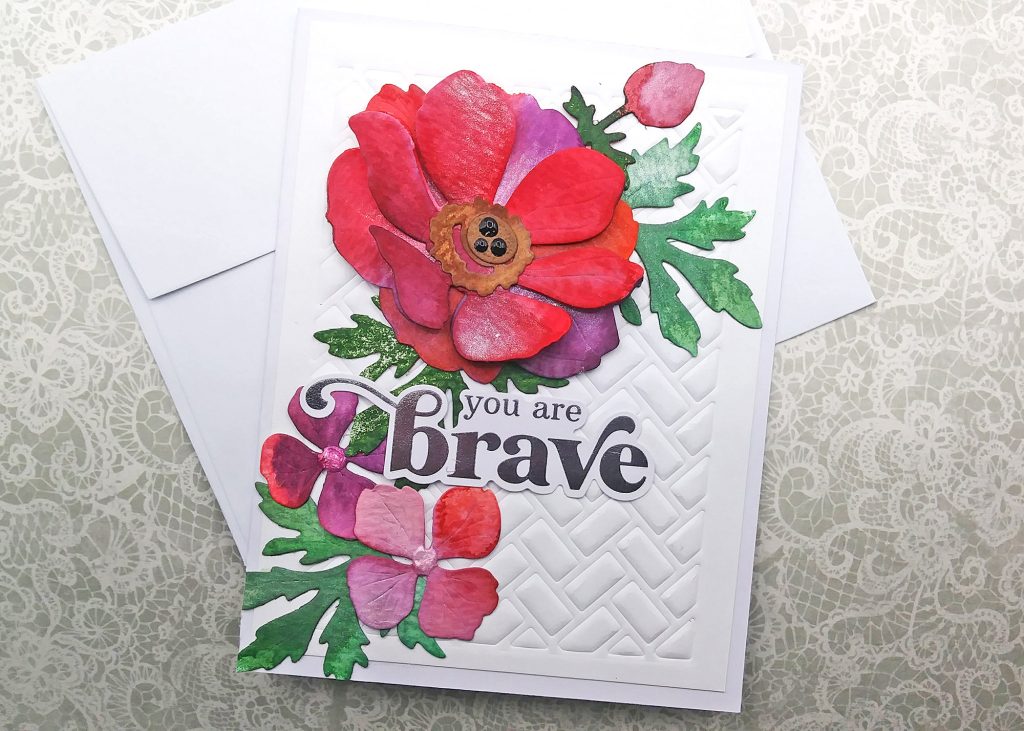
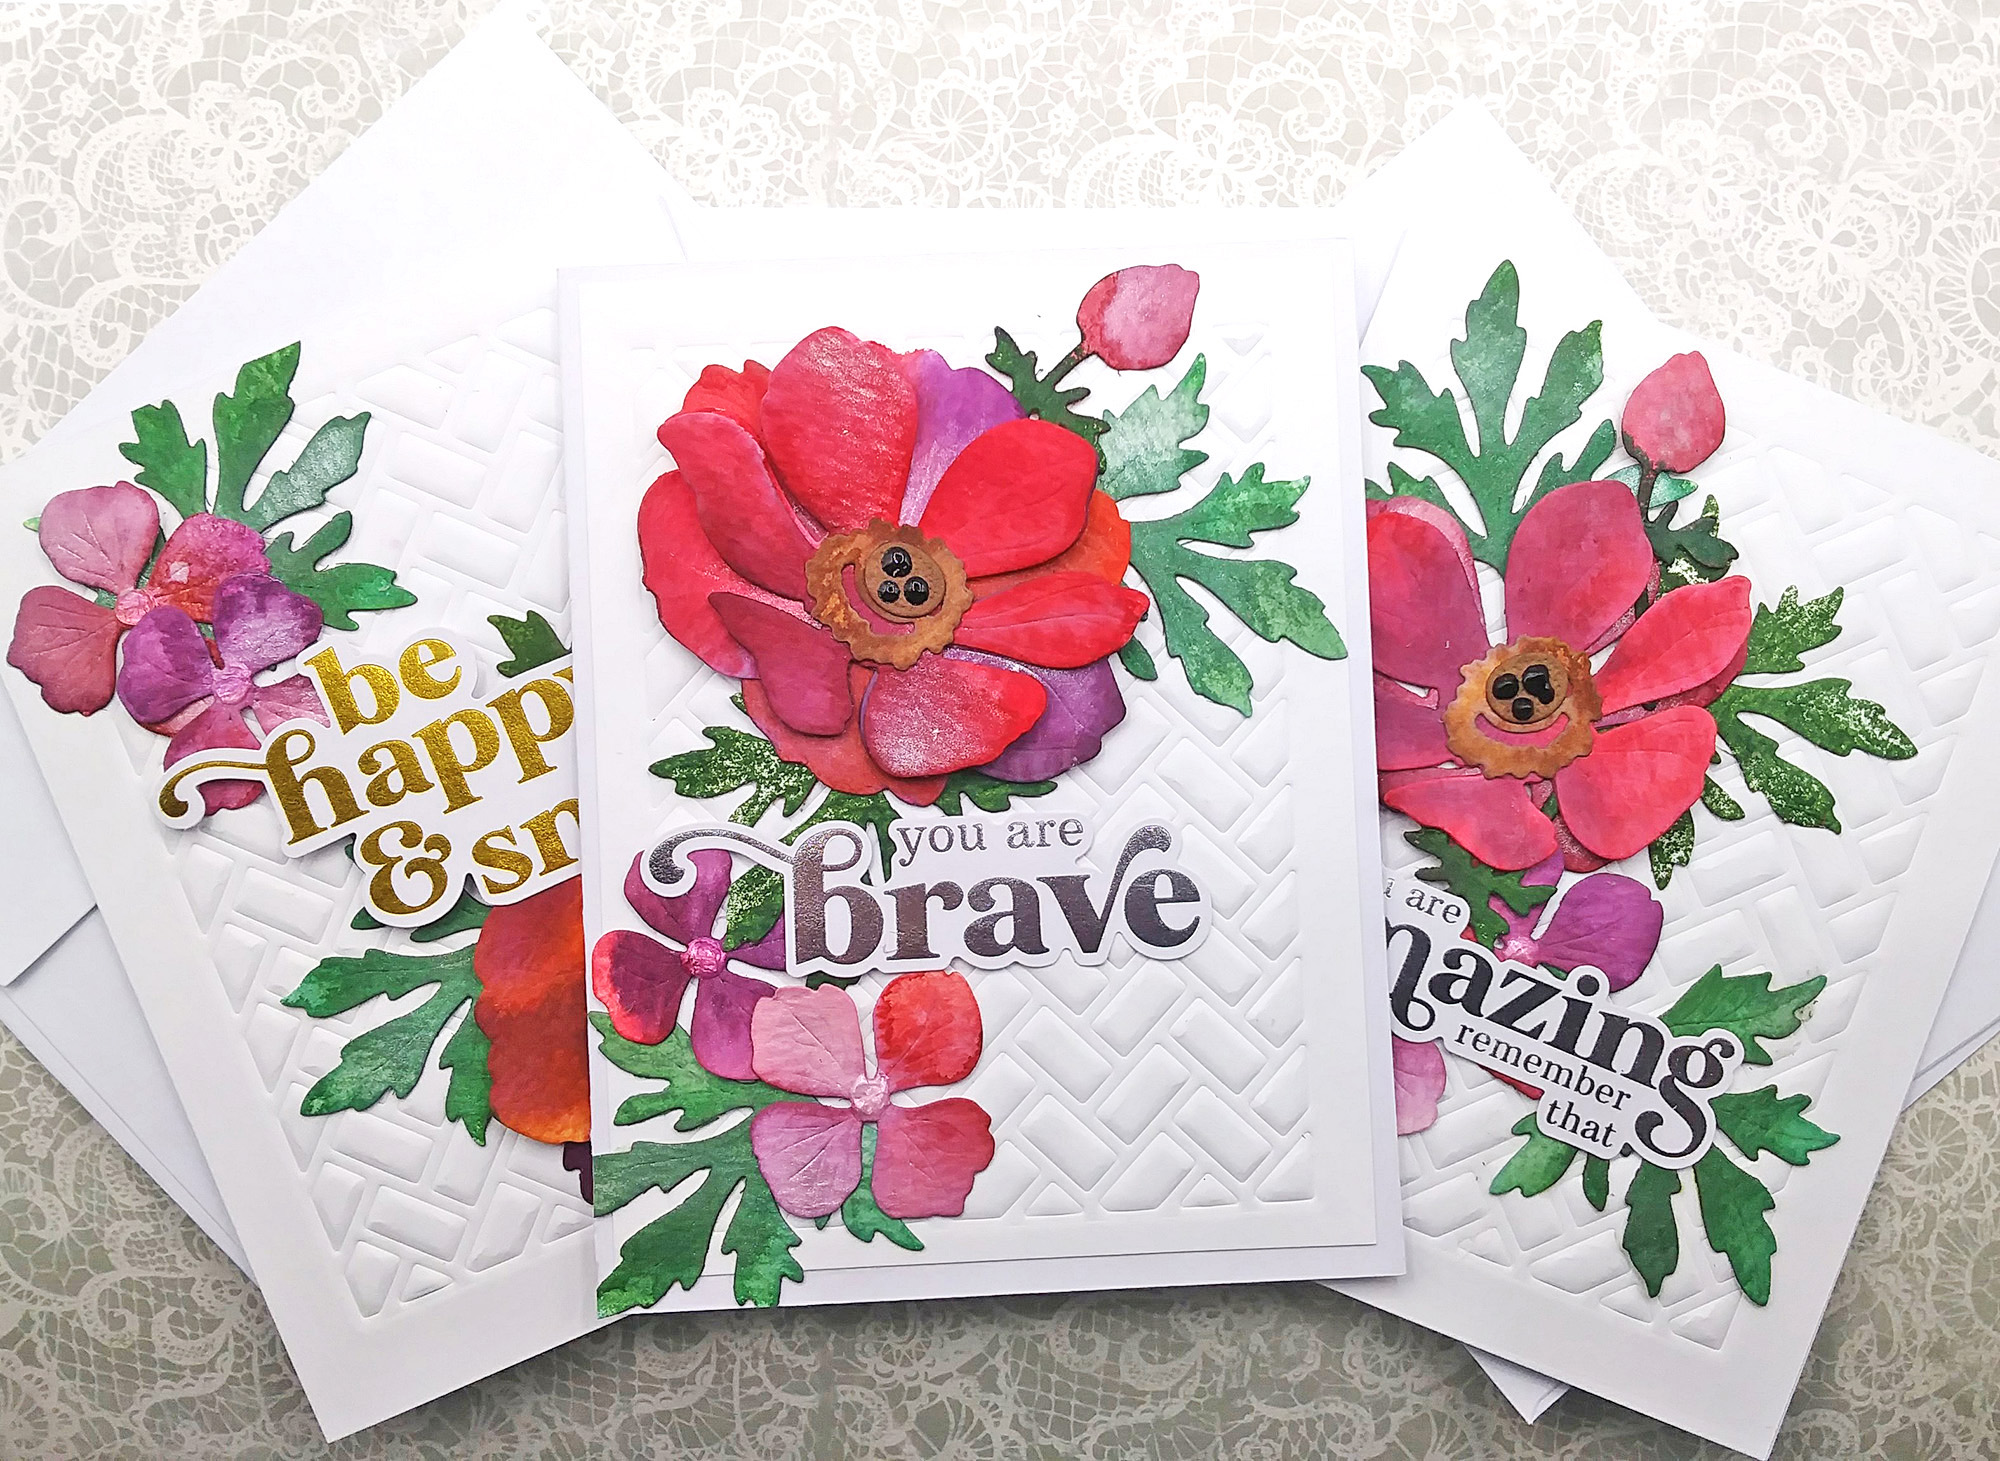
For today’s cards, I’m using Honey Bee Stamps “Lovely Layers” Die sets! I MUST have them all! For now, I have the Anemone and the Hydrangeas sets. The first 3 cards I made are with the Anemone flowers.

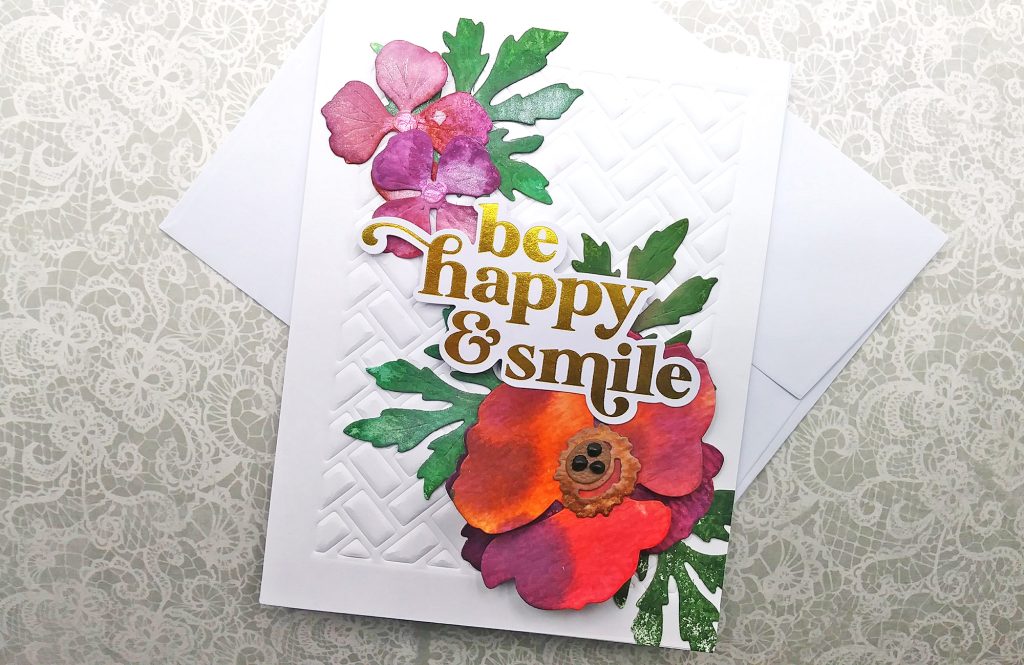
I die cut all my flower and leaf pieces on Tim Holtz Distress Watercolor Paper. I used the direct to paper ink technique and well as using a dome foam applicator to apply ink (used this method for all the cards).
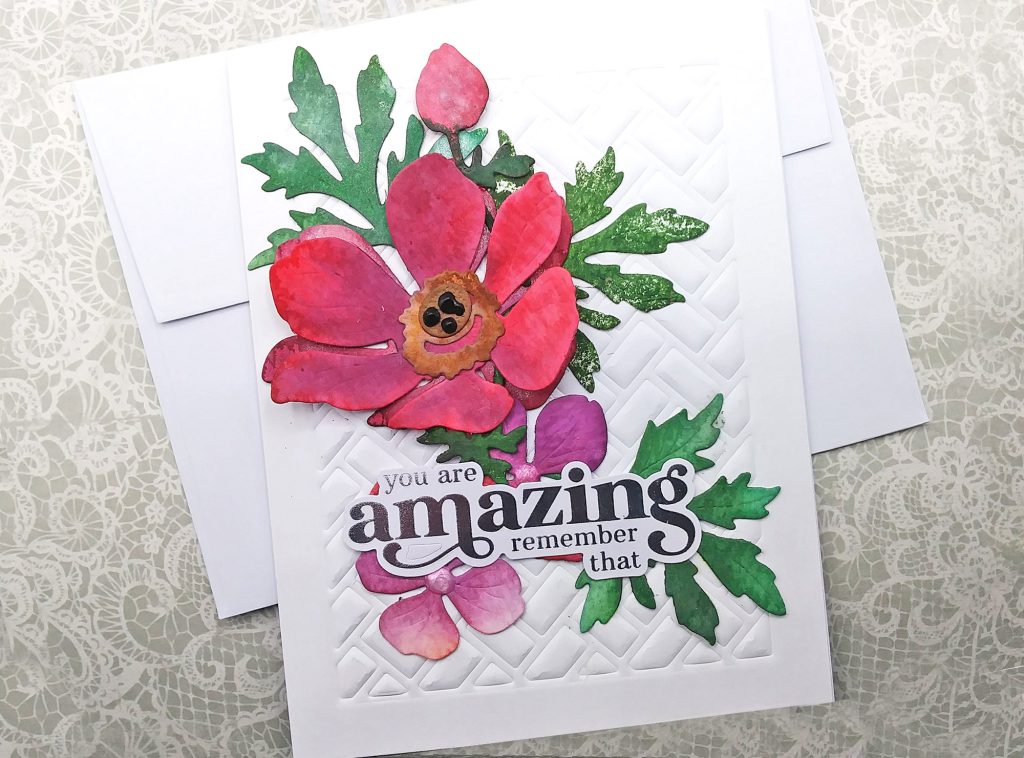
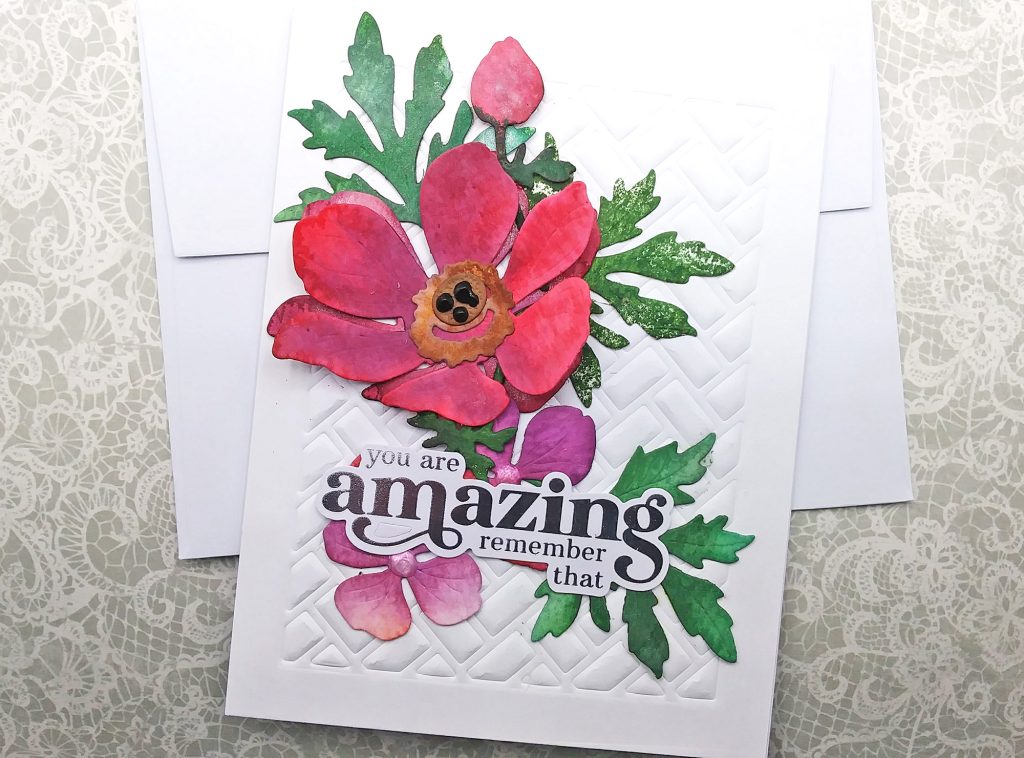
The colors I chose for the flowers for all my cards were: Seedless Preserves, Candied Apple, Spice Marmalade and Barn Door. For the leaves, I used Pine Needles and Rustic Wilderness. For the centers, I used “Vintage Photo” and “Walnut Stain”.
I sprayed all the die cuts generously with plain water and I also sprayed with a mixture of Perfect Pearls mixed with water. I keep separate spray bottles in my craftroom and label them. The Perfect pearls/water mix produces this beautiful shiny look. At first, I wasn’t sure if I would like it. It was a hot mess and I was all inky, but I followed Jennifer’s video instructions and I let them air dry. No heat gun used! 🙂
I love that you get different looks from how the ink colors blend together with the water. I also used pressure on certain petals with the dome applicator trying to get that ombre effect. After all the pieces had dried, I was so amazed! Next, onto the hydrangeas!
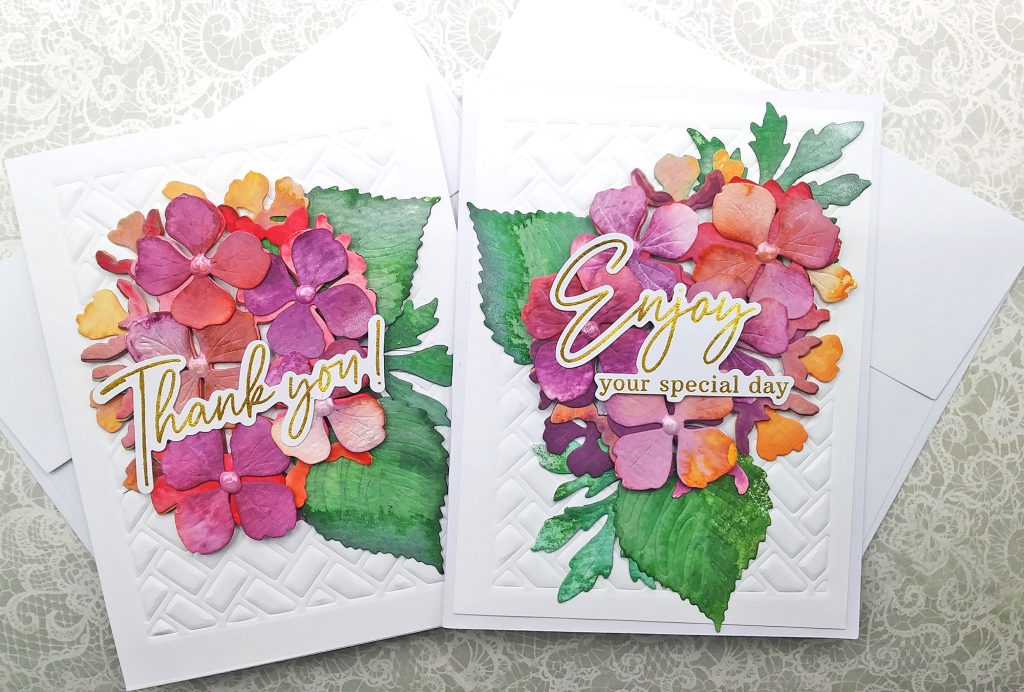
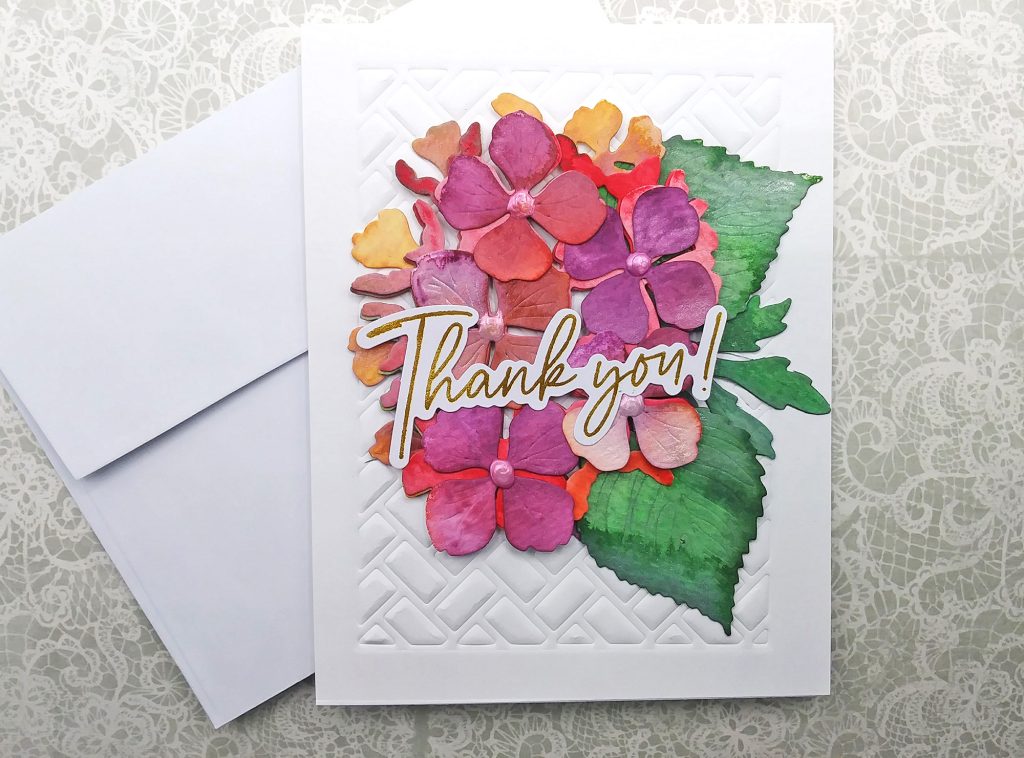
I followed the same steps for inking the colors as before, however I used more of the Seedless Preserves and Spiced Marmalade colors because they play so nicely together. As you can see, these petals look so different from my Anemone flowers. I LOVE THIS!
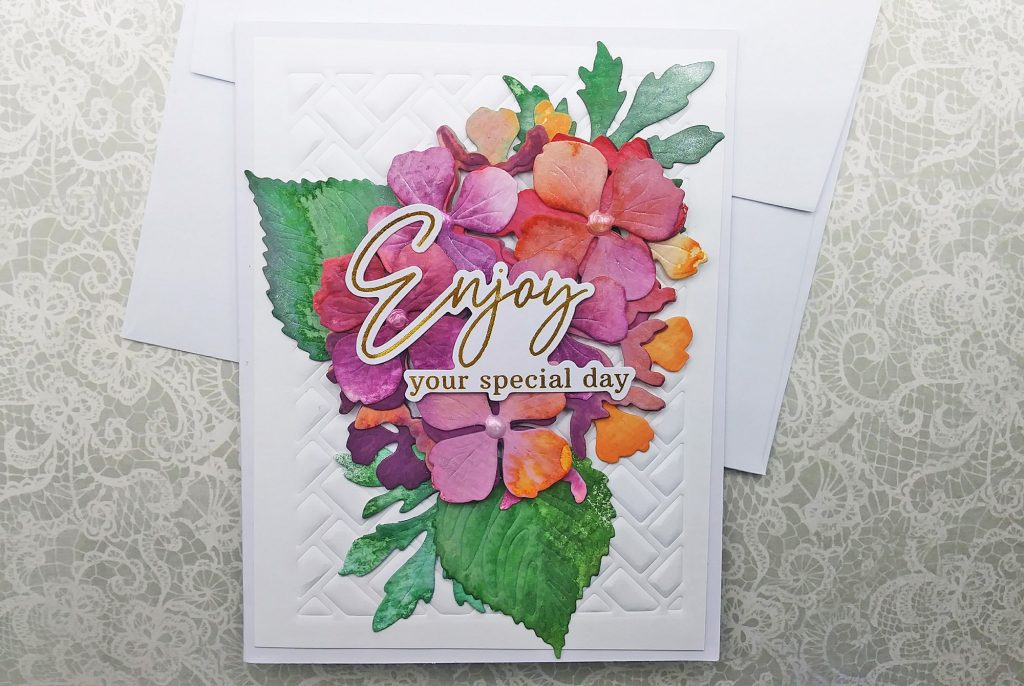
After all my die cuts were dried, I began putting the flower clusters together with Bearly Art liquid glue. My craft table was happily full of colorful flowers!
For the Anemone flowers, I added Nuvo Crystal Drops (black) for interest. To the hydrangea flowers, I added Nuvo Dream Drops “Cloud” to the centers and what was even more amazing is how it took on the colors of the flowers rather than remained white.
While I was waiting for the Nuvo Drops to dry, I worked on my background design. For that, I used Sunny Studio Frilly Frames “Herringbone Frame” die and ran it through my Spellbinders Platinum machine like an embossing folder on white cardstock. The pattern looks like a pillow, so pretty!
I trimmed these down to 4″ x 5-1/4″ and adhered them to my card bases. Next, it was time to play with placement!
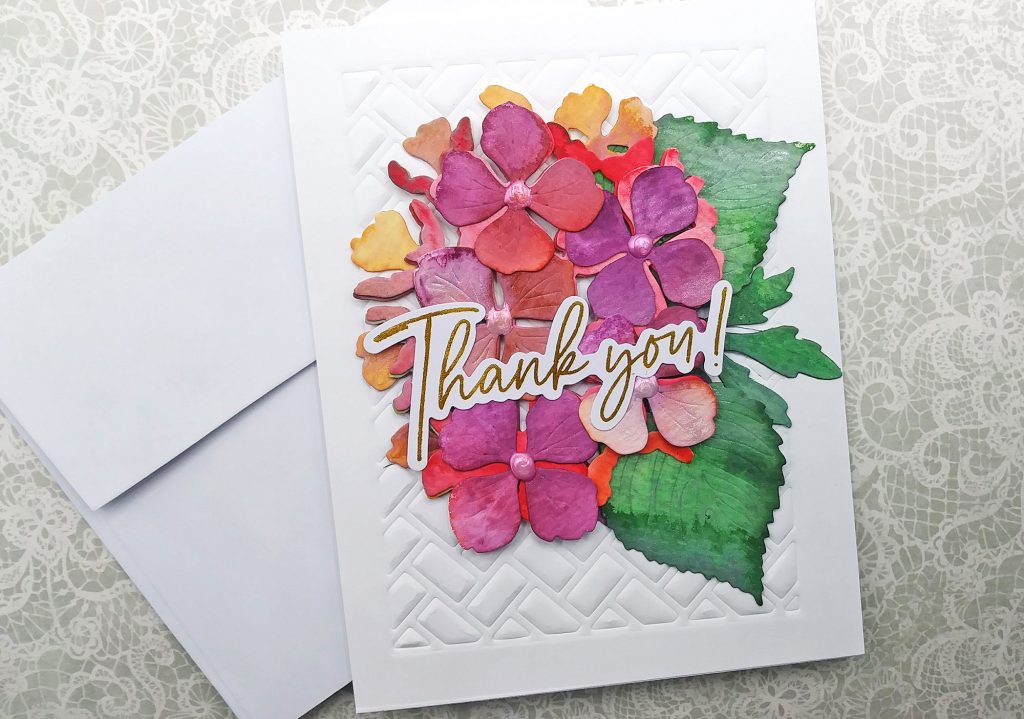
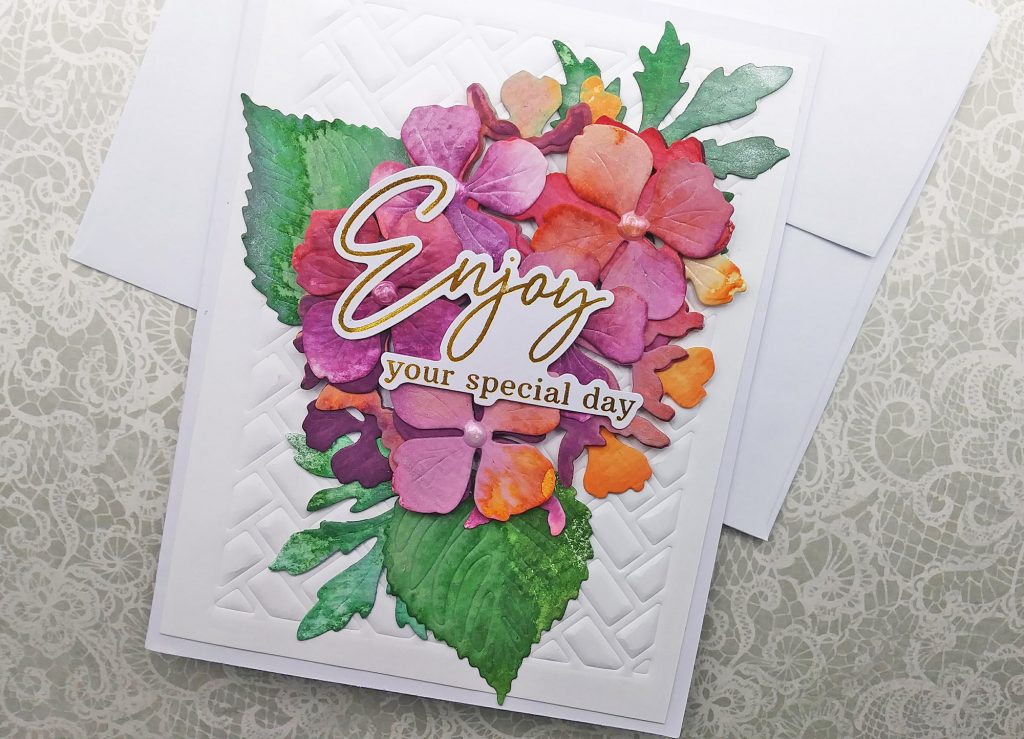
I glued my flower clusters to my panels and it just looks like they’re floating on top of the background design.
I wanted some simple sentiments and for each card to have a different message so, I reached for my Pinkfresh Studio Foiled sentiments that I’ve used before! I love that these are pre-cut and ready to use. I picked out my sentiments and adhered them on top of my flowers.
These cards do have dimension, but I love that effect especially with layered flowers. I was just so overjoyed when all the cards was done and I remember just staring at them with a big smile on my face, now, that’s therapy!
This is definitely a technique I’ll be doing over and over again!

- Distress Watercolor Paper
- Honey Bee Stamps “Lovely Layers” Anemone Die Set
- Honey Bee Stamps “Lovely Layers” Hydrangeas Die Set
- Distress Traditional Inks or browse all the Distress lnks here
- Sunny Studio Frilly Frames “Herringbone frame” die
- Pinkfresh Studio Ephemera Foiled Sentiments Pack
- Nuvo “Ebony Black” Crystal Drops
- Nuvo Dream Drops “Cloud”
- Spellbinders Platinum 6 Die Cutting/Embossing Machine here or here
- Bearly Art Glue
- Perfect Pearls (Confetti white)
- Distress Spray bottle
- Accents 100 lb. White Cardstock
- Dome Foam Applicator