Scene cards are absolutely NOT my jam! Not because I don’t like them, cause I LOVE seeing them from other cardmakers and I LOVE watching how they’re made. But as for me, I’m a CAS girl and I get nervous to the point of panic thinking of everything that could go wrong when you have so many elements to design for scene-making.
That said, in the back of my mind, I’m thinking I should not be this intimidated and so I decided to give it a try with a simple design. I knew I wanted to make something “Springy” and bright. With all that’s going on in the world right now, we could all use some brightness to the day right? I shopped my stash for most of this design. I only made 1 purchase and that was my bird die.
The bird die is from Sizzix and it’s a layered die set. I love that there are many pieces to customize the bird anyway you want. For example, you can die cut the pieces from colored cardstock and be done with it or you can die cut them on white cardstock and color the bird with watercolor or other color medium. I chose Copics, as I’m on a journey to get more comfortable with the sketch markers. You can follow my path by reading past posts from the series here.
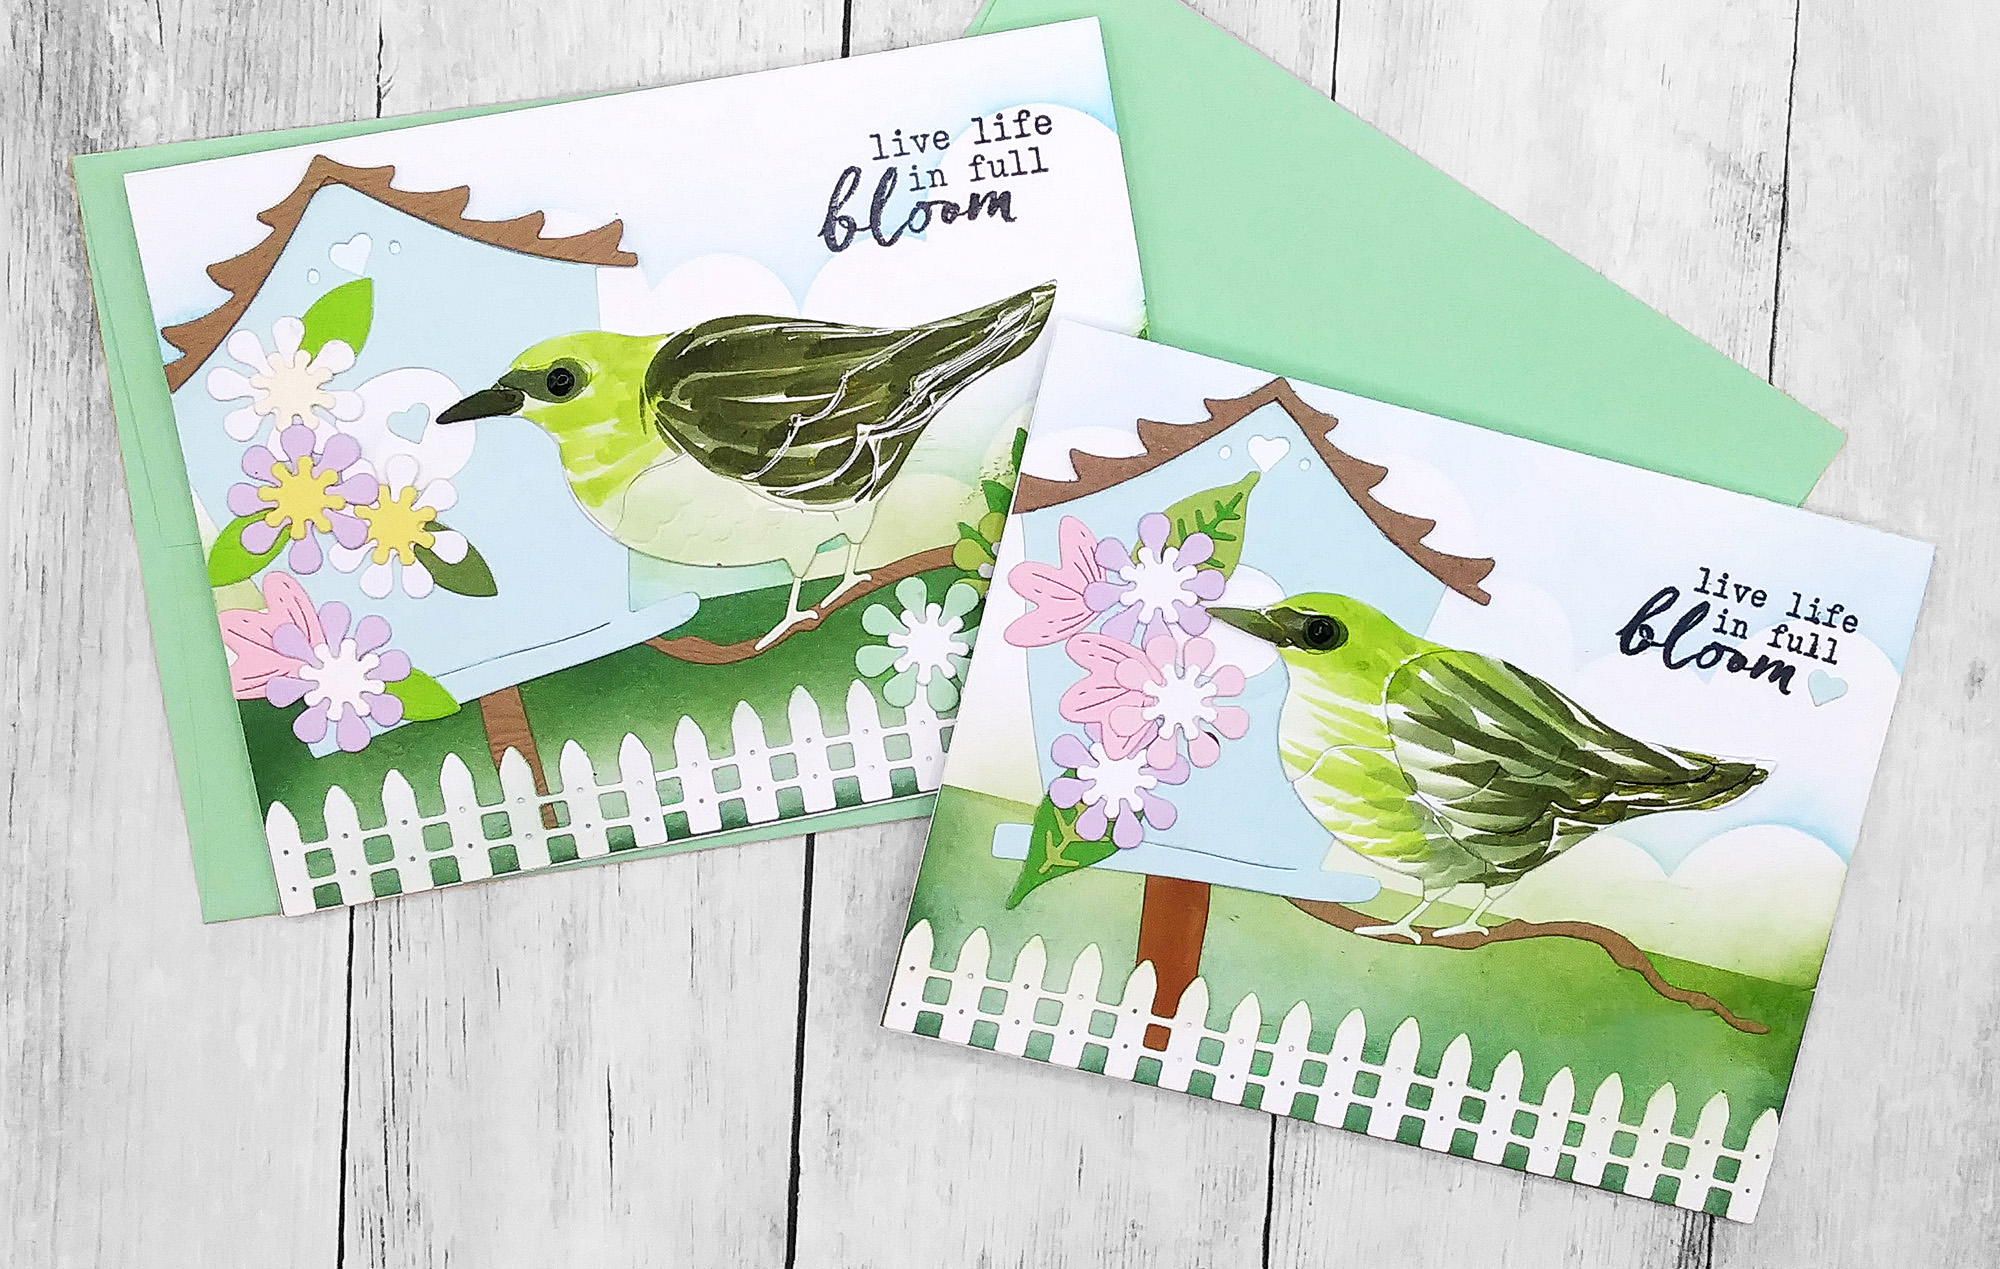
I took my time with this design and in fact it took me 2 days to finish. I made a couple of cards and I really LOVE how they turned out. Later in this post, I’ll share my “10 Lessons Learned” about cardmaking. For now, let’s talk about what went into the making of these cards.
To make this as easy as possible, I worked in sections this way:
- Background design
- Focal point #1 – Bird
- Focal point #2 – Birdhouse
- Stamping the Sentiment
- Putting it all Together
- Final Touches
Background Design
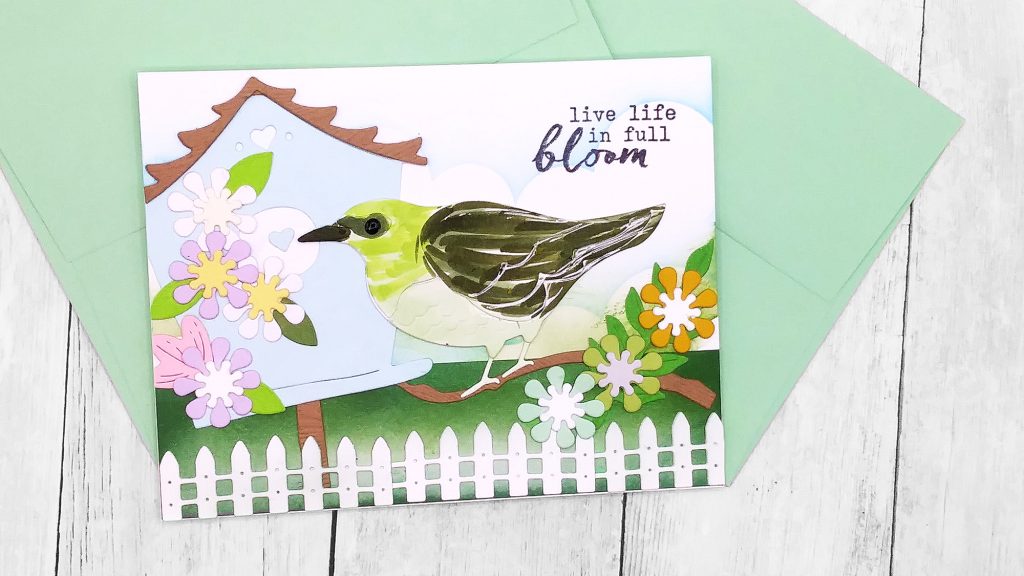
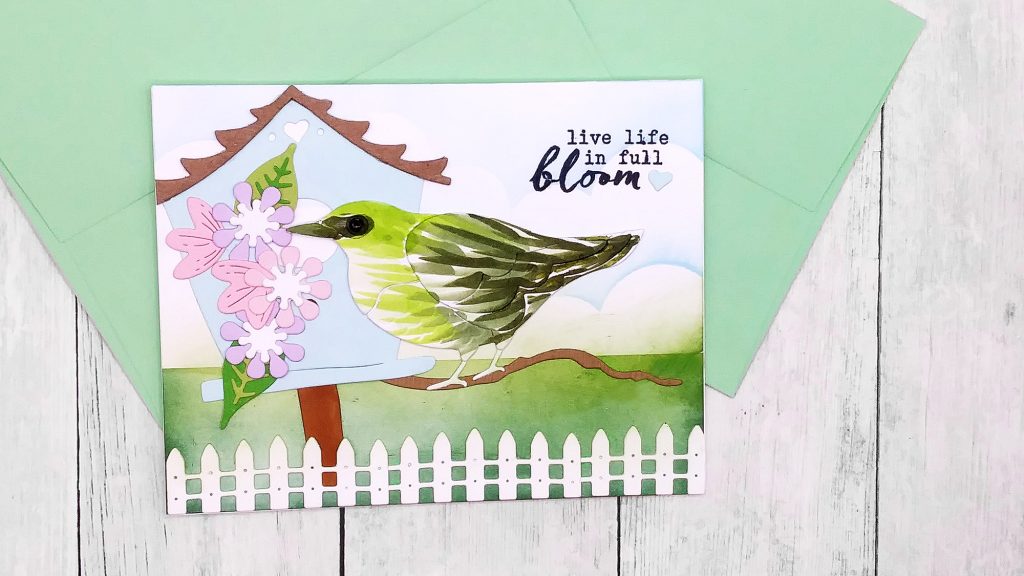
For my backgrounds, I was thinking of a Spring day with grass and blue skies. For all of my ink blending, I used Pinkfresh Studio inks. Since I have the entire collection, I thought it would be really easy for me to pick out the right colors. So for the grass, I chose “Evergreen” and “Olive” inks. For the sky, I got some help with Simon Says Stamp’s Cloud stencil and the colors I used were “Sky Blue” and “Summer Shower”.
After I finished with the ink blending, I started working on the fence. For this I used Spellbinders “Birdhouse through the Seasons Build a Spring Birdhouse” die set, however the fence isn’t long enough for an A2 card so I die cut it 3 times and snipped off just 1 of the fence boards on 2 of those die cuts and glued them together for a seamless look over my grass (I made sure not to glue the top part of my fence where my birdhouse would stand).
Also, I added a little green ink blending (very light touch) across the top of the fence so that it wouldn’t be exactly bright white.
Focal Point #1: The Bird
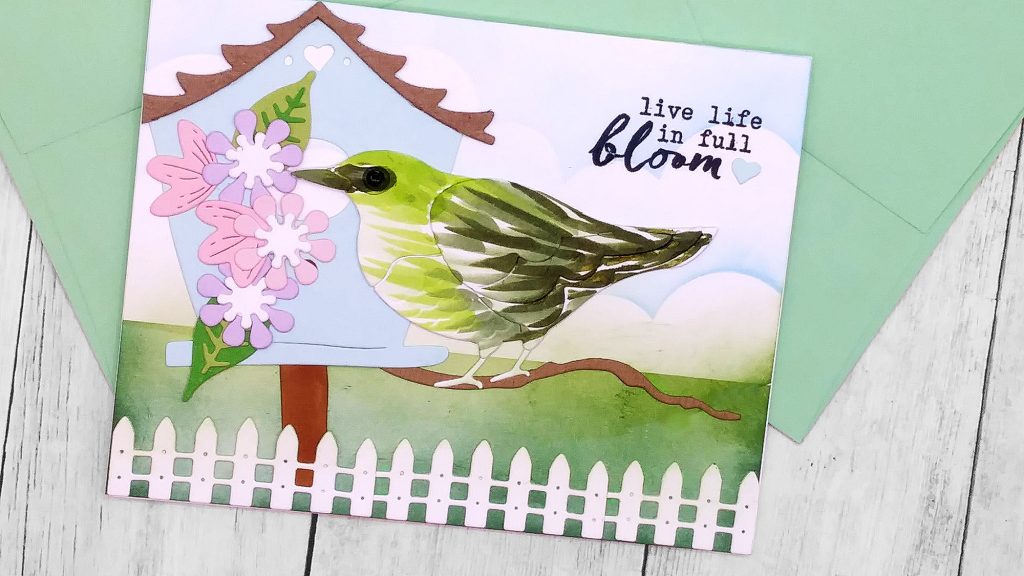
I used 6 dies from the Bird die set and glued those parts together before I did my coloring. I loved how large he is and the dimension since I die cut him from 120 lb. white cardstock. I gathered up my green Copic markers (colors listed below).
I started with my darkest color and I used the “flicking” motion with my coloring, I then transitioned into the next lighter color until I was at the body of the bird with my lightest color. I added accents like the beak with the darkest color, the eye with Nuvo Ebony Crystal Drops and a #10 While Gelly Roll Pen for highlights especially in the wings.
At this point, I wasn’t sure if I had totally messed up, it was a hot mess on my craft table! You don’t want to know how many times I made and colored this bird over and over again trying to get it to look like the image in my head :O
Eventually, I stopped. I let the birds dry overnight. In the meantime for the branch, I die cut that piece from Lawn Fawn “Light Brown Woodgrain” cardstock. I was tired and went to bed!
The Copic colors I used from darkest to lightest:
- G94 (Grayish Olive), G99 (Olive), YG03 (Yellow Green) and G40 (Dim Green)
Focal Point #2: Birdhouse
The birdhouse was probably the easiest thing to do out of this whole process. I die cut the house from Cardstock Warehouse Blue (part of the “Pretty in Pastels” pack) and Lawn Fawn “Dark Brown Woodgrain” cardstock for the roof and “Light Brown Woodgrain” cardstock again for the post (along with Distress “Vintage Photo” for a distressed look).
I glued those parts together for my birdhouse and inserted it just behind my fence. I angled it slightly because I just like that look of it not being exactly straight up :D!
Stamping the Sentiment
At this point, I’m only working on the card panel. I haven’t added it to my card base yet so I thought it would a good stopping place to get my sentiment ready for stamping. I looked through my stash and I chose a Hero Arts past “My Monthly Hero Card Kit” as it was perfect for these cards. The theme was Asian-inspired. It came out March 2020. Unfortunately, when the My Monthly Hero Kits sell out, they aren’t restocked. I stamped it with Memento “Tuxedo Black” ink.
Putting it all Together
After I set my birdhouse down, it was time to figure out where the bird and the branch would go. One thing I forgot to mention was I wanted my branch behind the birdhouse so I made sure I didn’t add any glue to that section so that if I didn’t like where the branch was, I could still move it around until I was happy with the placement.
I was happy with the branch so I placed my birdie on top of it and I was happy that he fit on the card without me having to trim off extra pieces. I think he’s perfect just a little in front of the birdhouse.
Final Touches
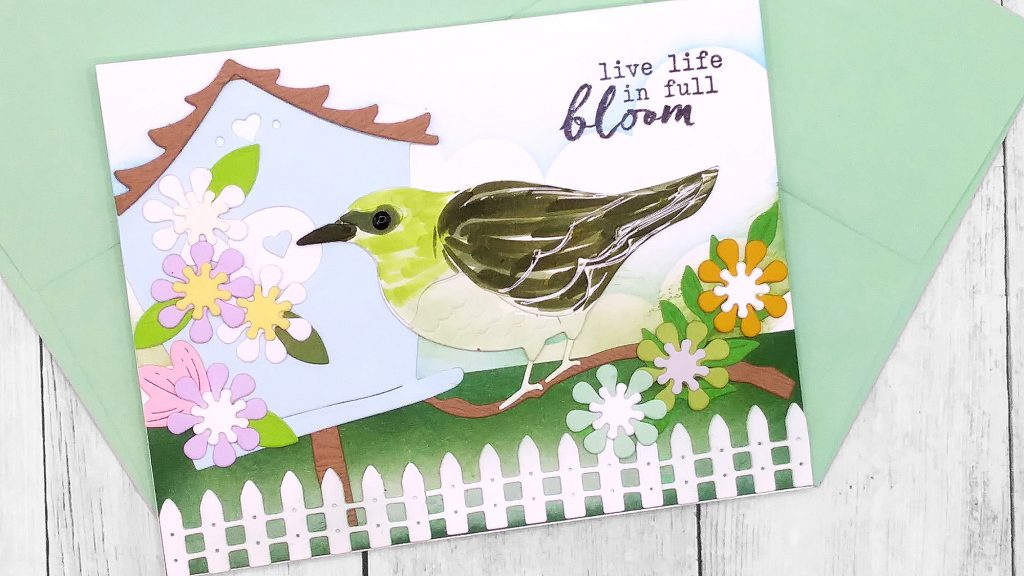
What would a Spring day be like without flowers?! I was so happy that I had extra flowers in my bins so I didn’t have to do much but glue them where I wanted. I framed them around the birdhouse and the branch on one of the cards. They add extra interest to the design. As I was embellishing, I began to see how the design was coming together and I really liked it!
I added a small light blue heart on both cards as my last embellishment. Finally, I glued my panels down to my card bases and both cards were done! YAY Me!

My 10 Learned Lessons
Here’s a few things I’ve learned and/or trying to learn about making cards (at least for me):
- Don’t be a perfectionist. This is a handmade hobby run by a single human being.
- Don’t give up so soon. Sometimes, just walking away for awhile and coming back can put a whole new perspective on a card design.
- Don’t throw away a design, find a way to make it work. Only throw something away if there’s no way to recover. In that case, just start over, it’s only paper!
- Stop comparing my cards to other cardmakers. Cut myself some slack, for a beginning cardmaker of only 3 years, to be where I am is remarkable. Don’t feel like my cards don’t measure up to others. This is a wonderful industry with so much inspiration and encouragement from other crafters.
- Enjoy the process. A hobby is something you enjoy doing, it should never be a job. The moment, it changes to a stressful event, it’s time to re-evaluate.
- Remember the “why” I’m a maker. I make cards to encourage others, to send love and help spread Handmade Happiness which is my logo tagline. I don’t do it for any self edification except to just feel good about creating something pretty.
- Pray for the person who will receive my cards. I donate to people and I have no idea who they are so saying a short prayer after making a card just tells God I want the right person to receive this card at the right moment.
- Ministering to others through crafting is powerful. I can always go buy a card or a gift and give it to somebody, but it’s just extra special when you know a person took the time to make you a card. It’s not something I would instantly throw away.
- Keep learning, keep improving. Nothing wrong with wanting to improve my designs, how I color, techniques I want to become comfortable with. Practice is essential and it’s not a requirement that I have to make a card everyday.
- Repeat designs that brought me joy. There are thousands of methods or techniques to card designing. Take a look at some past cards I’ve made and pick out the ones that I enjoyed making and re-make them again. I can switch up the colors and sentiments. This is also a great way to break a creative slump.

Background:
- Fence – Spellbinders” Birdhouse through the Seasons Build a Spring Birdhouse” Die Set here or here
- Simon Says Stamp “Clouds for Days” stencil
- Pinkfresh Studio Inks: Blue “Morning Sky” Combos / Greens “Garden Stroll” and “Over the Hills” Combos
- Blending Brushes, large size here, tiny size here
Bird:
- Sizzix “Spring Bird” Layered Die set
- Accents Opaque 120 lb. White Cardstock
- Copic Sketch Markers here, here or here
- Nuvo “Ebony Black” Crystal Drops
- White #10 Gelly Roll Pen
- Lawn Fawn “Light Woodgrain” Cardstock
Birdhouse:
- Fence – Spellbinders” Birdhouse through the Seasons Build a Spring Birdhouse” Die Set here or here
- Cardstock Warehouse “Pretty in Pastels” Cardstock
- Lawn Fawn “Dark Brown” Woodgrain Cardstock
- Distress Traditional “Vintage Photo” ink pad
Flowers:
Sentiment:
- Hero Arts March 2020 My Monthly Hero Kit (sold out)
- Memento “Tuxedo Black” Ink
Other Products: