Hey Crafty friends! Before I talk about my cards in this post, I have to say how rewarding and happy it is to have this craft as my hobby. I can be having the worst day ever and when I go to make a card, I can let go of everything bothering me. Creating is such a release! The day I made these cards was indeed a bad day but making these cards made up for it!
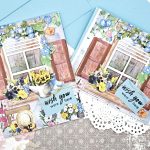
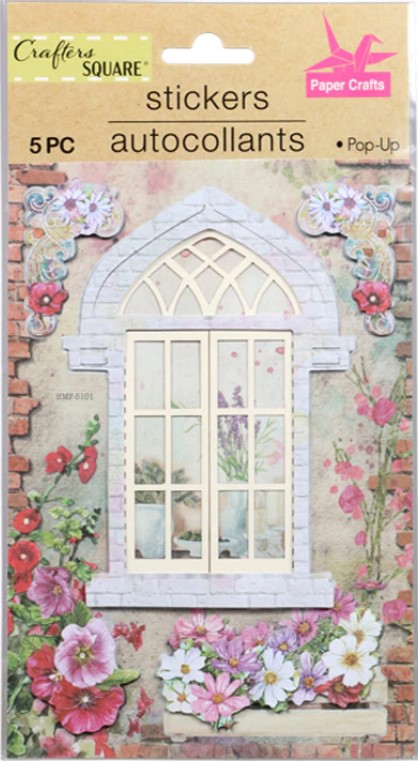
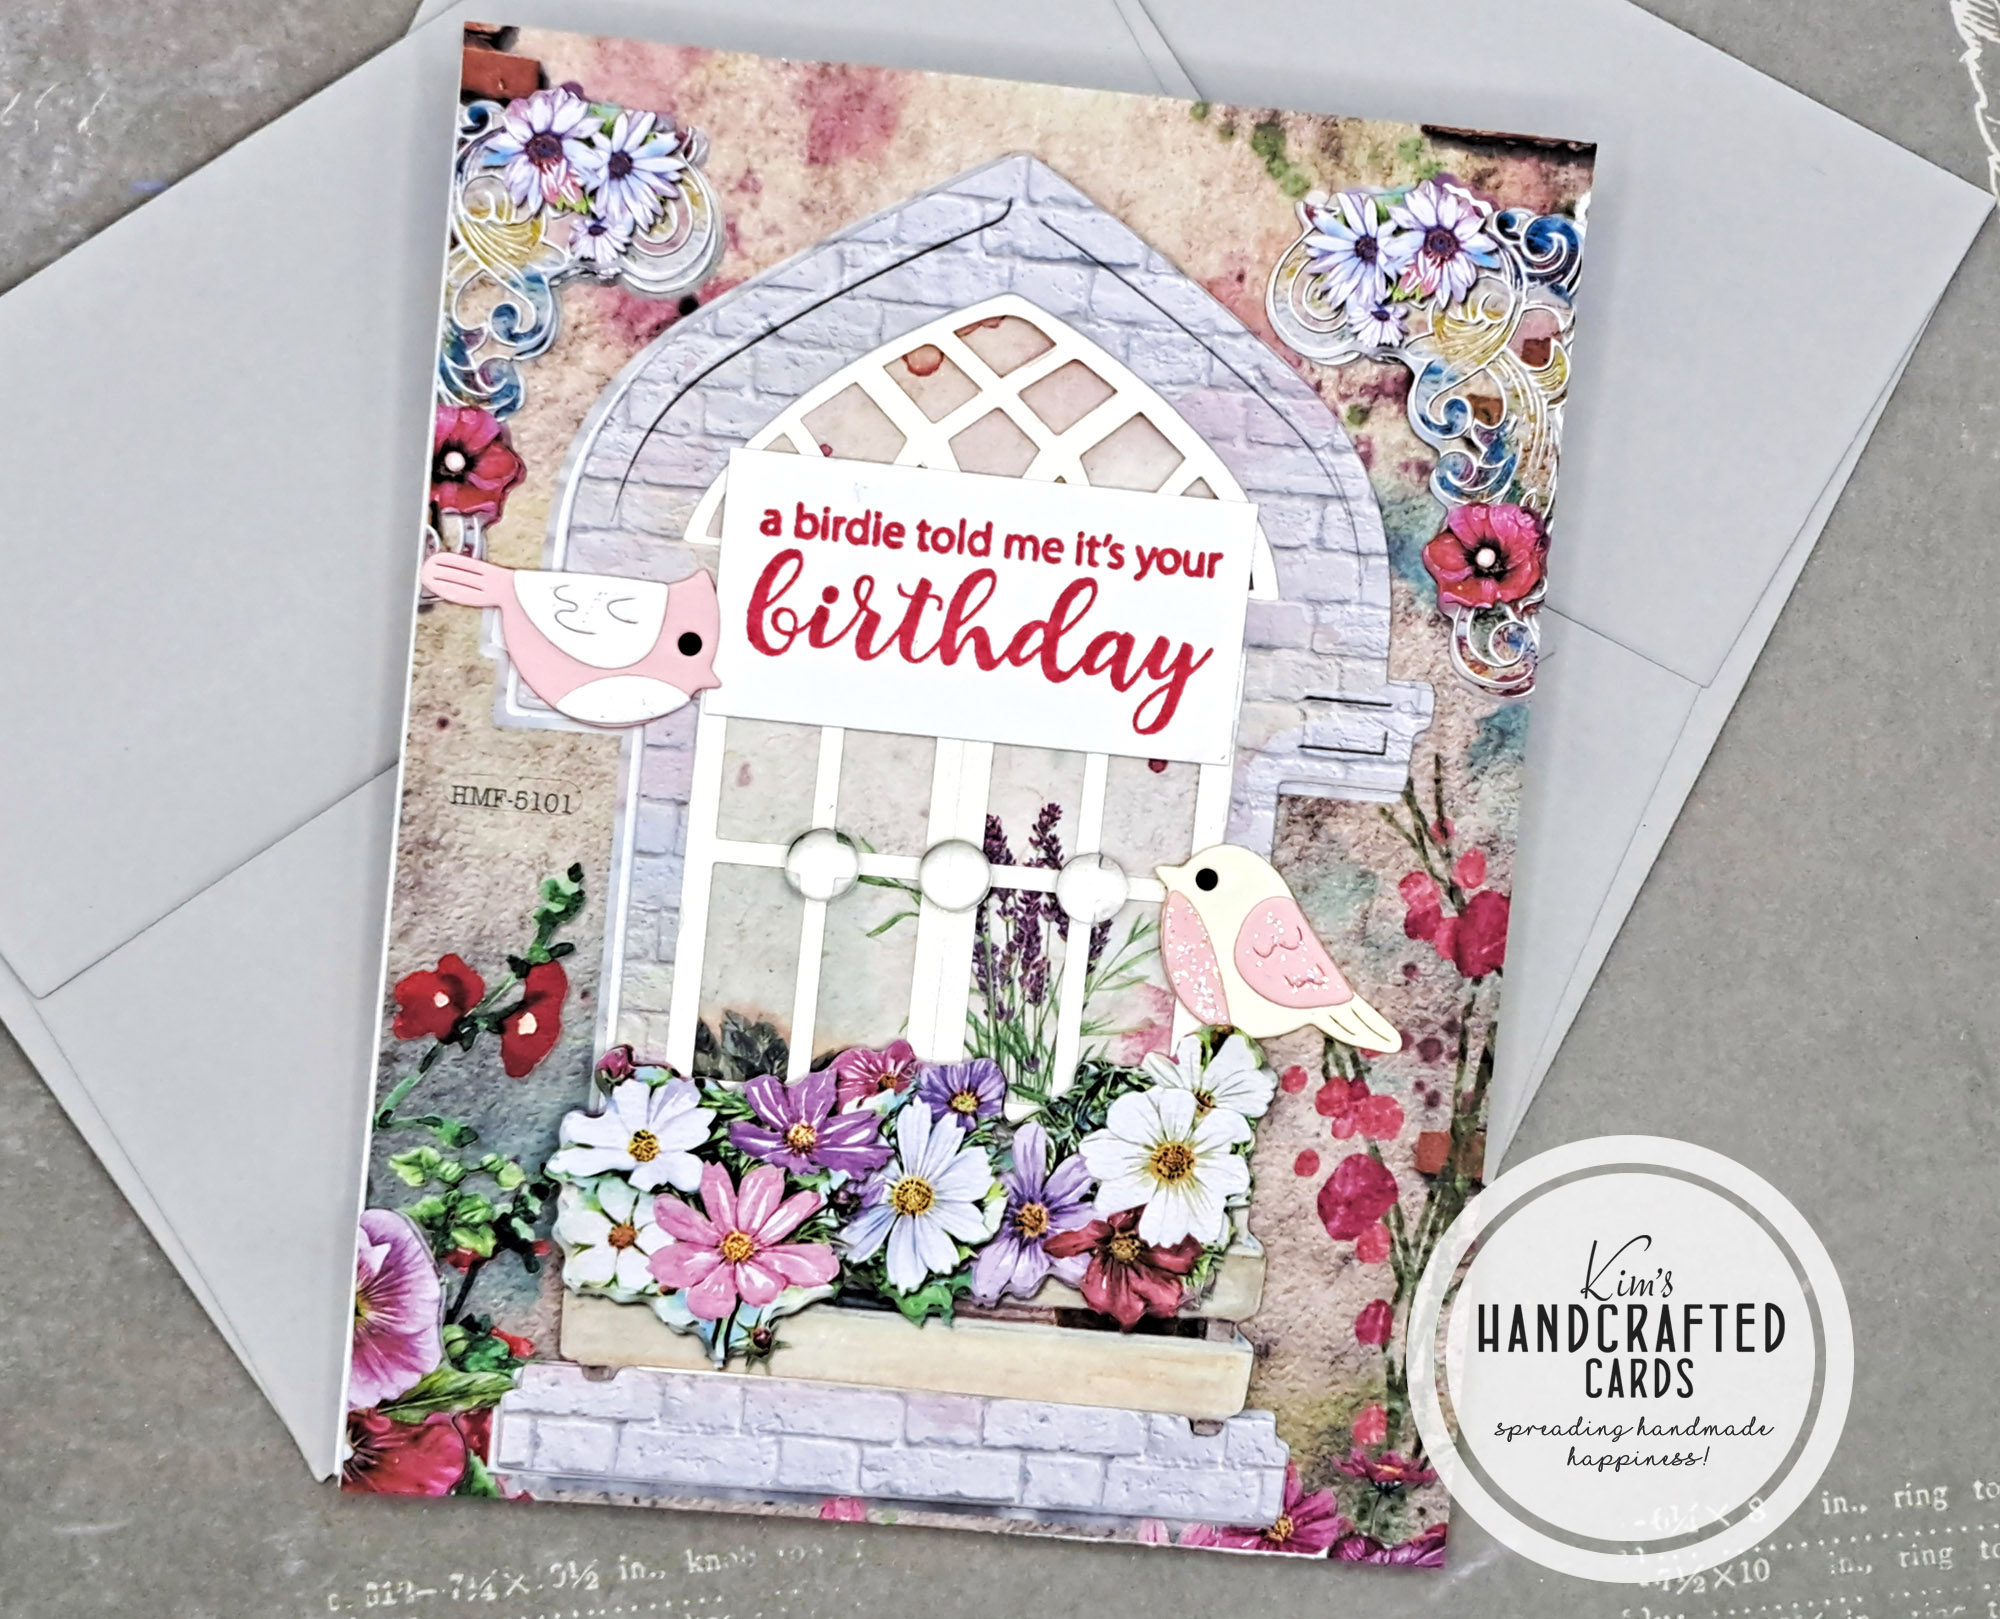
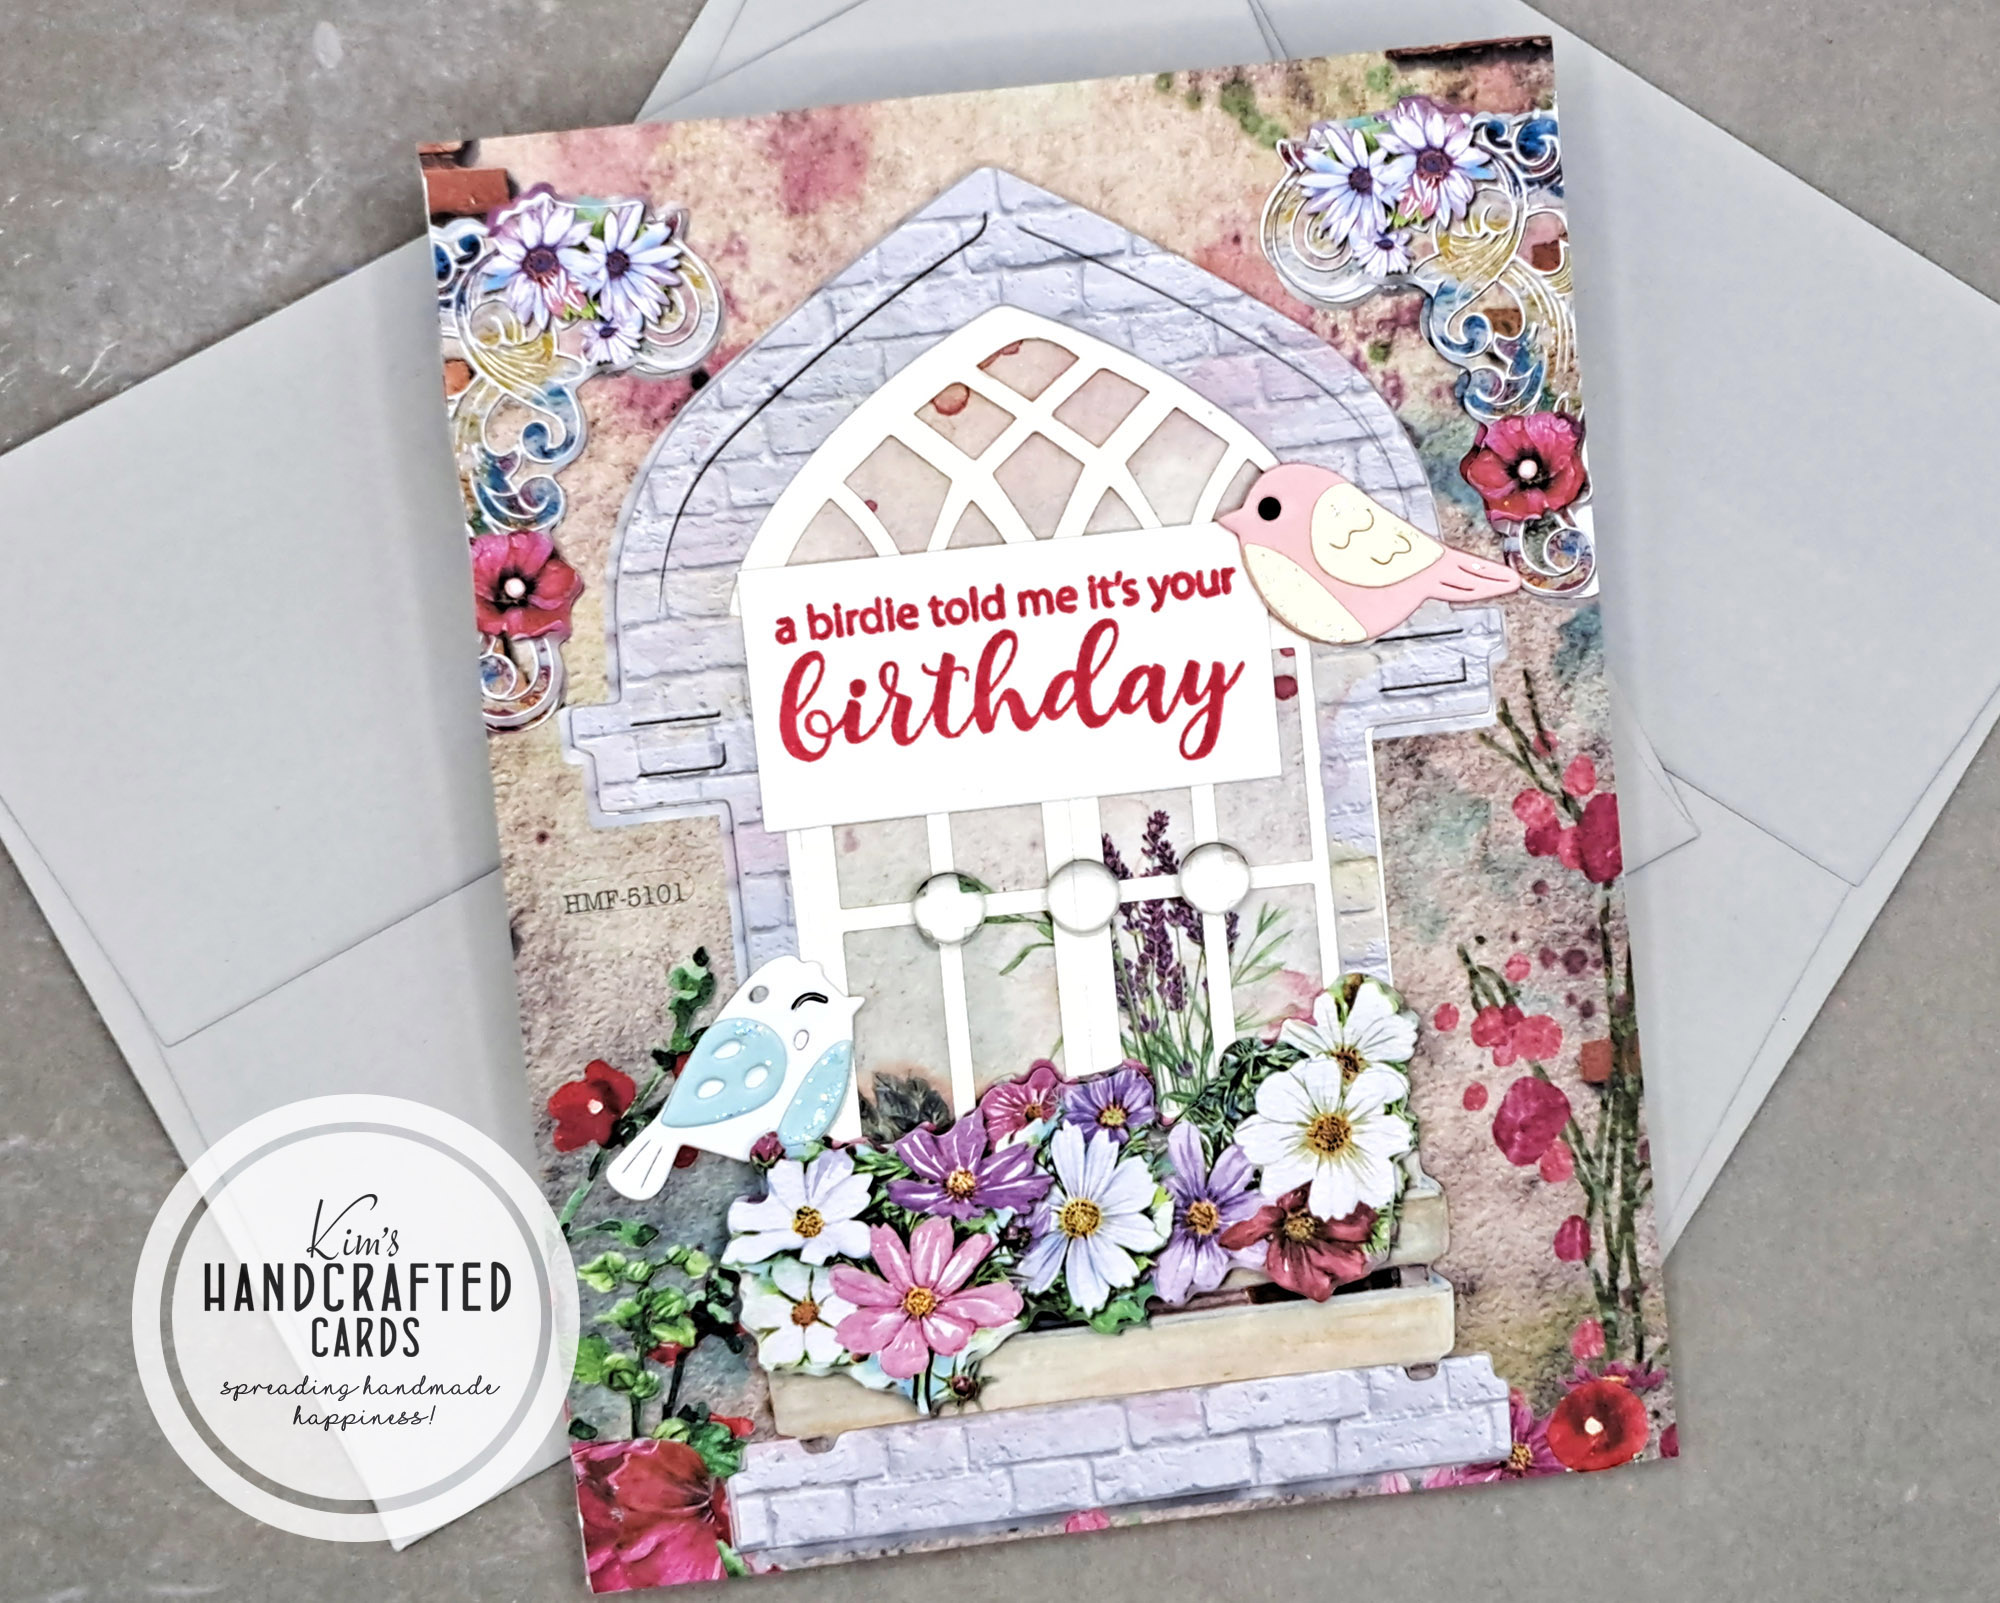
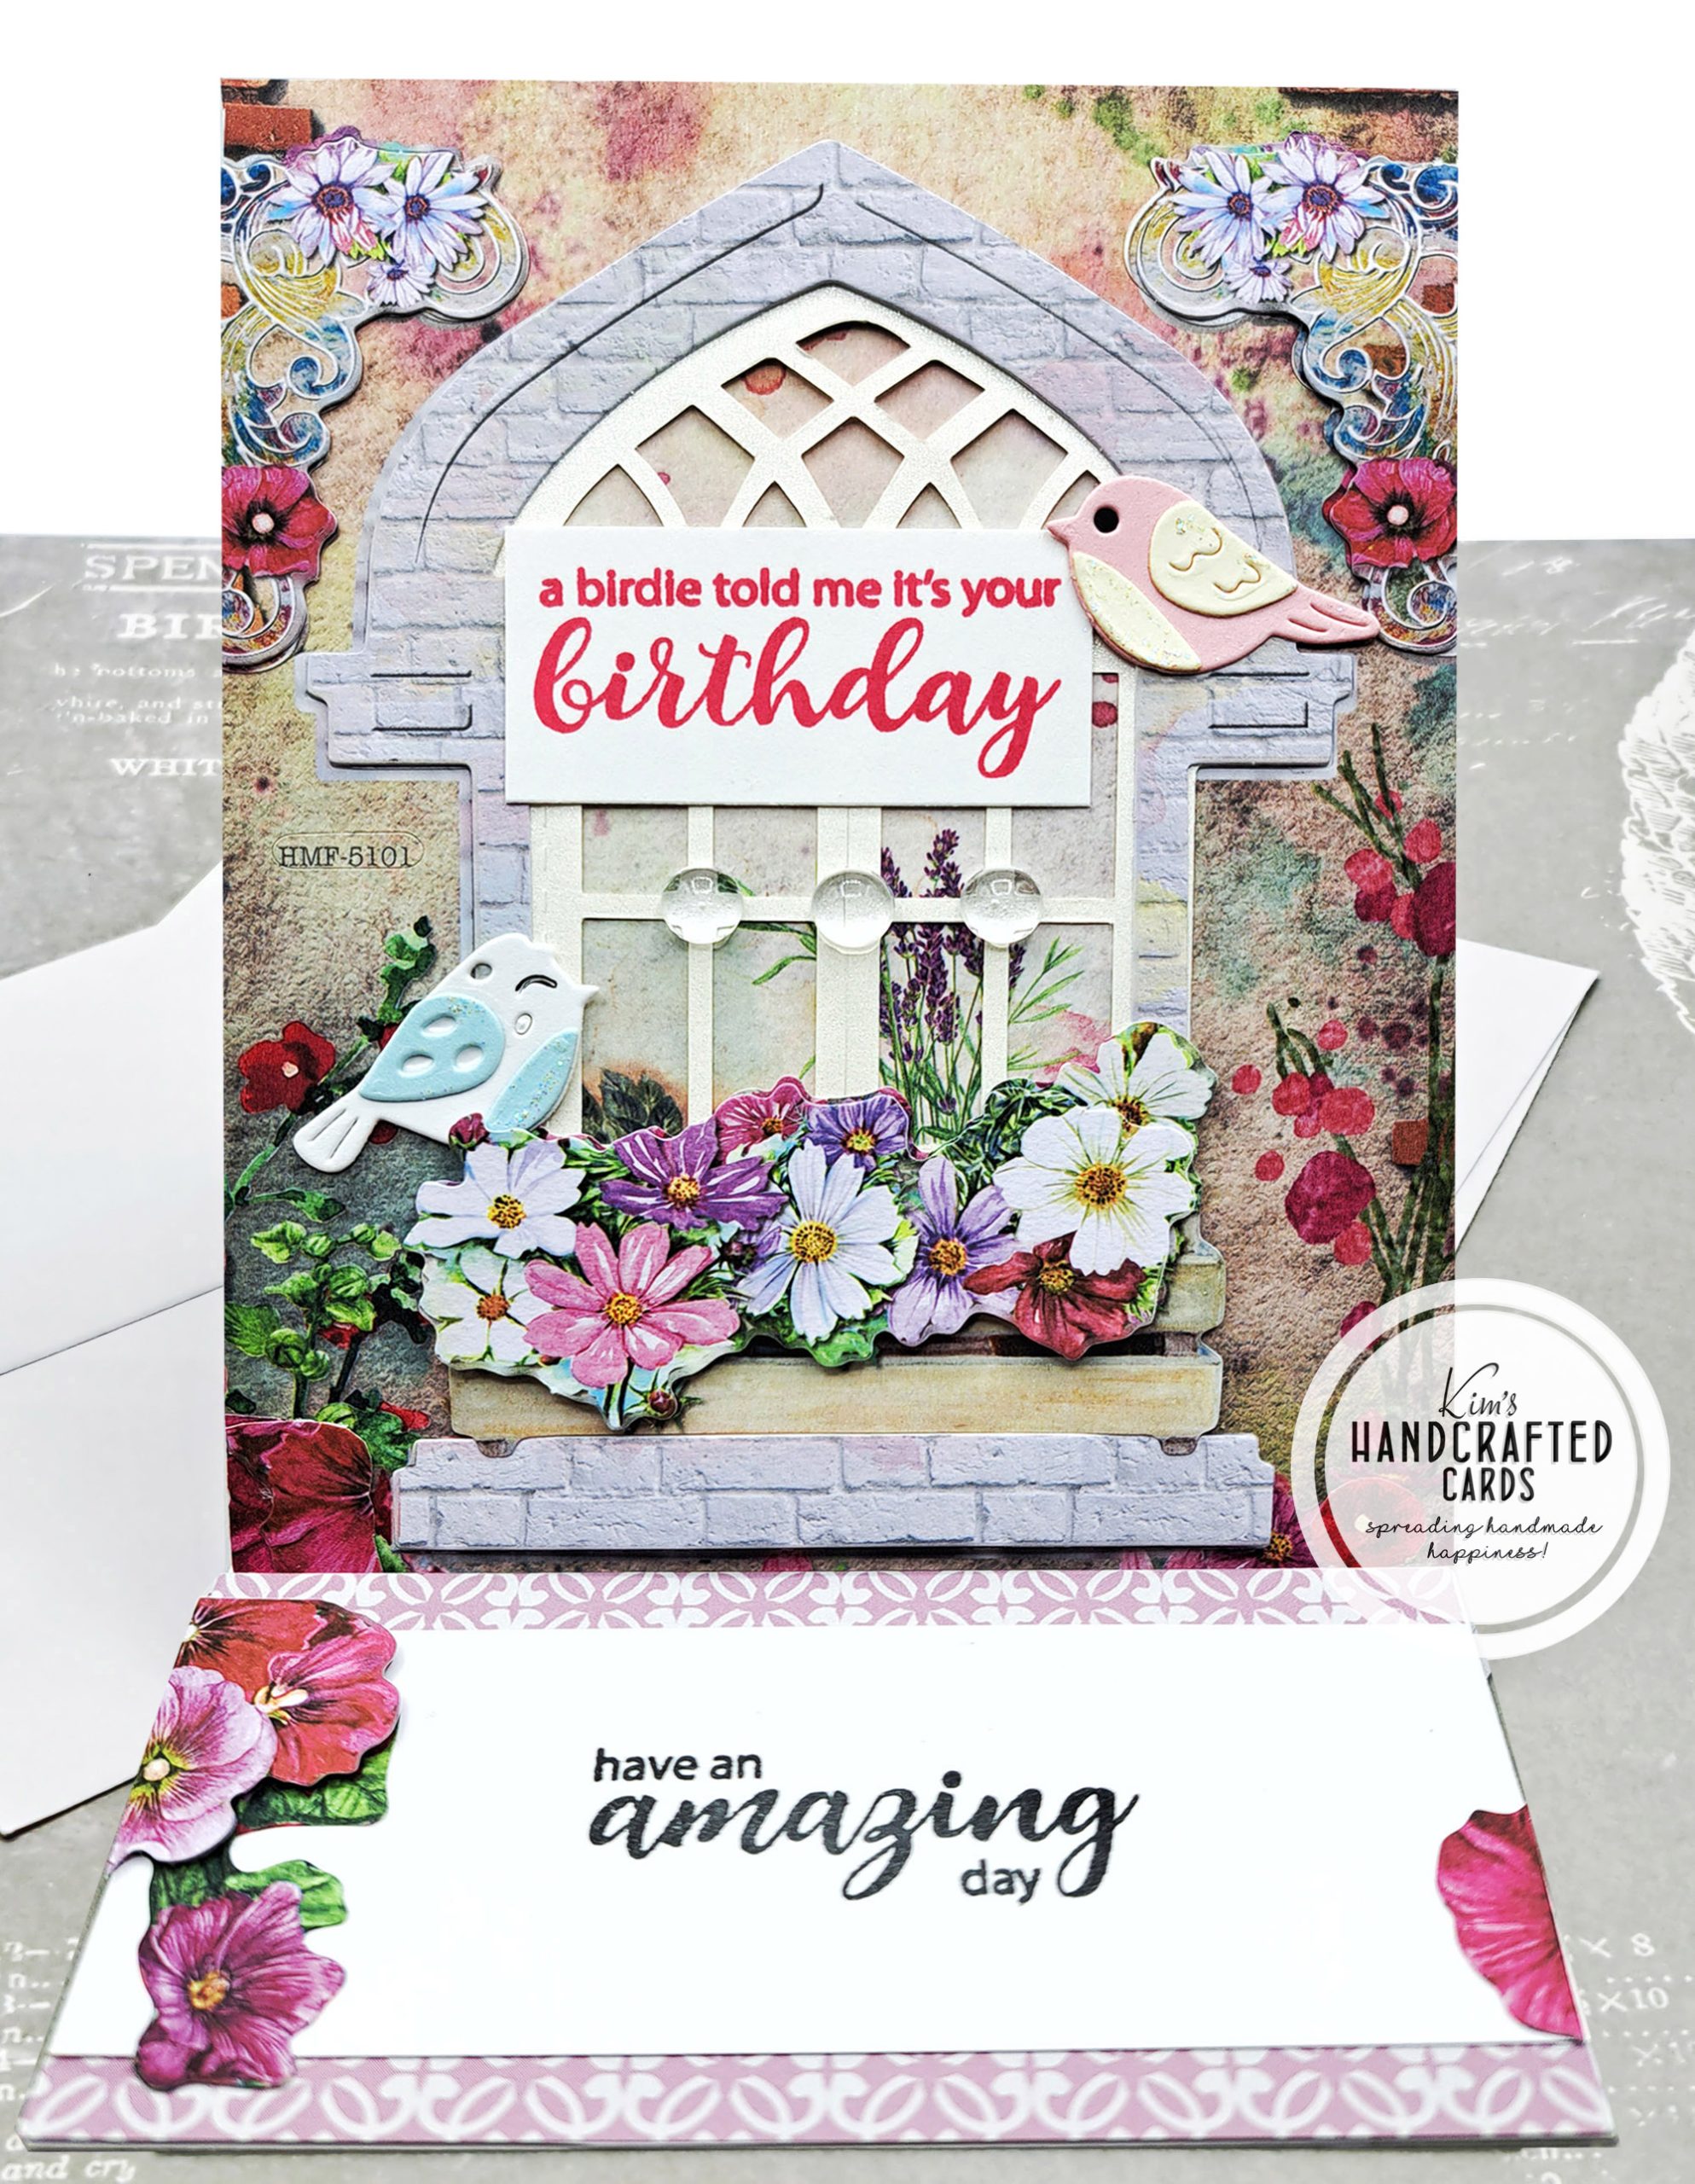
Anyway, earlier this week I went out to run errands and stopped by Dollar Tree. And you know I had to head to the crafty aisle! I picked up two 3D sticker sheets which are the focal point of my cards. There’s an arch window with a bunch of flower beds and clusters. I even used the background along with the stickers. That’s how much I love this sheet!
I’m pretty particular about what stickers I like to use, mainly I go for vintage, shabby chic or farmhouse style. Then, I add other embellishments and touches to add more interest so that it doesn’t look like I just took a sticker and plopped it on paper! In fact, with these 2 cards, I removed all the stickers and purposefully placed them in different areas and even trimmed off some of the flowers to fill space on the cards. Also, I took inspo from Jennifer McGuire’s recent YT video and turned these into Easel cards!
Aren’t this beautiful?! OH WOW!!! Okay, back to the post! hee hee LOL
First, I made my easel card bases, these measure A2 size. So I started by making a top folding card and scoring the front panel at 2-3/4″. This fold is what makes the easel part. To make a stopper for the card to stand on, I trimmed my cardstock to 4-1/2″ w x 2″ l. I also trimmed about 3 sheets to give it dimension and strength to hold the card up when on display. Watch Jennifer’s video if you haven’t made an easel card before. It is incredibly easy! I’ve also made easel cards before, check out this post!
Again, I removed all the stickers and set them aside. I carefully removed the rest of the sticker from the sheet and placed it on the front side of my card and trimmed off the excess (the sticker sheet is larger than A2 size). Then, placed the arch back in the center. I added the 2 flower clusters on the top left and right and filled in other areas by trimming some of the stickers. I wanted the entire front to be covered.
This is where I had to add my birdies! I have a bunch of these already die cut and stored in a bin. They coordinate with Spellbinders “Birdhouses Through the Seasons” and this set is called “Sweet Birds on a Branch” etched dies that I used on some Christmas cards I made last year here! I added some Star Dust Stickles on their little wings for some shine. Also, added 3 ice embellishments by Sparkletz. I wanted the large flower bed to sit in the window and I used some liquid glue to ensure all the 3D pieces stay in place especially when sitting upright.


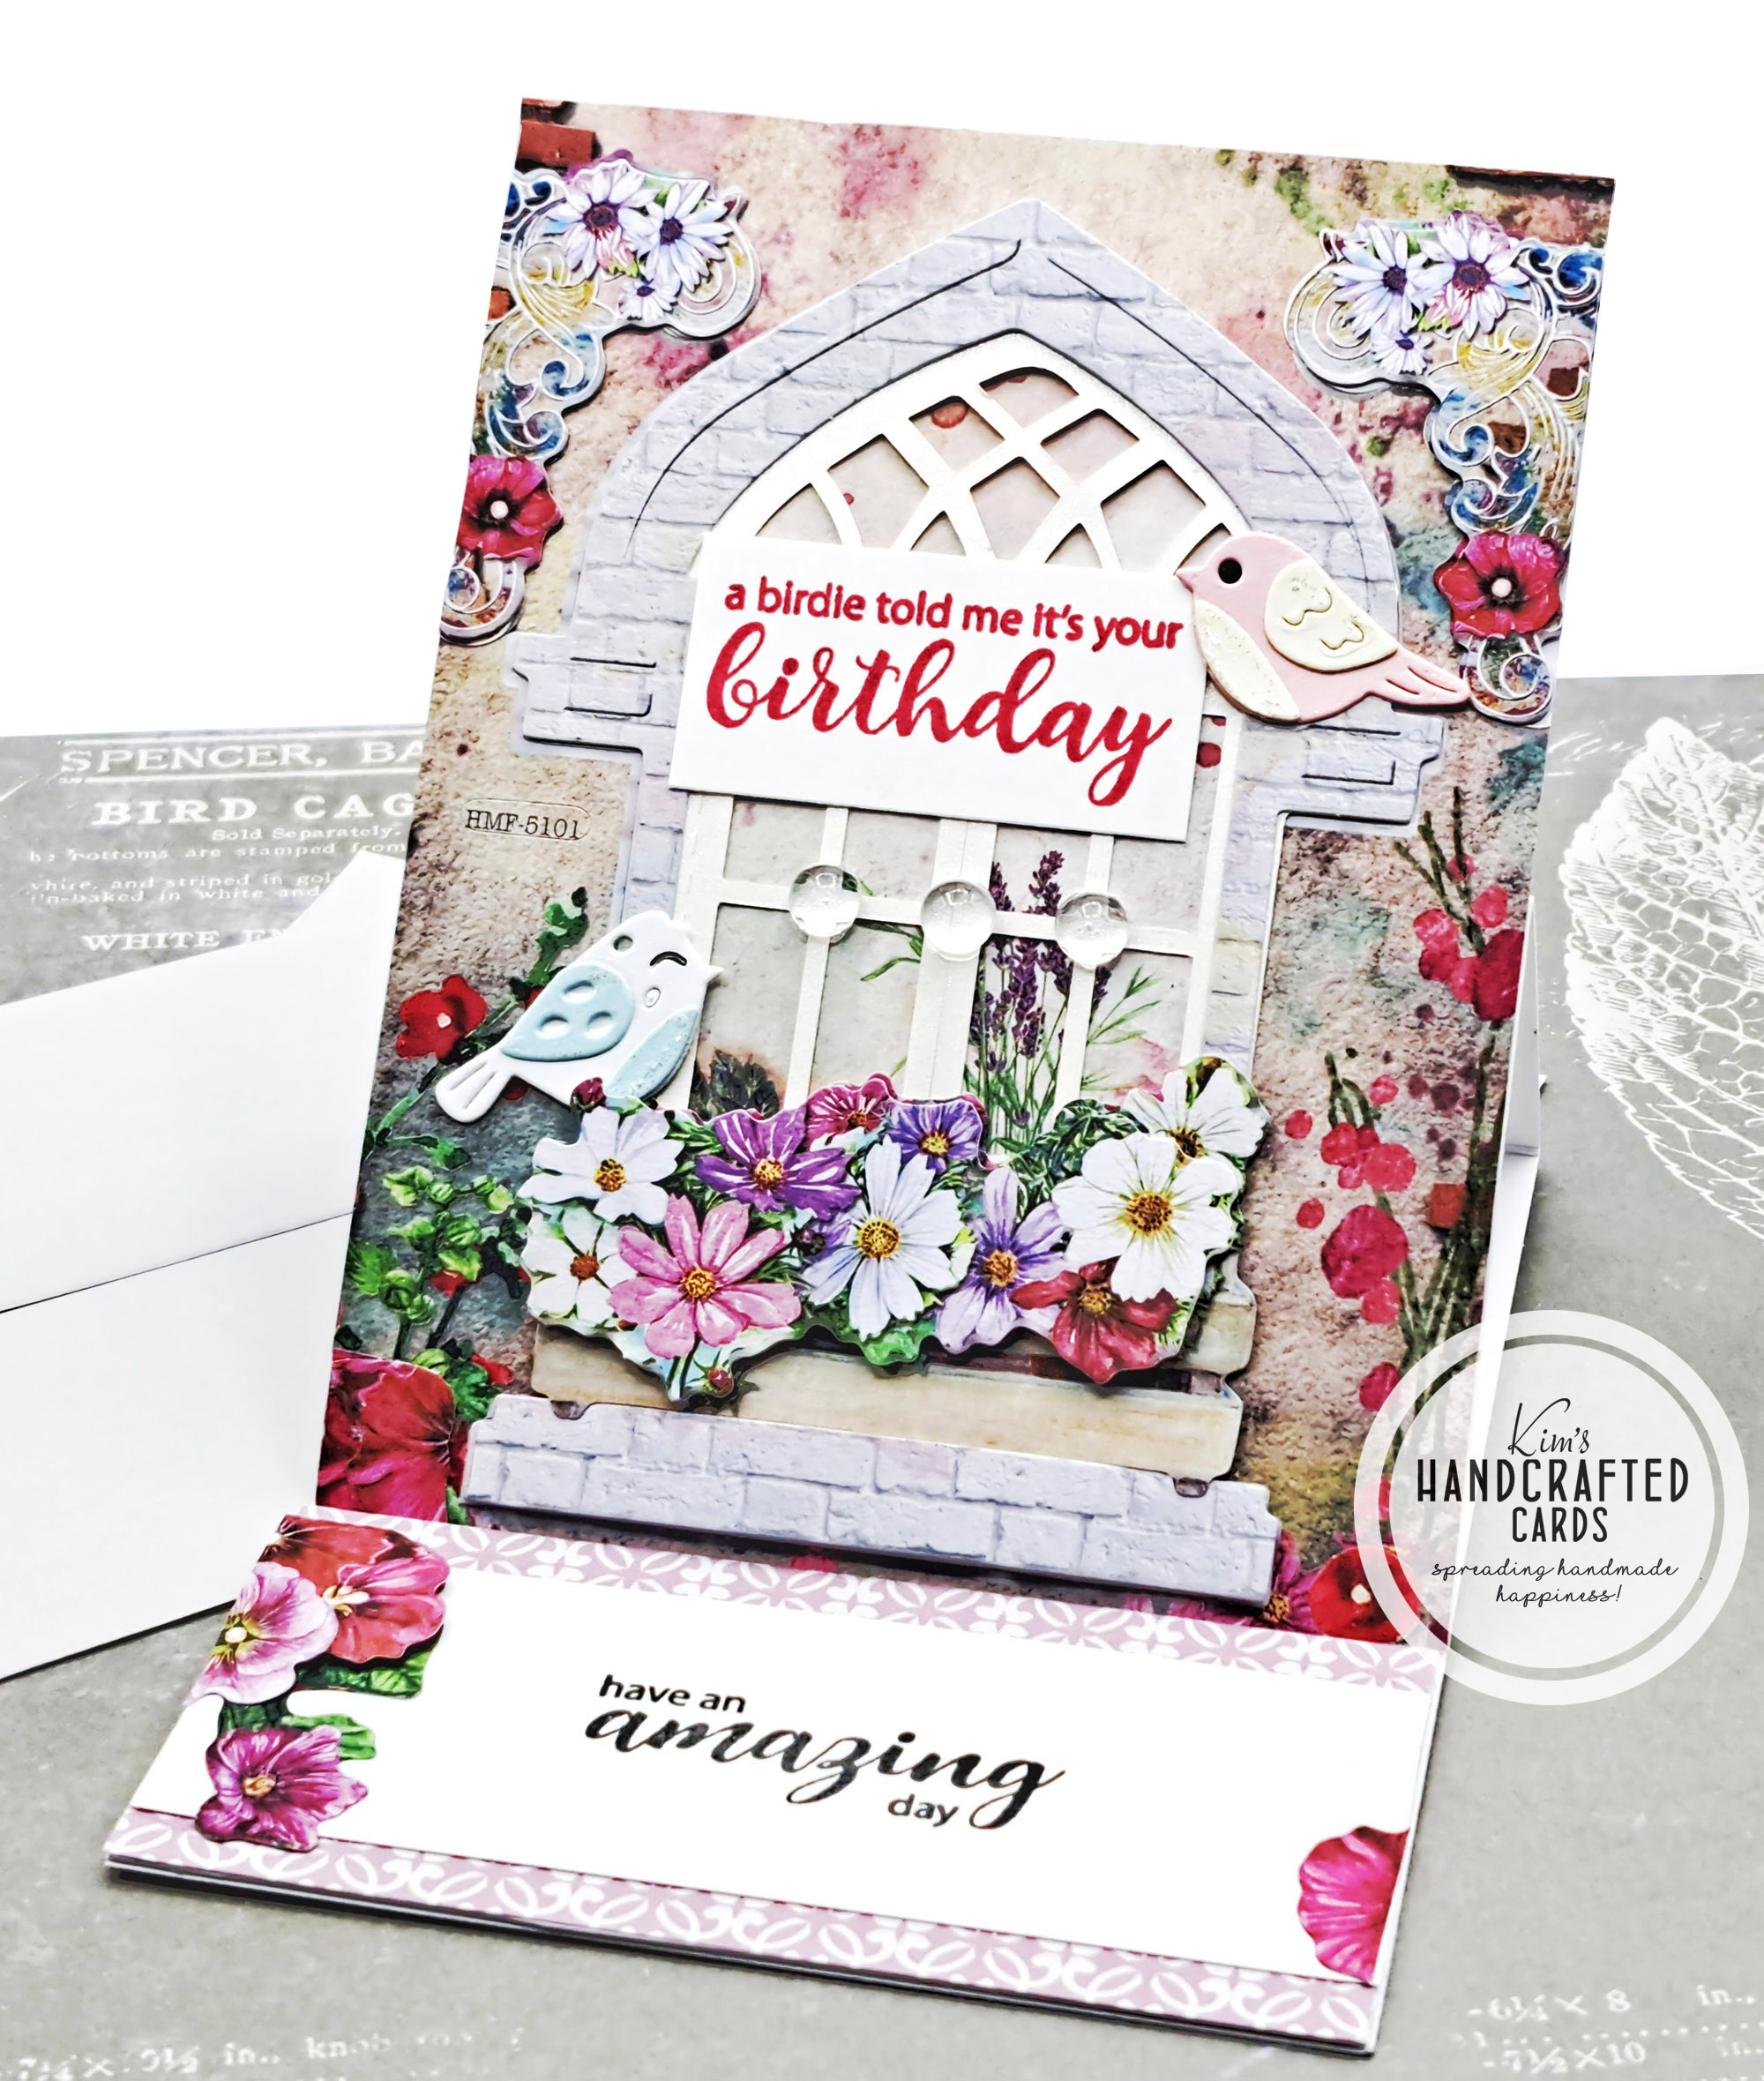
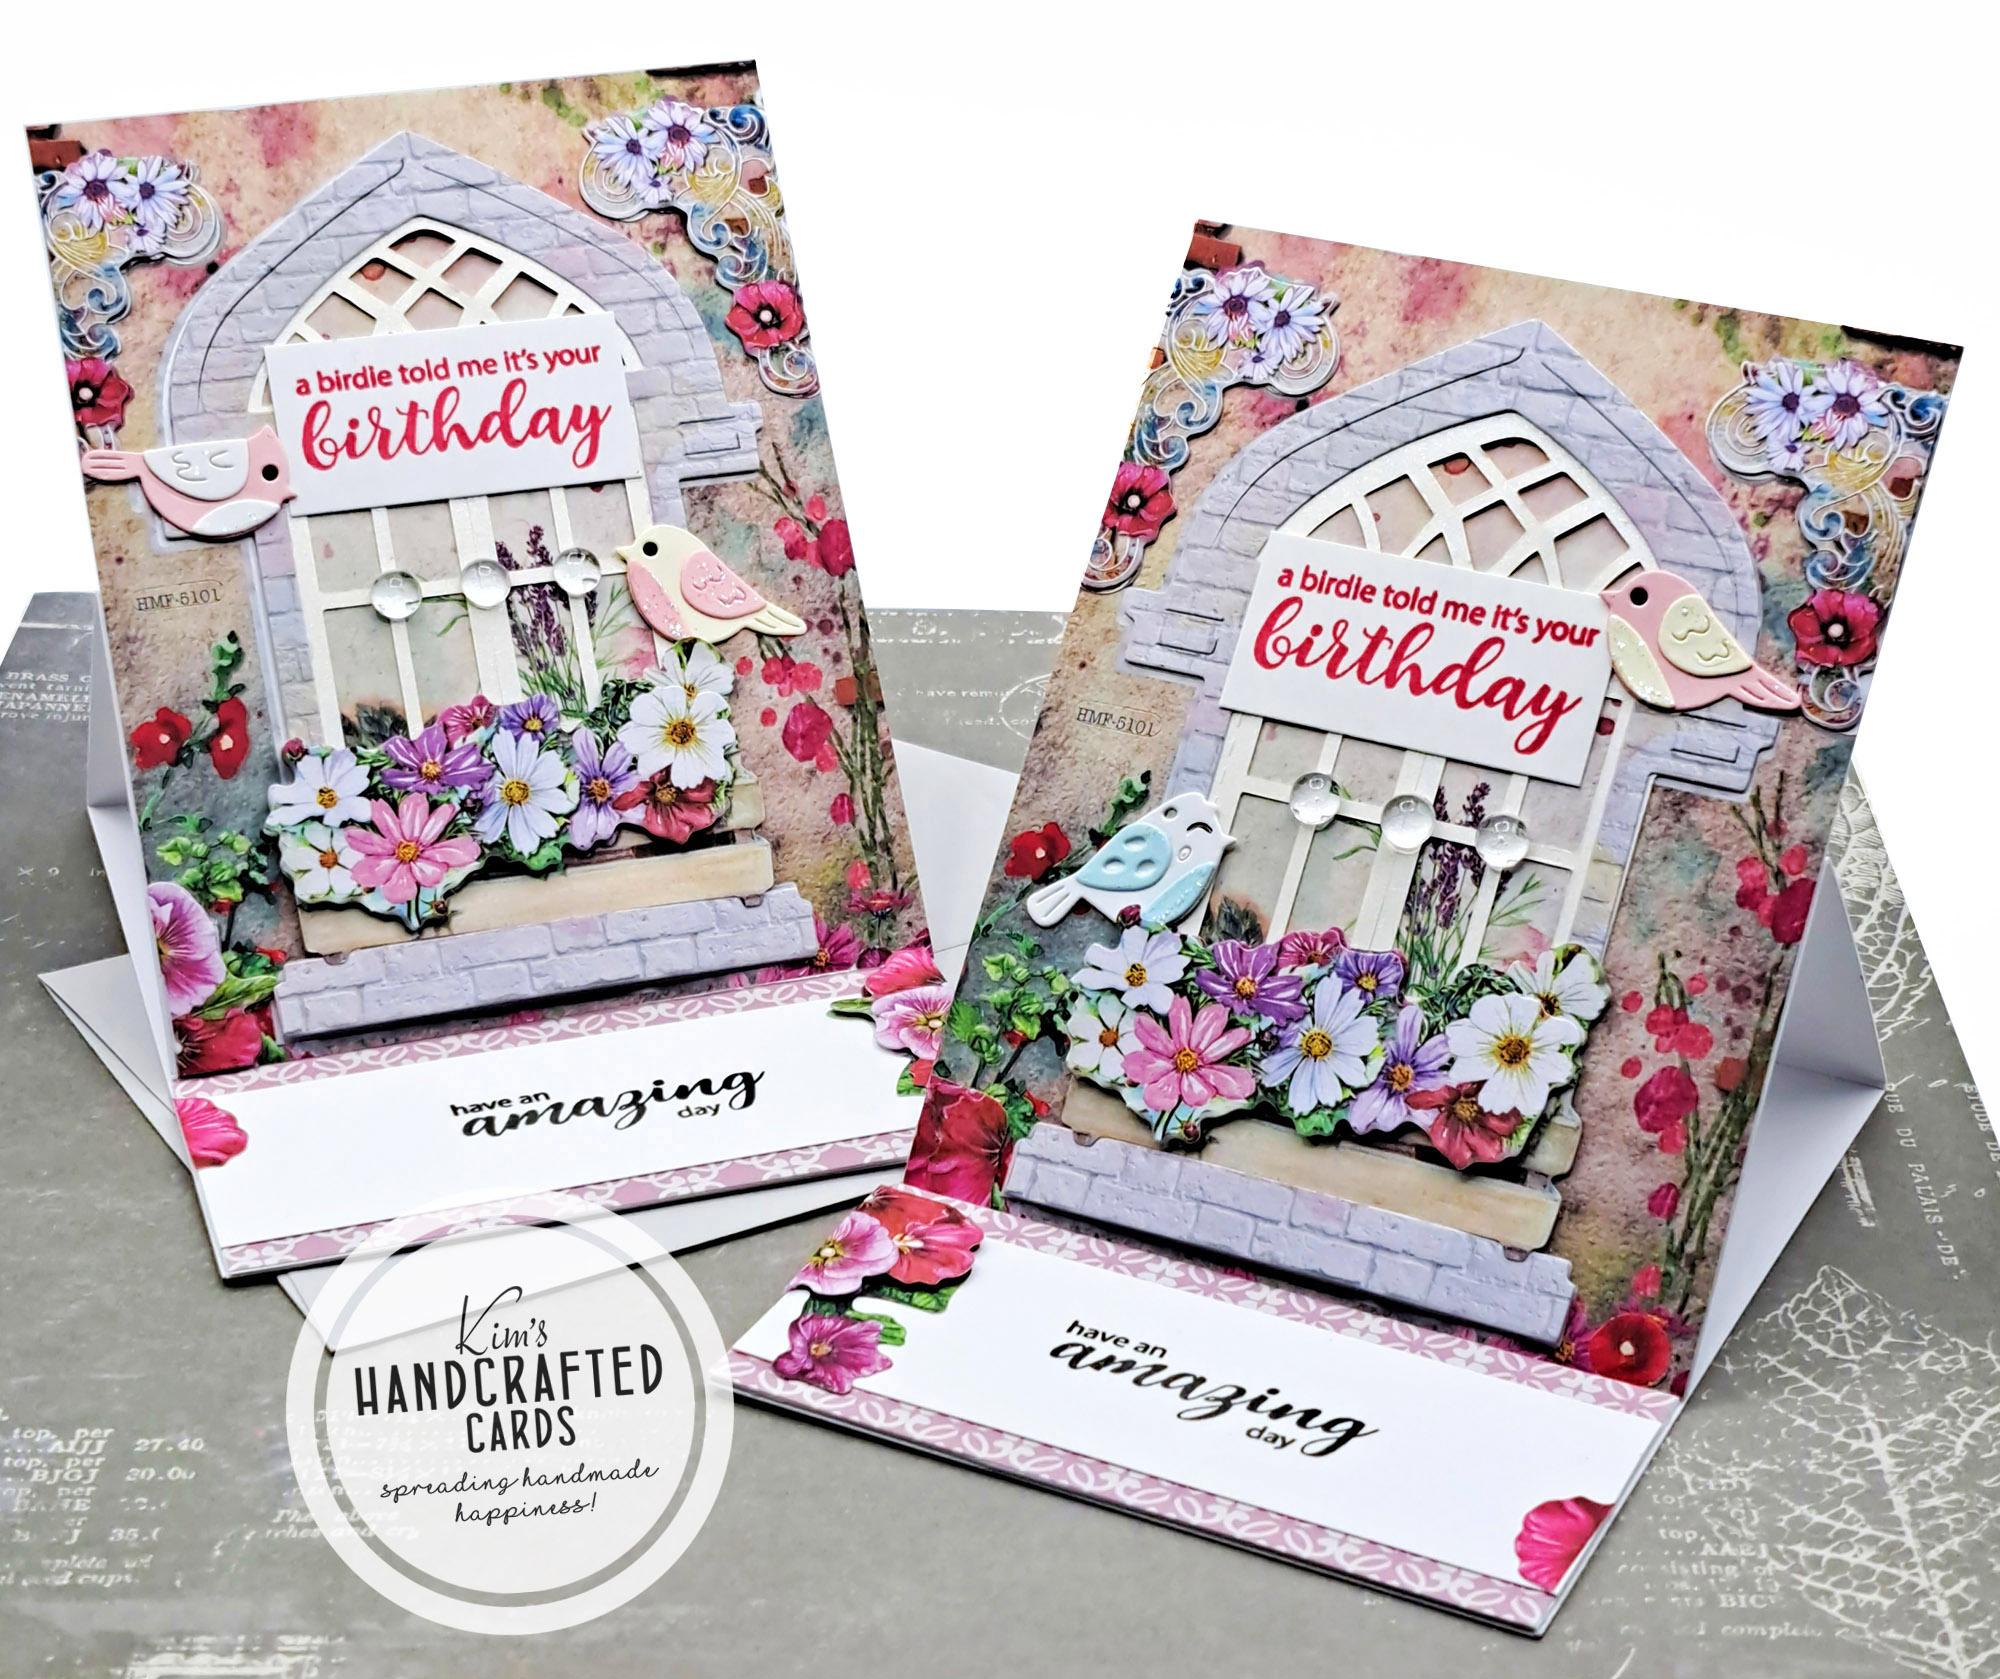
I wanted to make birthday cards so for my sentiments, I used Spellbinders “Tweet Sentiments” set. I stamped the sentiment on the front of the card with Simon Says Stamp’s Watermelon Pawsitively Saturated ink and Intense Black ink for the stopper portion. I used some extra flower stickers for my stopper. The background for that is pattern paper from Paper Boutique’s “Damask” collection. I think it blends well since the colors in the pattern paper are similar to the sticker sheet.

I am simply in love with how these cards turned out, so much so I don’t think I can donate them! They may have to stay with me! Think I’ll need to go back to Dollar Tree and buy more of this sticker sheet to make some for giving away! 😀

- Dollar Tree “Crafter’s Square” Stickers (you can probably find this sheet in your local Dollar Tree, but here’s a link to see it on their website too)
- Spellbinders “Sweet Birds on a Branch” Etched Dies or here
- Spellbinders “Tweet Sentiments” stamp set
- Accents 100 lb. White Cardstock
- Paper Boutique Damask Delights Collection – 8 x 8 Paper Kit
- Simon Says Stamp “Watermelon” Pawsitively Saturated Ink
- Simon Says Stamp “Intense Black” ink pad
- Bearly Art Liquid Glue
- Ranger Star Dust Stickles
- Sparkletz “Buttons Galore” Ice Embellishments