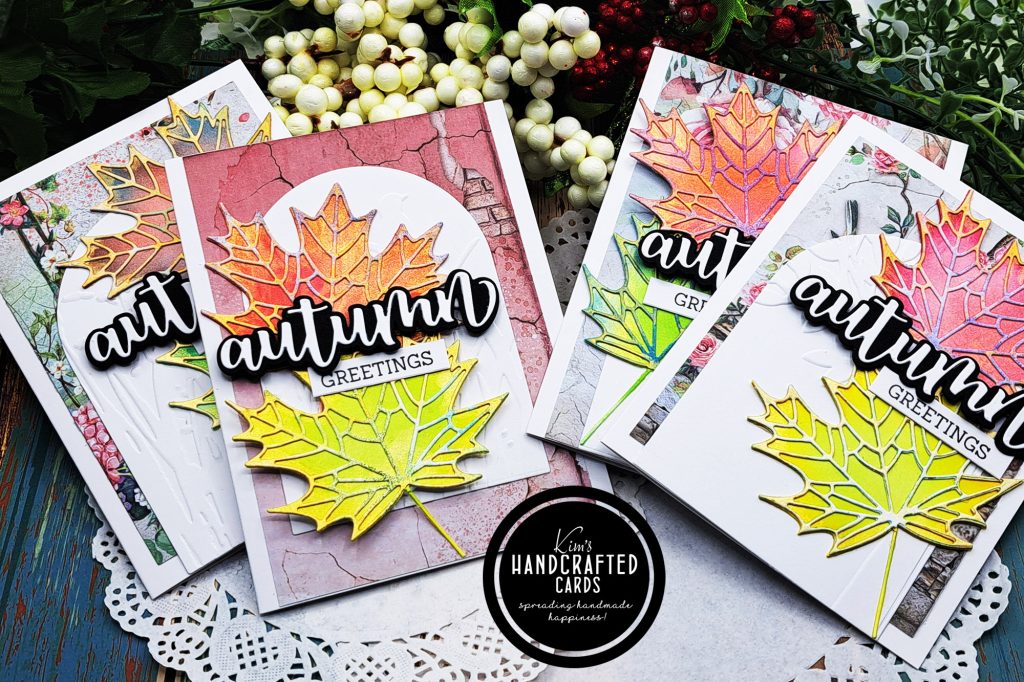
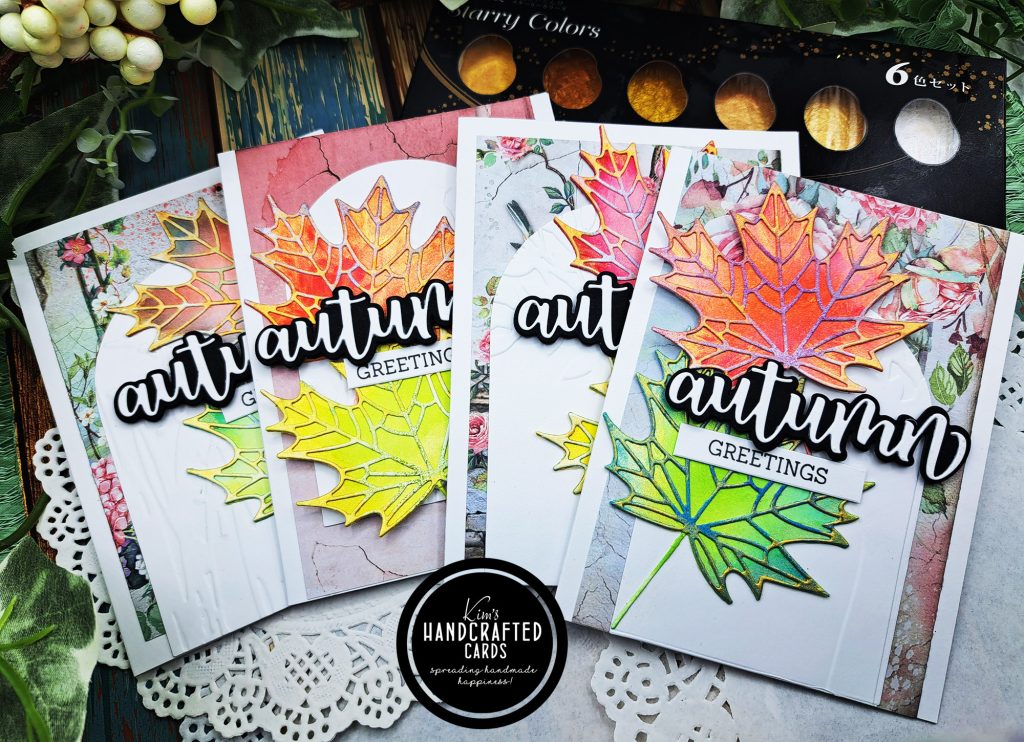
Hi friends!! Today, I’m super duper excited for the 4 cards I just made. Last night, I was watching Simon Says Stamp’s “5 Ways in 5 Days Crafty Series”, “5 Pawsitively Perfect Color Combos” video on YT with Nina Marie.
She used Simon’s Pawsitively Saturated Inks mixing different colors together to make cards with butterflies as her main focus. And of course, you know how much I love their line of Pawsitively Saturated inks.
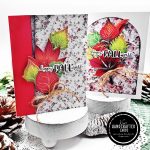
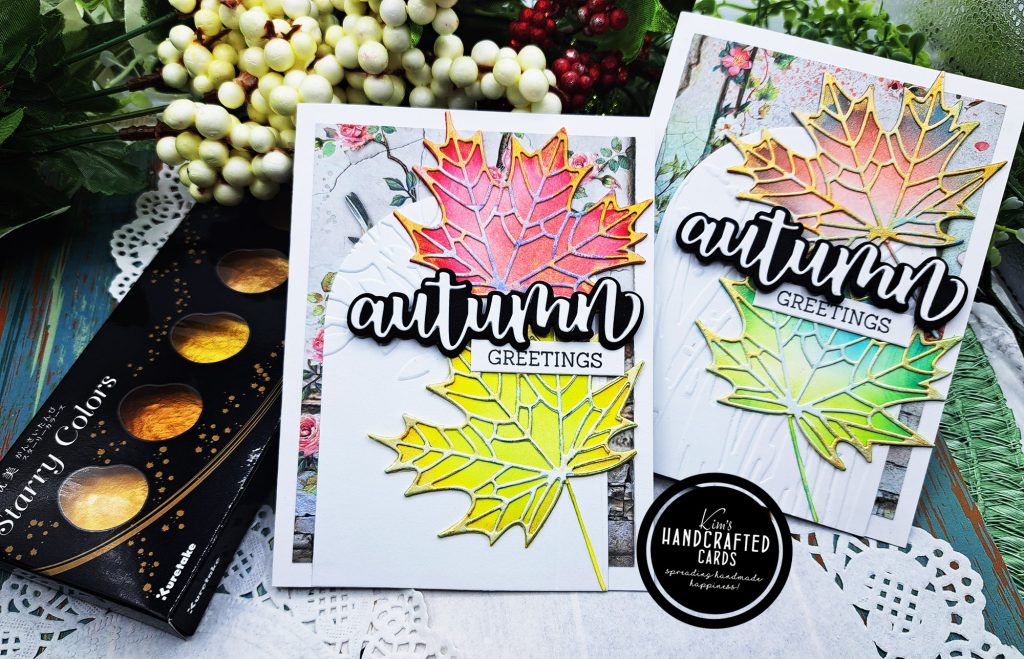
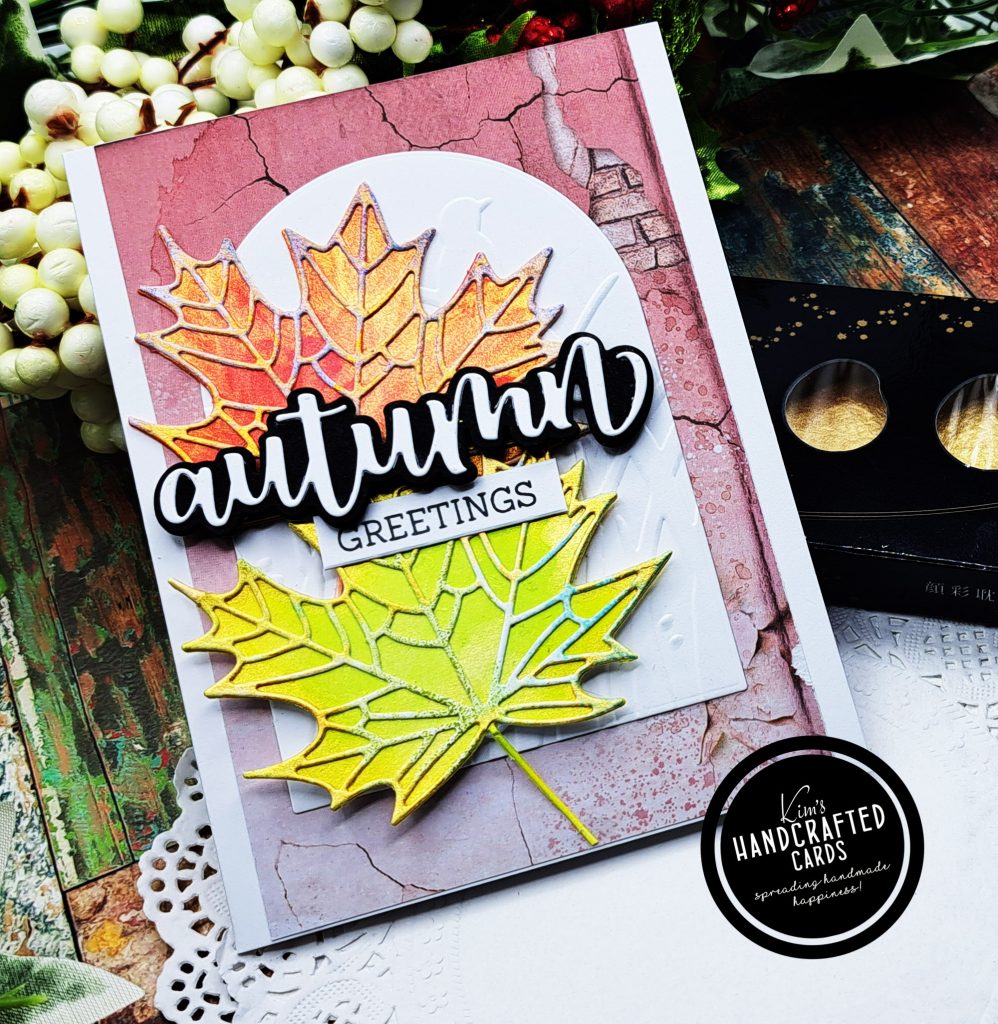
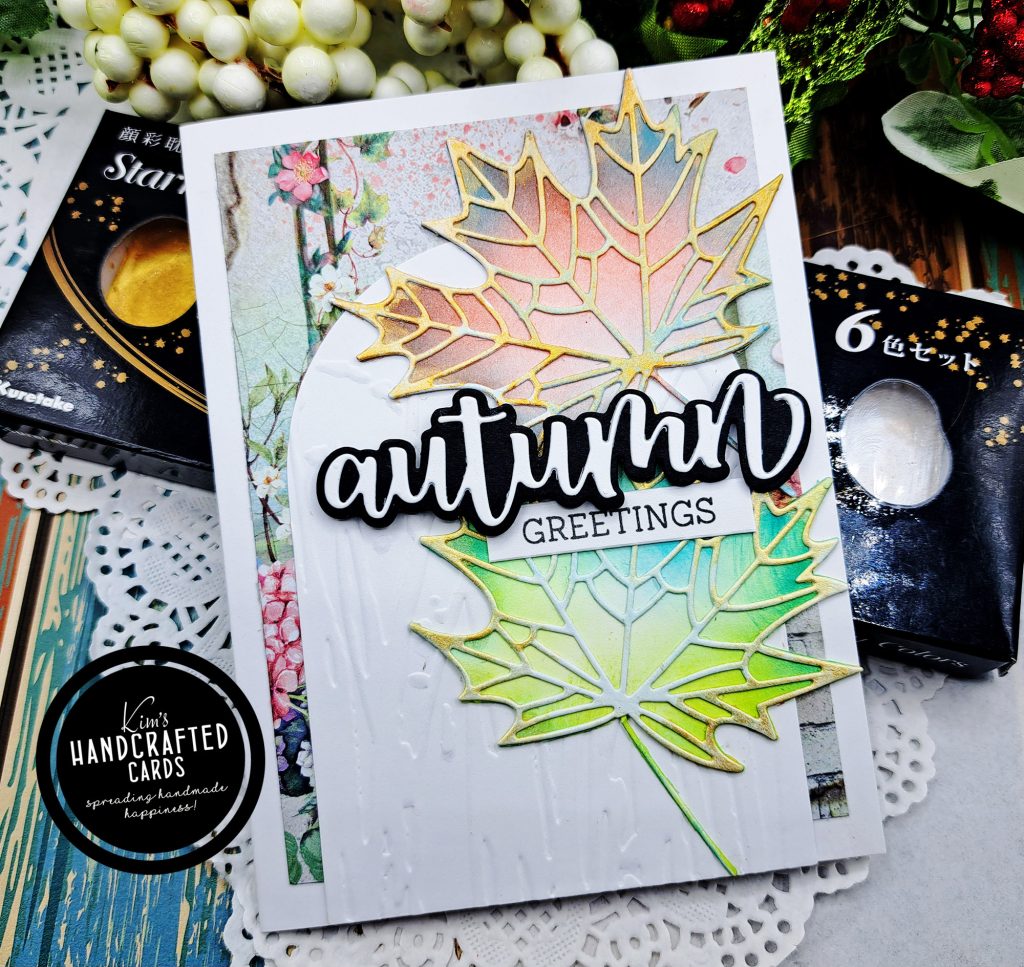
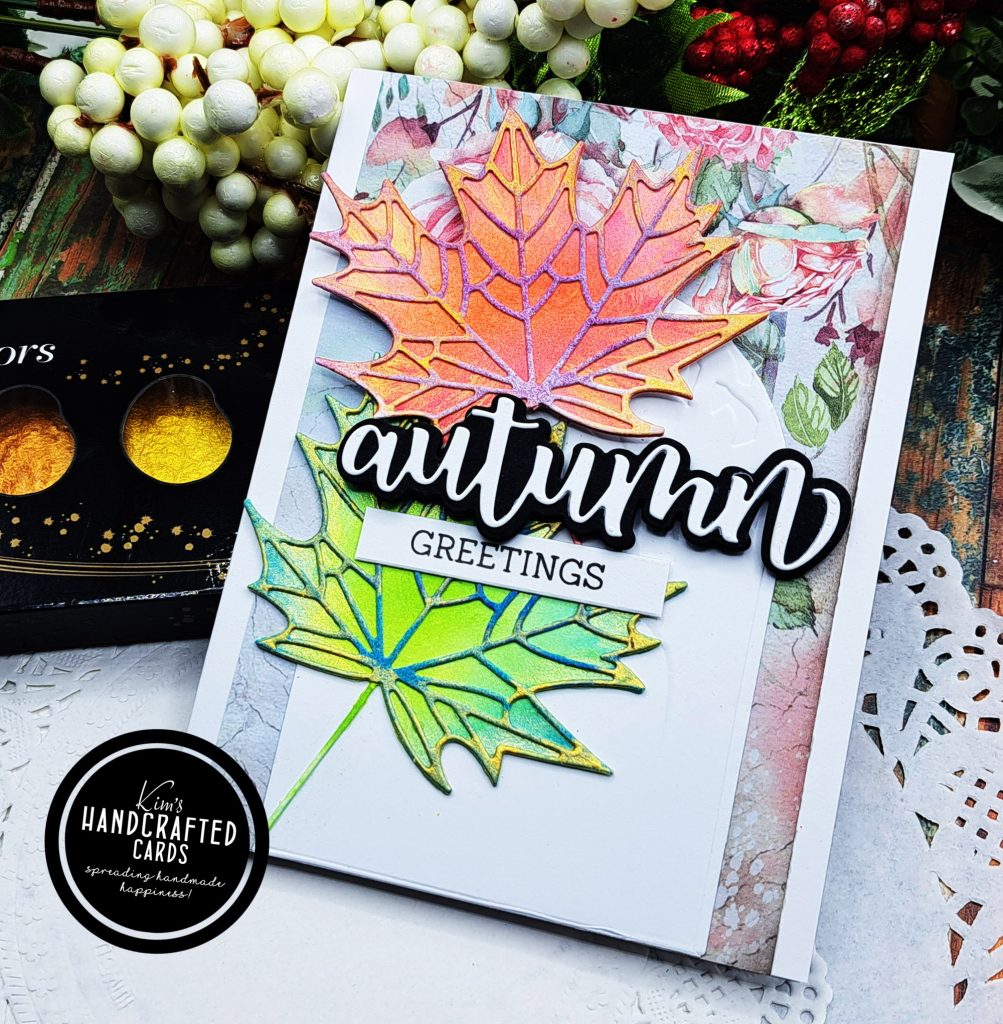
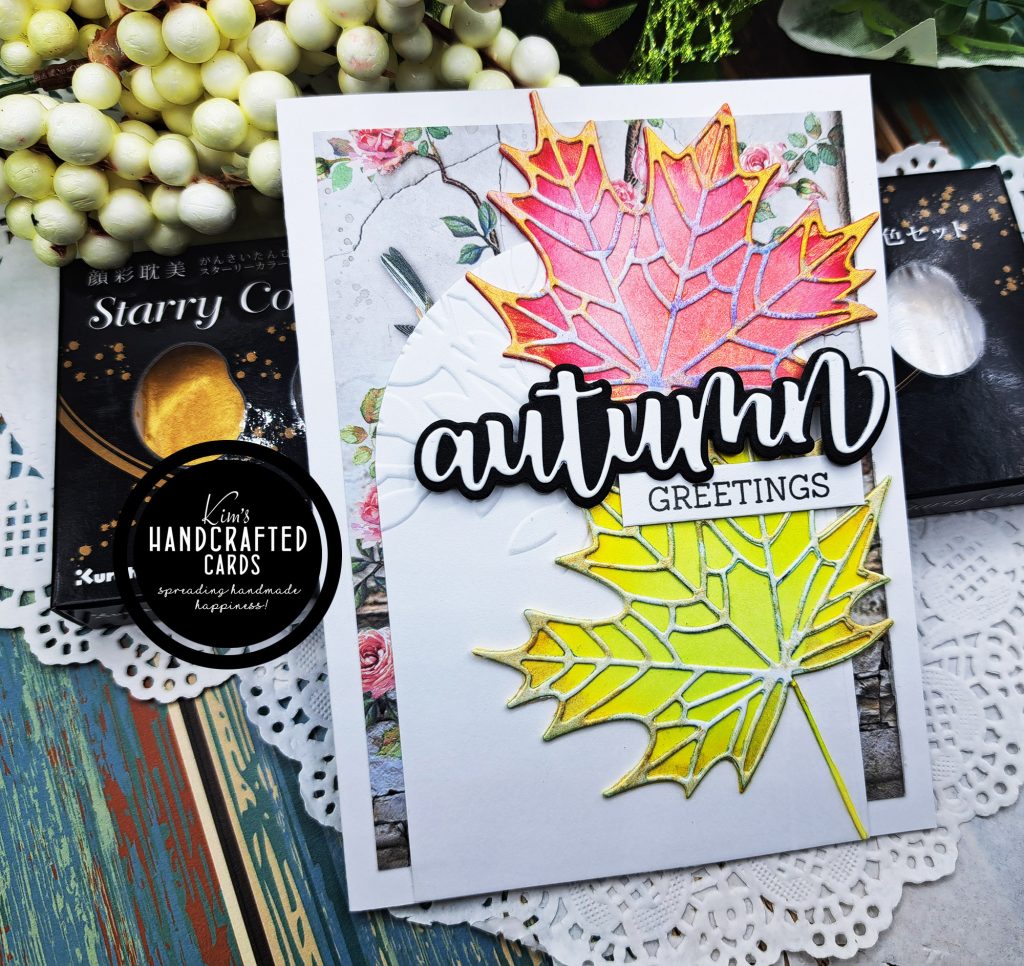
I don’t have many of them, but the ink collection I do have worked perfectly for the leaves that are taking center stage on my cards. I used the Honey Bee Stamps “Lovely layers Maple Leaves” die set. There’s 2 dies to this set (the bottom layer which is solid and the top layer that has the cutout pieces).
Check out this post where I used them to make some slimline cards.
Because these cards have a few parts, it’s easier to explain each part separately and I’ll bring it all together at the end of this post. Let’s get to it!
these are the Specific Parts:
- The Leaves (set of 2 dies that were colored differently)
- The Arches which were embossed
- The Pattern Papers on the card panels
- The Main sentiment (word die)
- Secondary sentiment (stamped)
The Leaves:
I felt the best way to design these cards was to work in an assembly line style so starting with the leaves, below are the specific color combos for the bottom leaf layers:
- Pearfection & Ocean
- Watermelon & Mandarine
- Limelicious & Sunbeam
- Pucker & Surf
- Pucker & Cherry
First, I die cut all these leaves on white cardstock and used 2 colors per leaf for my ink blending (this was done on the bottom leaf die). I’ll explain how I colored the top leaves in a minute.
Nina also added some gold coloring to the edges of her butterflies and I remembered I have the Starry Watercolors set, it is a set of 6 pretty golden shades and I hadn’t used it in awhile. So, I watercolored the edges of my die cuts using Starry Colors #901 and #902 with a #4 Flat Paintbrush. The gold effects are just stunning! I set these aside to dry while I worked on the top layer leaf.
For the top leaf, I started out with some gel press backgrounds I saved in my stash and I die cut the top leaves with them. My backgrounds had different distress oxide colors from when I used my gel press. Love how easy and quick making backgrounds are with it.
Anyway, after die cutting them, I colored again with #901 and #902 adding more color to the top leaves (not just the edges) creating an ombre effect. It was so freeing to just color with my watercolor brush and I wish you could see in real life how shiny and beautiful these leaves turned out. I set these aside to dry as well, there’s a total of 8 leaves. Then, it was time to work on the next layer; the arches.
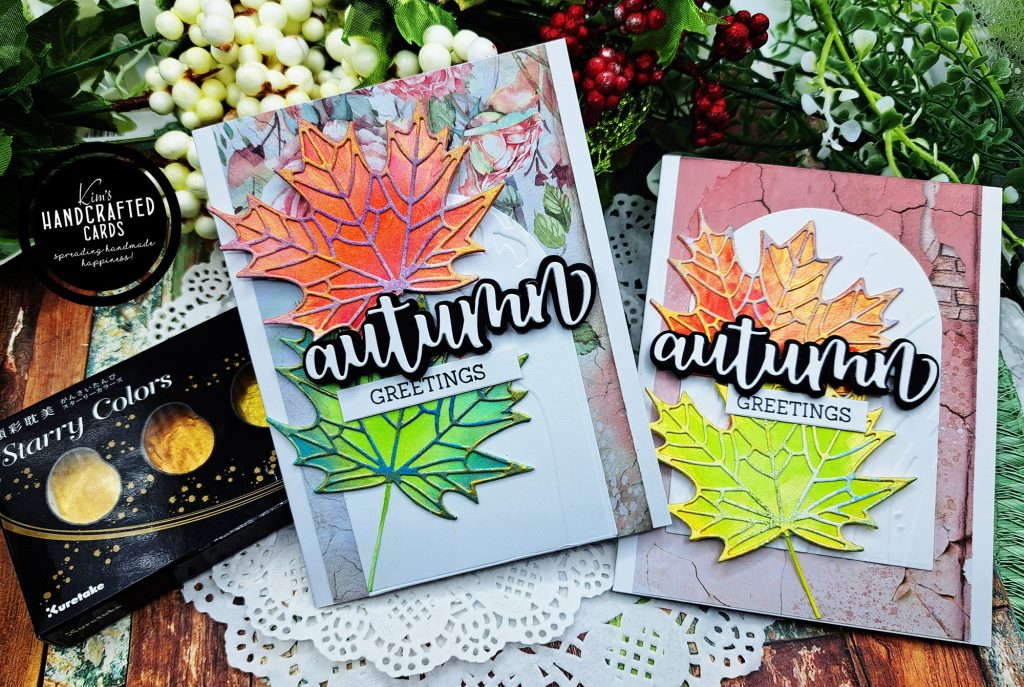
The Arches
I love archways! Love them! So, I die cut a couple of different sizes using Essentials by Ellen Arch Nested die set on white cardstock. I wanted to decorate them so I decided to emboss over them. My plates were warped and starting to give me trouble with my Spellbinders Platinum 6. I was contemplating replacing the plates but decided instead to purchase the Universal Plate System and it arrived just in time.
For the embossing, I used a Cuttlebug Provo Craft embossing folder that has a bird with tree branches. The other embossing folder is a tree by Darice. I’m not sure what these folders are called nor if they’re still available. I’ve had both for years. They embossed really well with the Universal Plate System.
Card Panels
For the card panels, I wanted to use a pretty pattern paper and still had some left from the Stamperia “House of Roses” pack. Check out this post for more about this pattern paper. I trimmed 2 of these sheets to 3-3/4″ x 5-1/4″ and the 2 sheets to 3-3/4″ x 5″. I glued the panels to the card bases.
Sentiments
I knew these would be Fall cards so I broke out Honey Bee Stamps “Autumn” stamp/die set for both my main and secondary sentiment. I die cut the shadow from black cardstock from Simon and the letters in white cardstock. I die cut the shadows for dimension. I glued all 4 of my sentiments and set aside.
For my secondary sentiment, I stamped “Greetings” with Simon’s Intense Black ink on white cardstock and used their sentiment strip die set to cut them out.
I set all my sentimens aside cause now it was time to work on placing everything together!
Putting it All together
I played around for a long time with composition. I first adhered my arches on the card panels. Some I placed the arch towards the bottom of the cards and one card I placed in the center.
Even though the card design is relatively the same, it’s still fun for each card to be just a little different and it makes mass producing fun and not boring.
I then decided which 2 leaves would go on each card and I overlapped each one slightly to frame my arches. I used a little double sided foam squares where needed but you’ll see 2 cards where I didn’t use any foam squares.
After adhering my leaves, I placed the “Autumn” greeting with foam squares and glued the secondary sentiment just underneath it. I LOVE, LOVE how pretty these cards are!
Those leaves are soooo pretty and I took several shots to try to capture them under the light but don’t think the camera can see what my eyes can!
I had such a wonderful time painting these leaves, that was my favorite part about this project. Cardmaking is such therapy. I’ve got links to most of these supplies below!
Be sure to check out my Fall 2023 collection of cards! Thanks for reading!

Some of the links to the products I used are affiliate links which means that when you shop with them, I’ll receive a small commission at no extra cost to you. Your support helps me run my small crafty business. Thank you so much!
- Honey Bee Stamps “Lovely Layers” – Maple Leaf Die
- Honey Bee Stamps “Autumn” die set
- Honey Bee Stamps “Autumn” stamp set
- Stamperia International House of Roses 8×8 Paper Pack
- Essential Arches by Essentials by Ellen
- Kuretake Gansai Tambi Starry Colors (set of 6 colors)
- Ngwall Flat Paintbrush (set of 12)
- Simon Says Stamp “Intense Black” ink pad
- Blending Brushes, large size here, tiny size here
- Spellbinders Platinum 6 Die Cutting/Embossing Machine here or here
- Spellbinders Universal Plate System – here, here or here
- Stamp Positioner: Misti here, here, here or here
- Gel Press 8 x 10 size, 5 x 7 size here
- Brayers
- Distress Oxide Inks (Collections and Bundles available too)
- Blending Brushes, large size here, tiny size here
- Simon Says Stamp Pawsitively Saturated Inks
- Simon Says Stamp Assorted Cardstock (100 lb.), you can also buy it in A2 size for a lot less at Simon here.
- Simon Says Stamp Sentiment Labels Dies
- Accents 100 lb. White Cardstock
- Bearly Art Glue
- White double-sided foam squares
- Glassboard Craft Mat → Use my Code → KIMCARDS20 at checkout
- Craft Reverse Tweezers by EK Tools (great for picking up die cut pieces)
- Paper Trimmer: Tim Holtz here (Ranger), here (Scrapbook.com) or here (AZ)