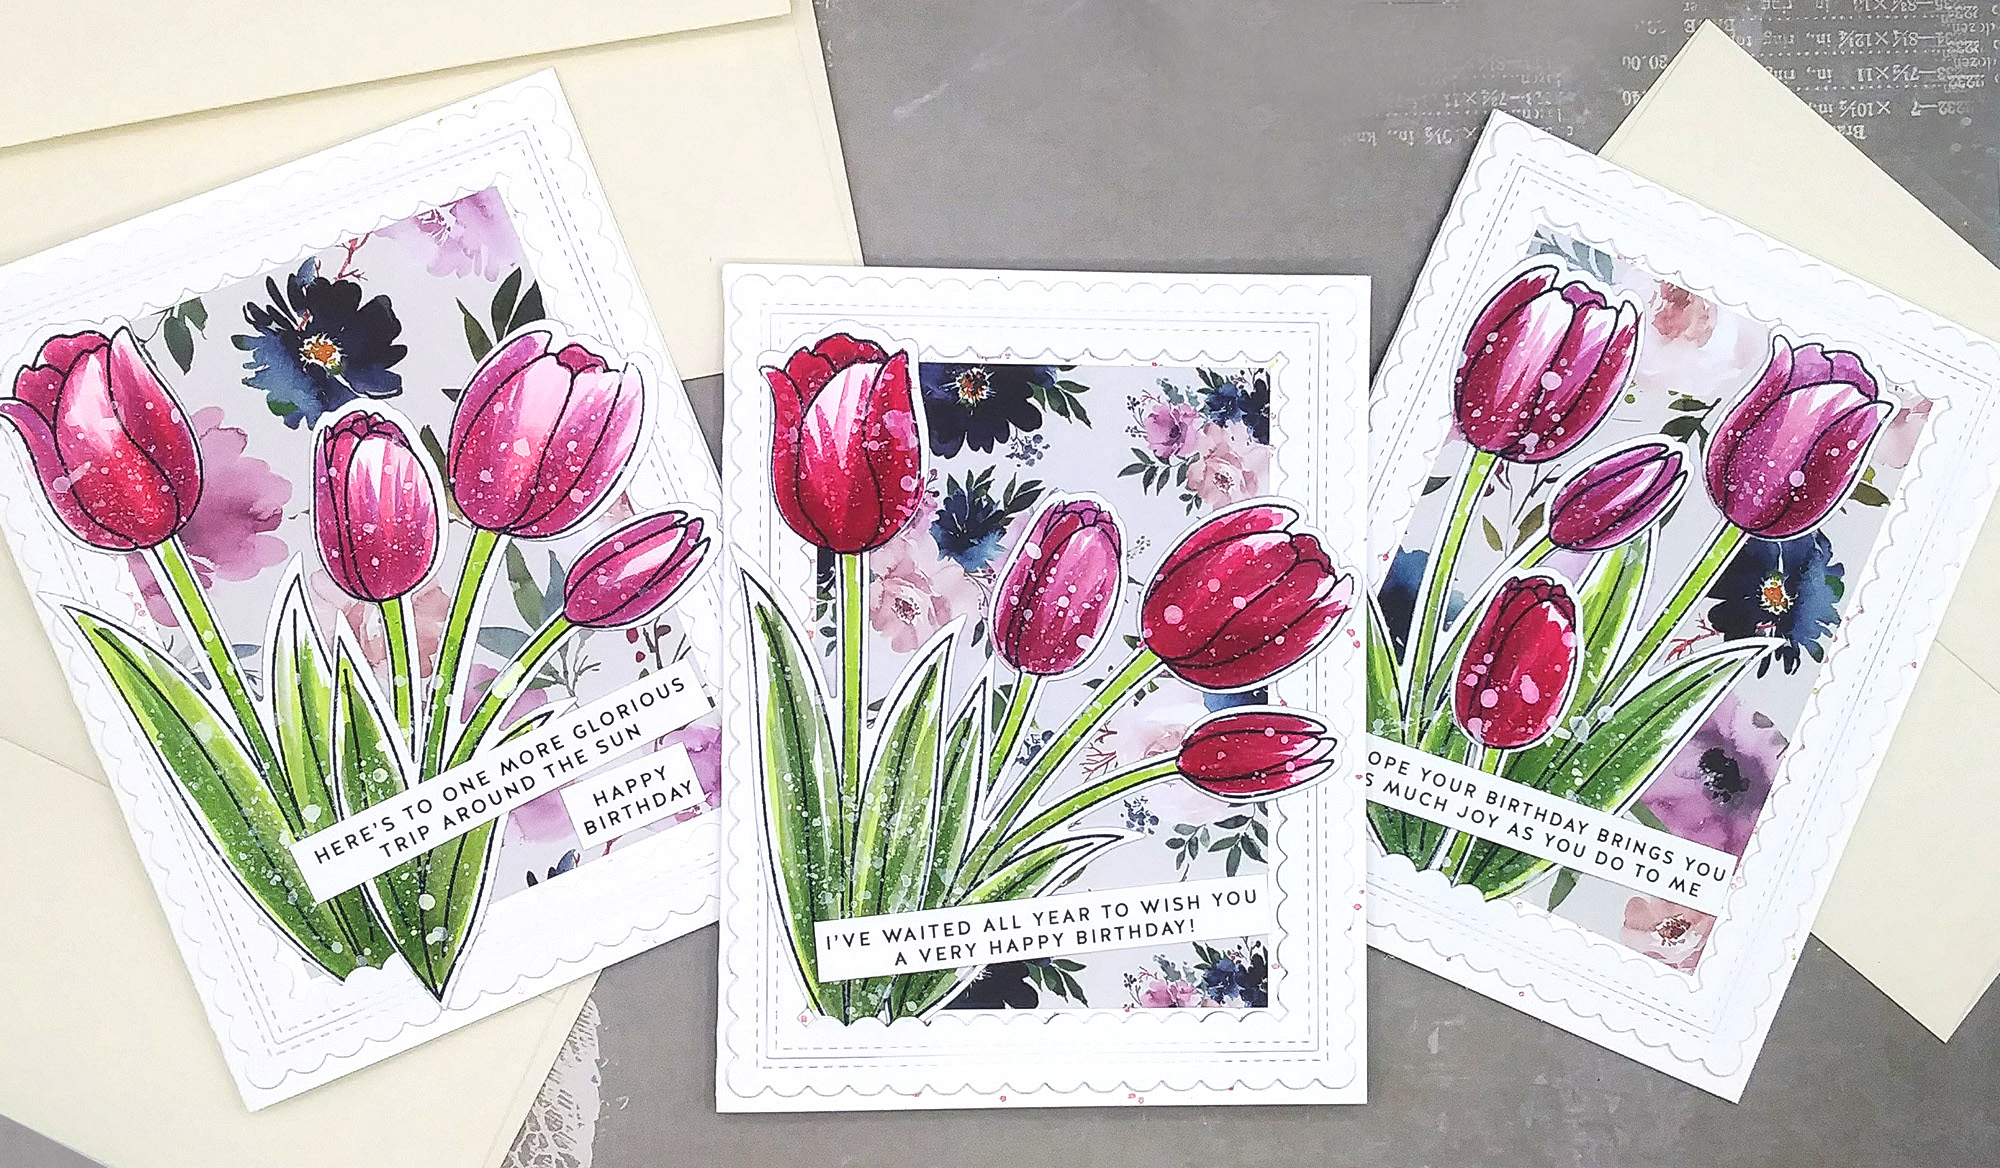
Hey friends! Today, I’m sharing 3 cards I made the other night with my Copic markers. I’m not the best at coloring, but I long to get better which takes a lot of practice. I’ll be sharing my progress with you, so consider this a new blog series and this is the 2nd post! You can check out Part 1 here, those cards are amazing!
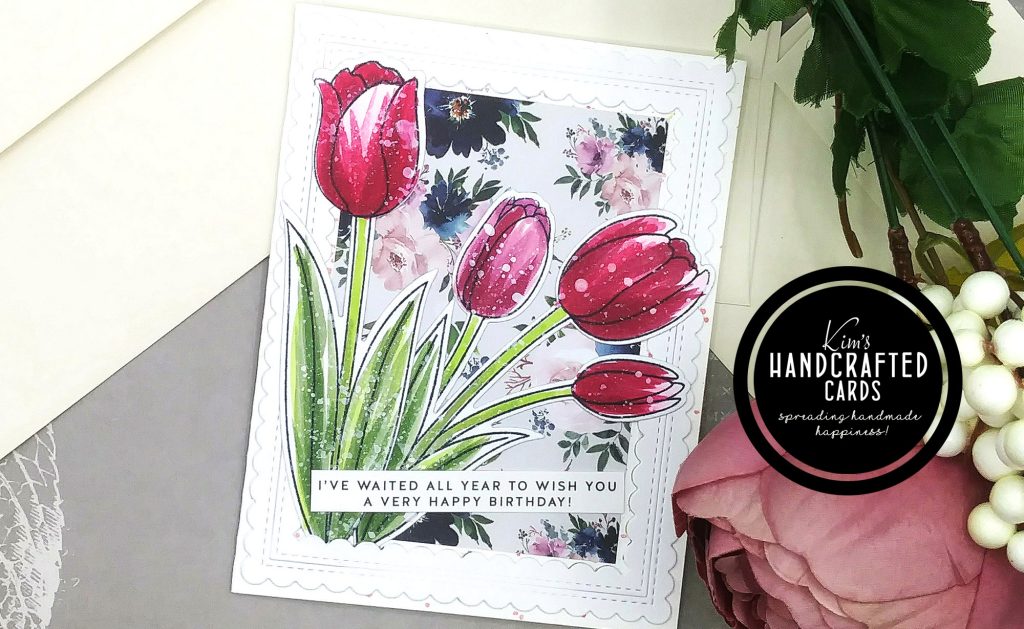
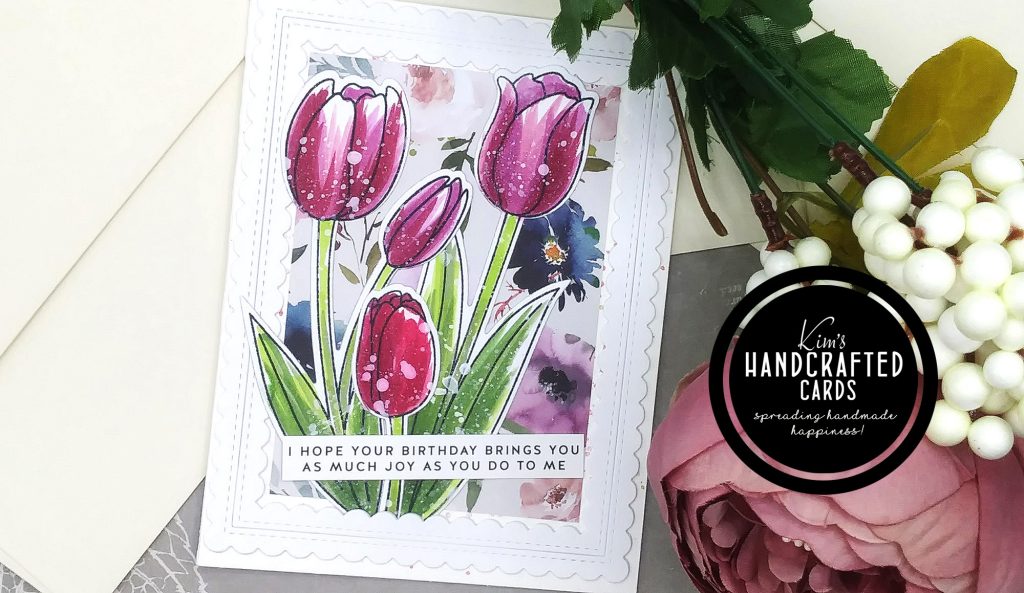
Flowers are my jam so I purchased a new stamp set with the coordinating dies from AZ of beautiful tulips! Three things drew me to this set: (1) how large they are, they fill up an A2 size card panel nicely. It comes with two tulip clusters, a bud and several leaves; (2) couldn’t beat the price point for both a stamp and coordinating die and; (3) they from the same company that I purchased my favorite flower die set from that I used in this post and this post.
I admire cardmakers who are experts at Copic coloring so for the past few months, I’ve been watching more YT video tutorials to understand how these markers work and what style works for me.
I started by stamping the tulips 3 times on white cardstock with Black Tuxedo Memento ink. I wanted extras to color in case I messed up! 😀
At first when coloring the flowers, I wasn’t impressed and thought I failed, but I kept pushing forward.
I used the “flicking” motion to color my tulips and leaves leaving some areas white on purpose. After coloring, I decided to add some ink drops with White Picket Fence Distress Paint, I was generous with the drops too! Then, I set them aside to dry. It wasn’t until I die cut them out that my heart skipped a beat! I fell in love!
The Copic colors I used for my red tulips are:
- R17 (lightest red)
- R24
- RV29
- R35
- R39 (darkest red)
To color my purple tulips, I went with these colors:
- R17
- V05
- RV66
The Copic colors for the leaves are:
- YG17
- G94
I worked one petal at a time and going back and blending more. I wanted the edges to have more emphasis so I concentrated darker shading there.
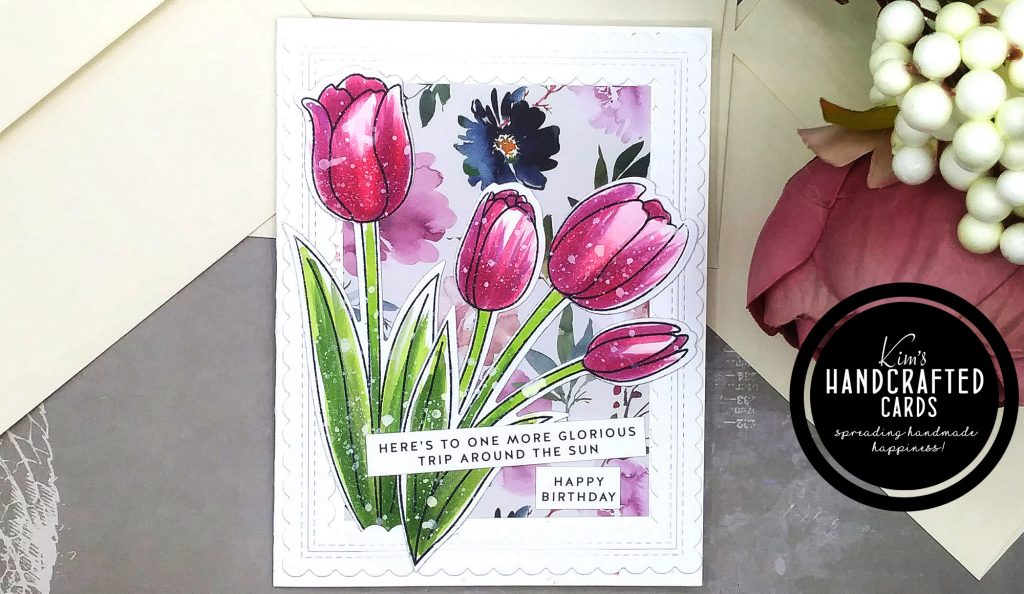
For my backgrounds, I had an idea at first (you can read that below), but changed my mind. I thought having some flowers in the background to offset the tulips would make them pop more. I again reached for Paper Boutique’s Damask Paper collection that I’ve used in my previous card project. I love this pack so trimmed down a couple of them to 3-3/4″ x 4-3/4″ and adhered them to my card bases.
I chose Pinkfresh Studio’s scalloped die set for my frames and die cut them on white cardstock. It gave my cards a little dimension but didn’t make them bulky.
I added ink drops to my card bases with Kuretake Gansai Tambi gold paint. At first, I was going to lay my flowers over that, but changed my mind and opted to use the flower pattern papers. But, you can see some of the ink drops showing around the scallop frame.
When all the flowers were completely dried, I played around with placement. I mixed up the flower clusters for each card so some have more red, some more purple and I think it really makes a striking design.
After putting all 3 cards together, I really LOVED how they turned out. I’m so glad I kept pushing through. Sometimes, during the process the design might look like a disaster, but by continuing, it gets much better.
The sentiment strips are from Simon Says Stamp. I decided to position them at an angle for added interest. This project gave me so much confidence, can’t wait to share my next coloring project!

- OOTSR Tulips Stamps and Die Set
- Copic Sketch Markers here, here or here
- Copic #0 Colorless Blender here or here
- Misti Stamp Positioner here, here, here or here
- Memento “Tuxedo Black” Ink
- Paper Boutique Damask Delights Collection – 8 x 8 Paper Kit
- Pinkfresh Studio “Scallop” Frame Die Set
- Simon Says Stamp “Birthdays, Send Happiness” sentiment strips
- Distress “Picket Fence” paint
- Ngwall Round Paintbrushes (set of 12)
- Kuretake Gansai Tambi Set of 6 colors paint
- Accents 100 lb. White Cardstock