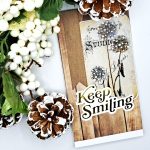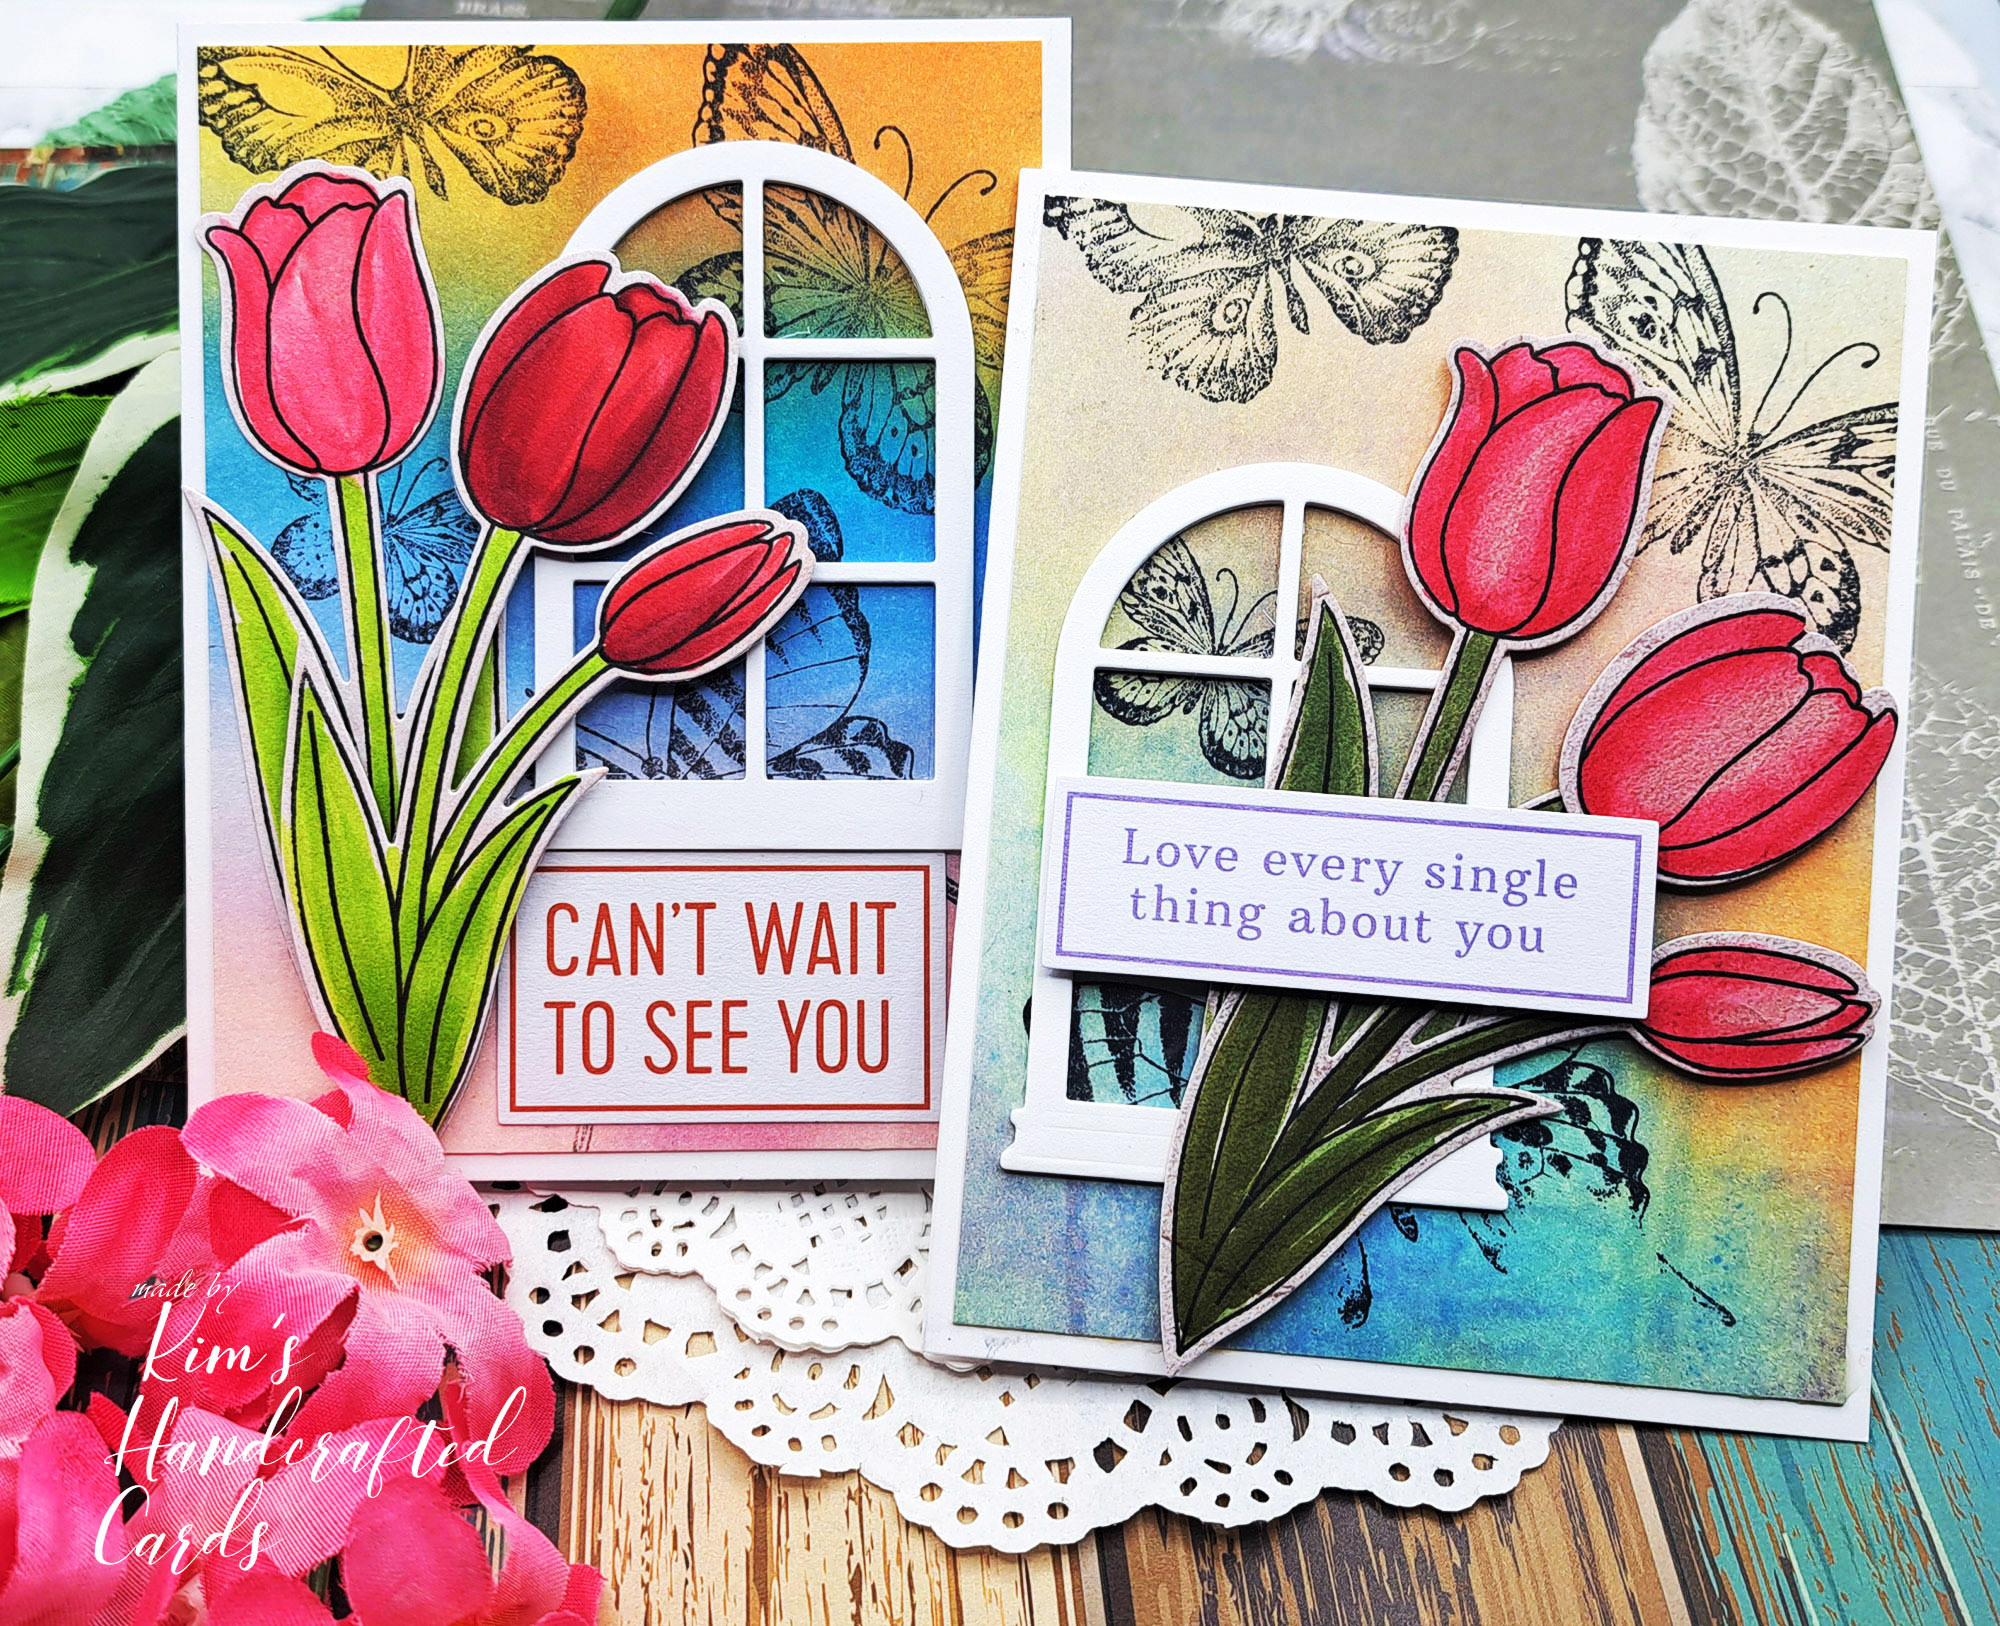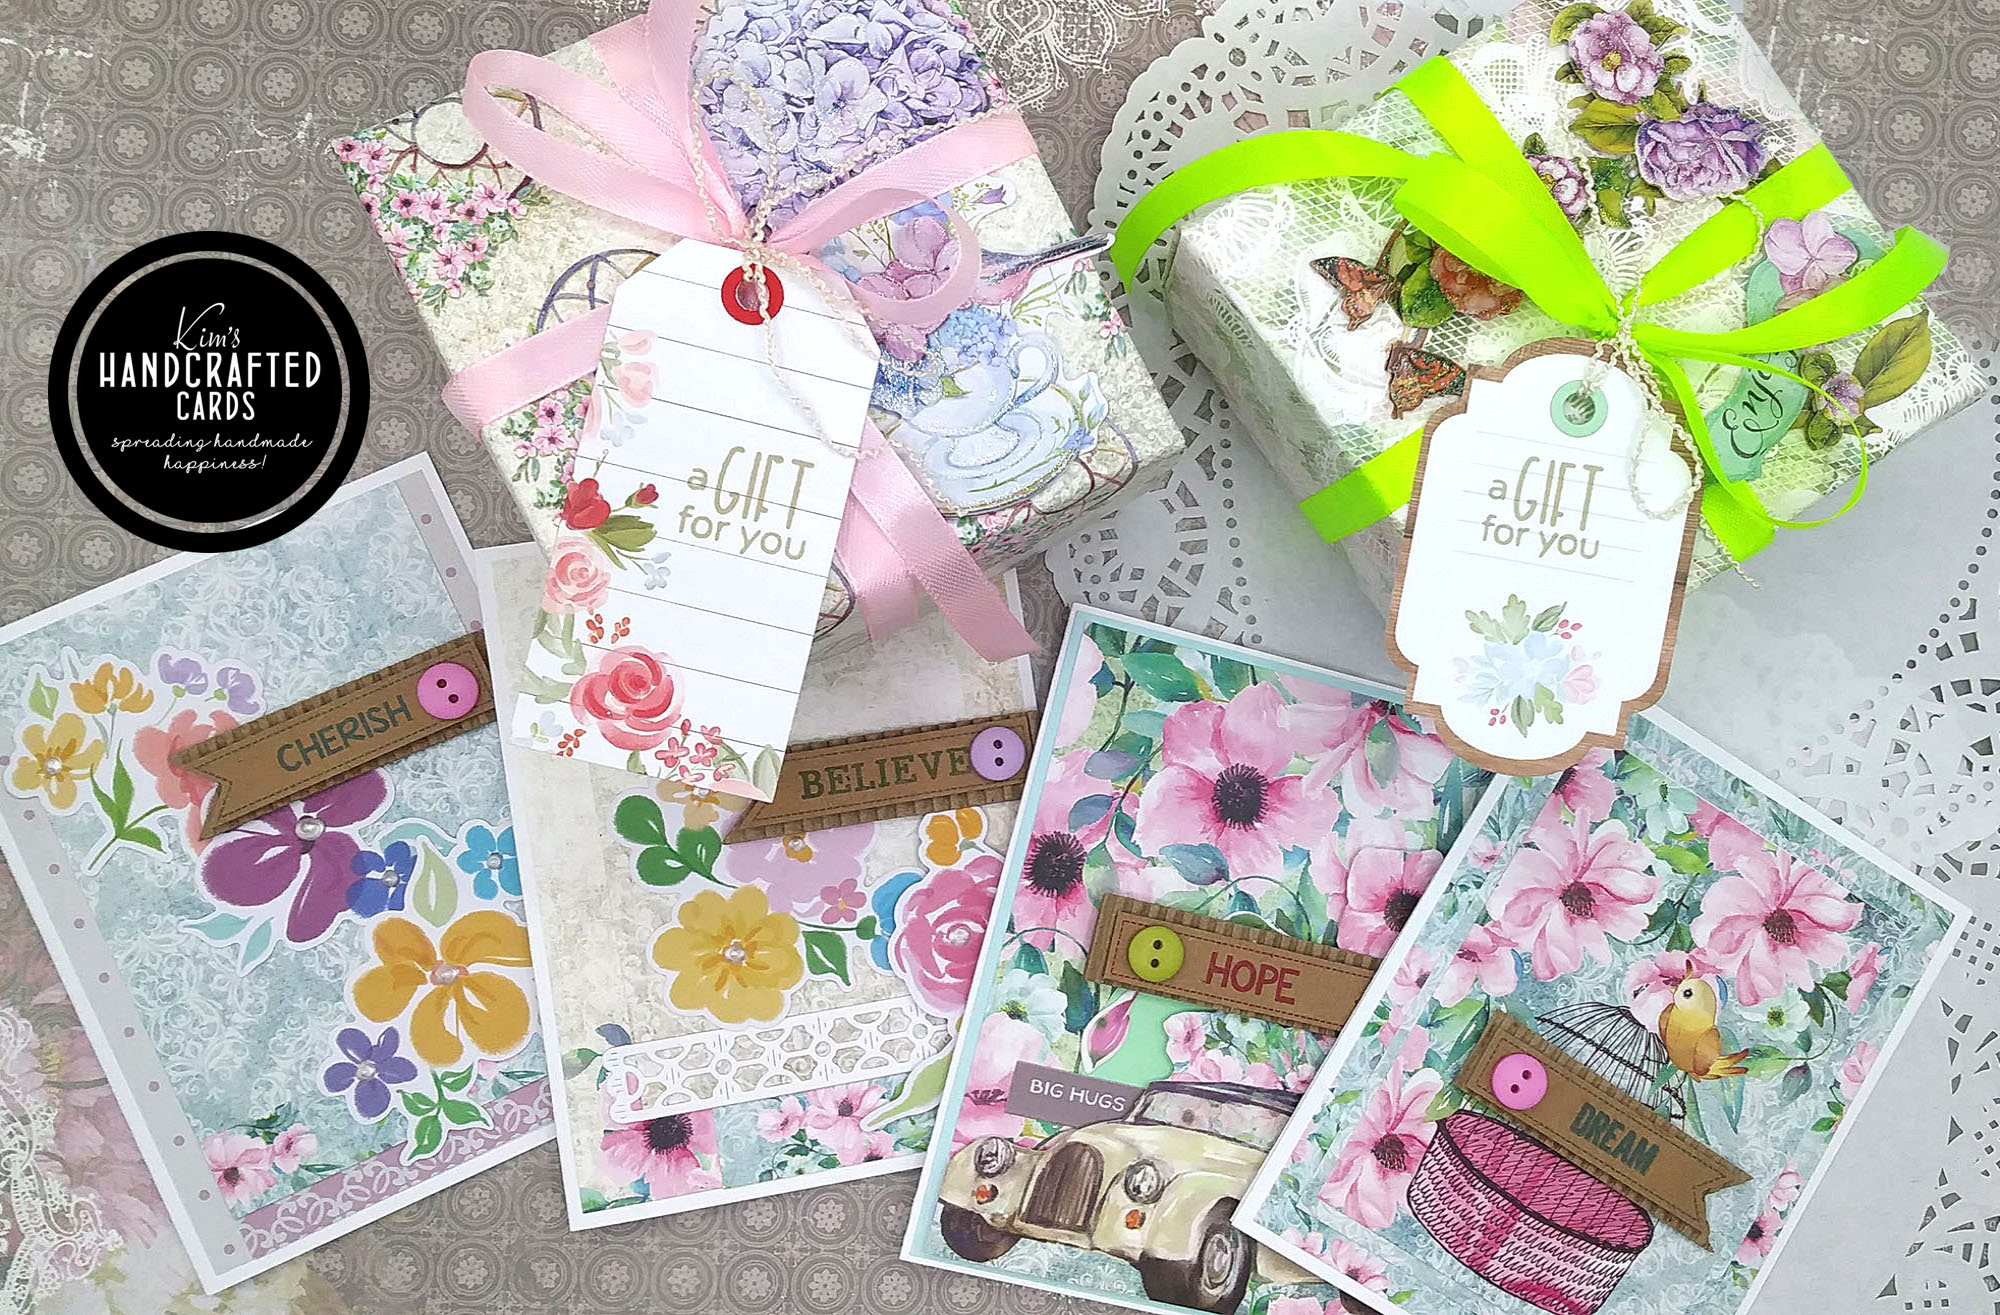
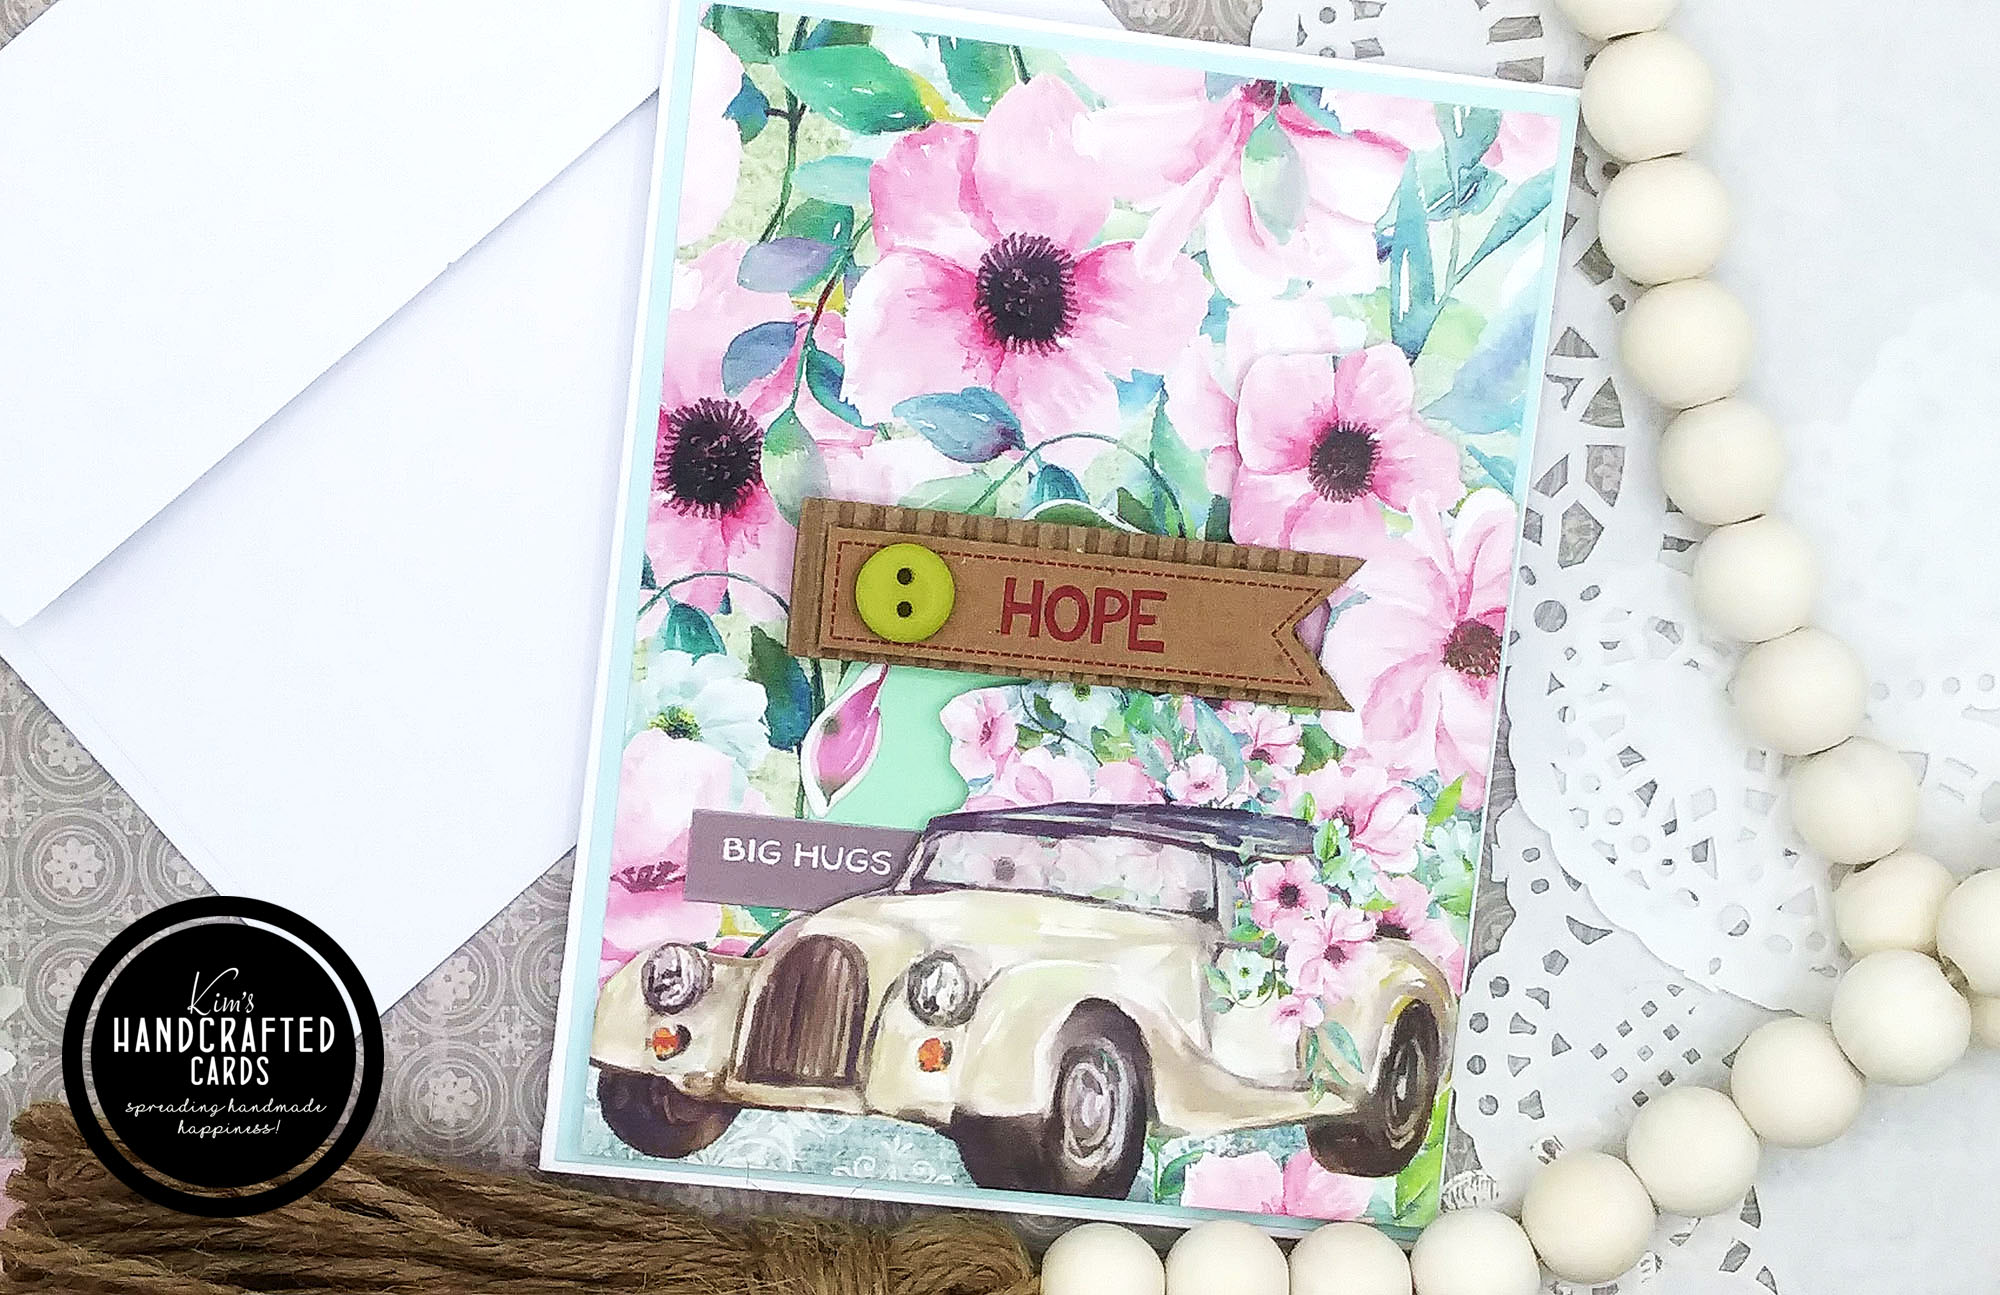
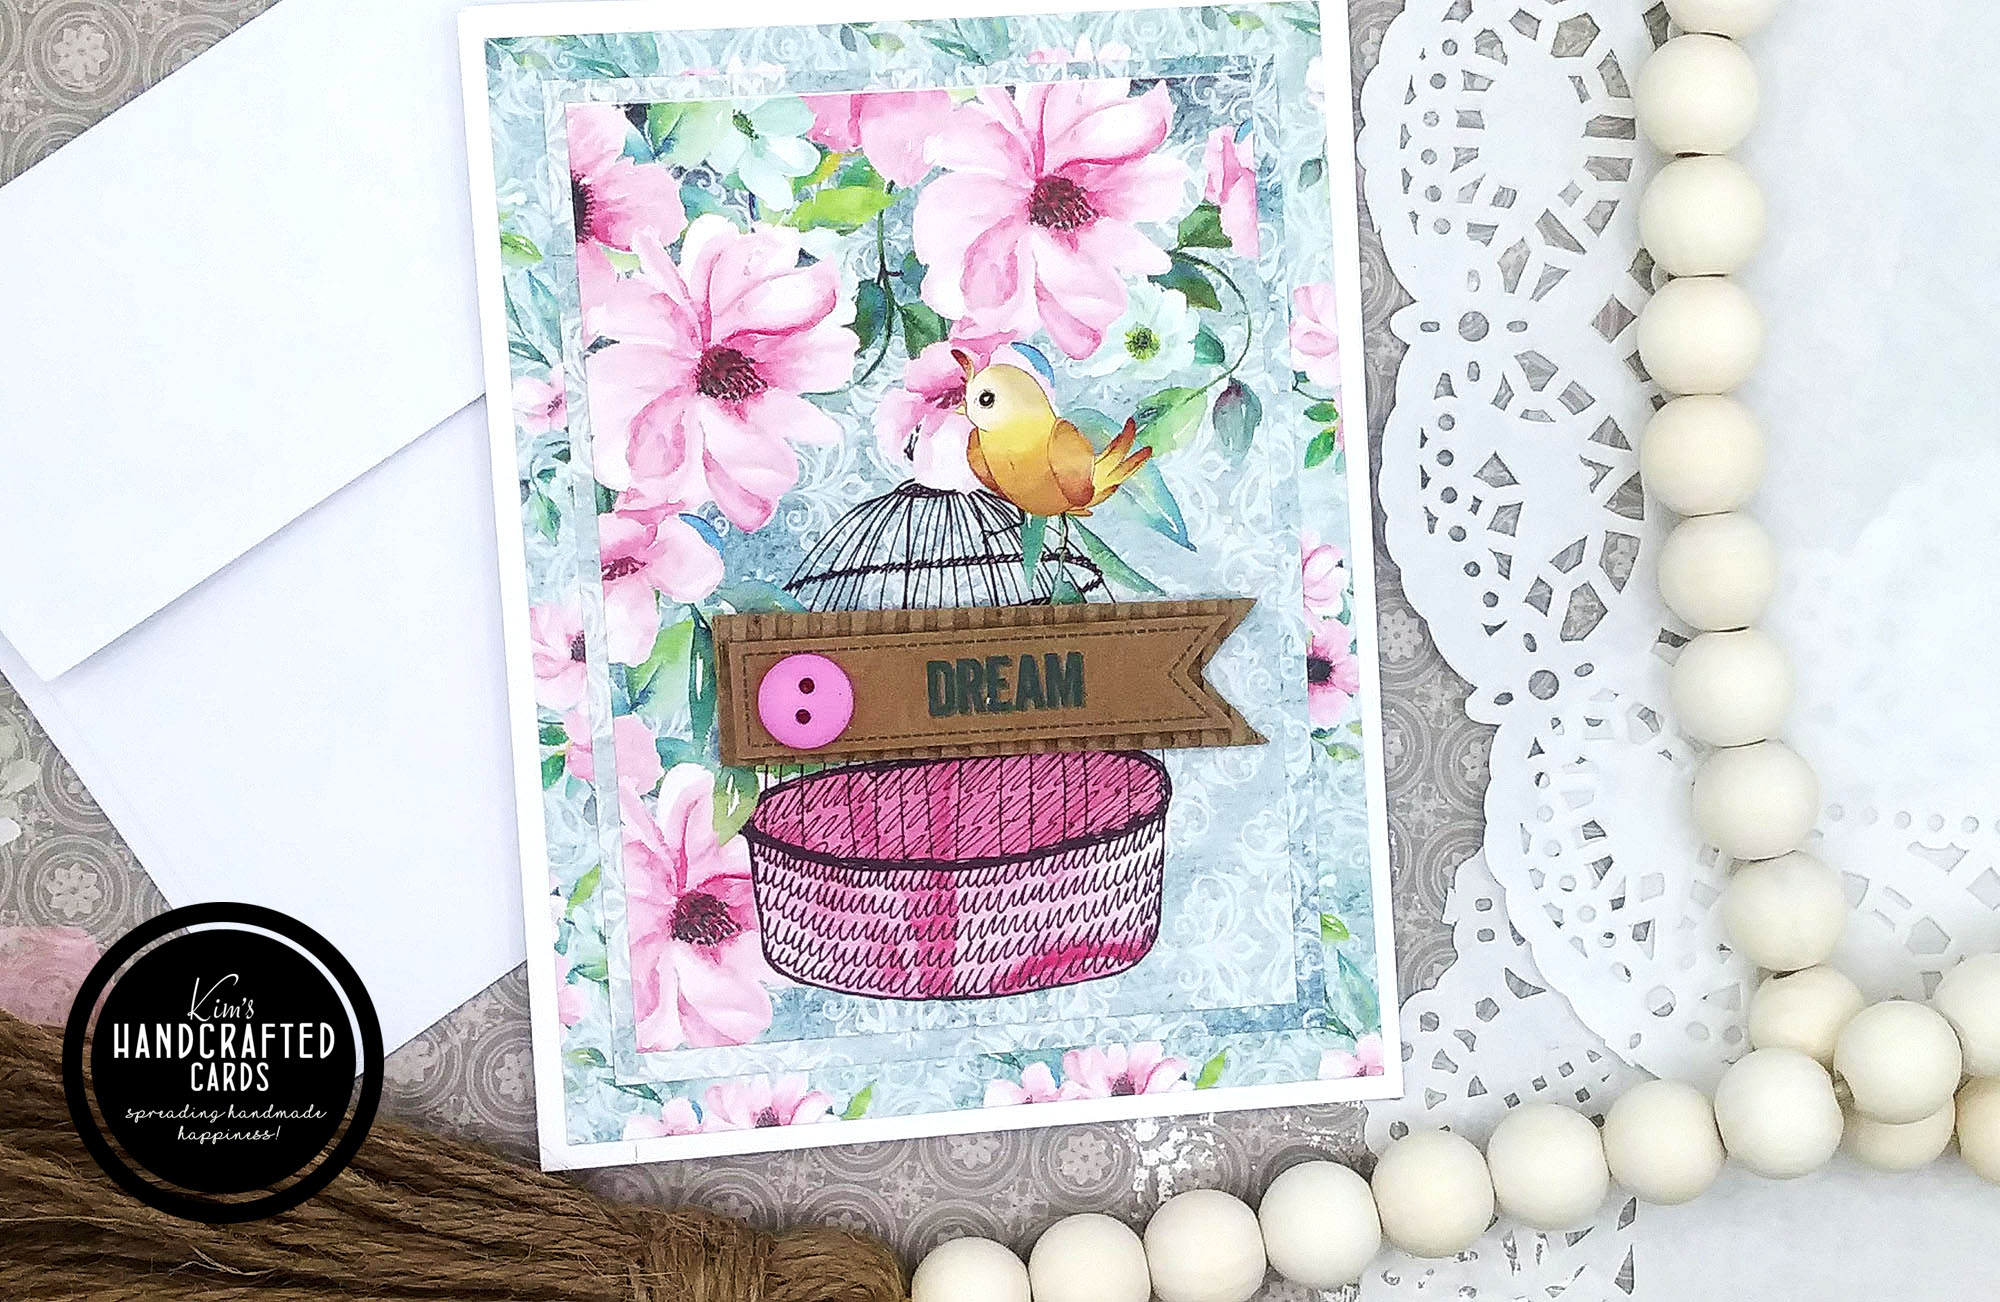
Normally when I design a card, the sentiment on the front is the main element that I’m thinking about. So, I rarely make just plain notecards without one. But today, I’m breaking with tradition by sharing 4 cards I made yesterday using pattern papers, Dollar Tree banner stickers, pre-cut flower images and other embellishments for my card designs but no sentiments. Sometimes, it’s just nice to have a card available to use for any occasion and just write a personal message inside 🙂
If you read my previous post, “Friendship Cards with Dress my Craft Magnolias Paper Pack“, you know how much I love this pattern paper pack. It’s 12″ x 12″ and very heavyweight (240 GSM) so it makes perfect card panels and even cardbases. I picked out several designs and trimmed them down so that my cards would have some dimension and extra interest to the overall design. I just played around with all my trimming, some layers are 4″ x 5-1/4″, 3-1/2″ x 4-3/4″ and some 3-3/4″ x 5”.
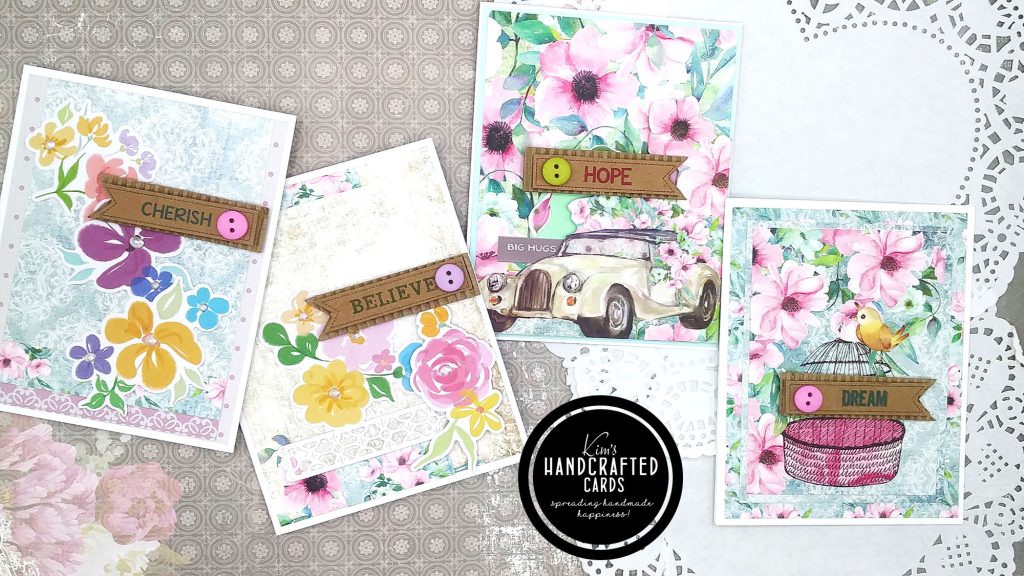
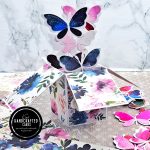
All my cards feature these really cool banner words that I got from Dollar Tree. I still have more leftover too! On the “Believe” card, I added some lacy detail from the Spellbinders May 2021 SDOM called, “Arched A2 & Slimline Card Creator – Small Die of the Month“. (It’s still available for purchase as of this post.) The flowers on this and the “Cherish” card are pre-cut dies from Pinkfresh Studio. I also did some fussy cutting on the car on the “Hope” card.
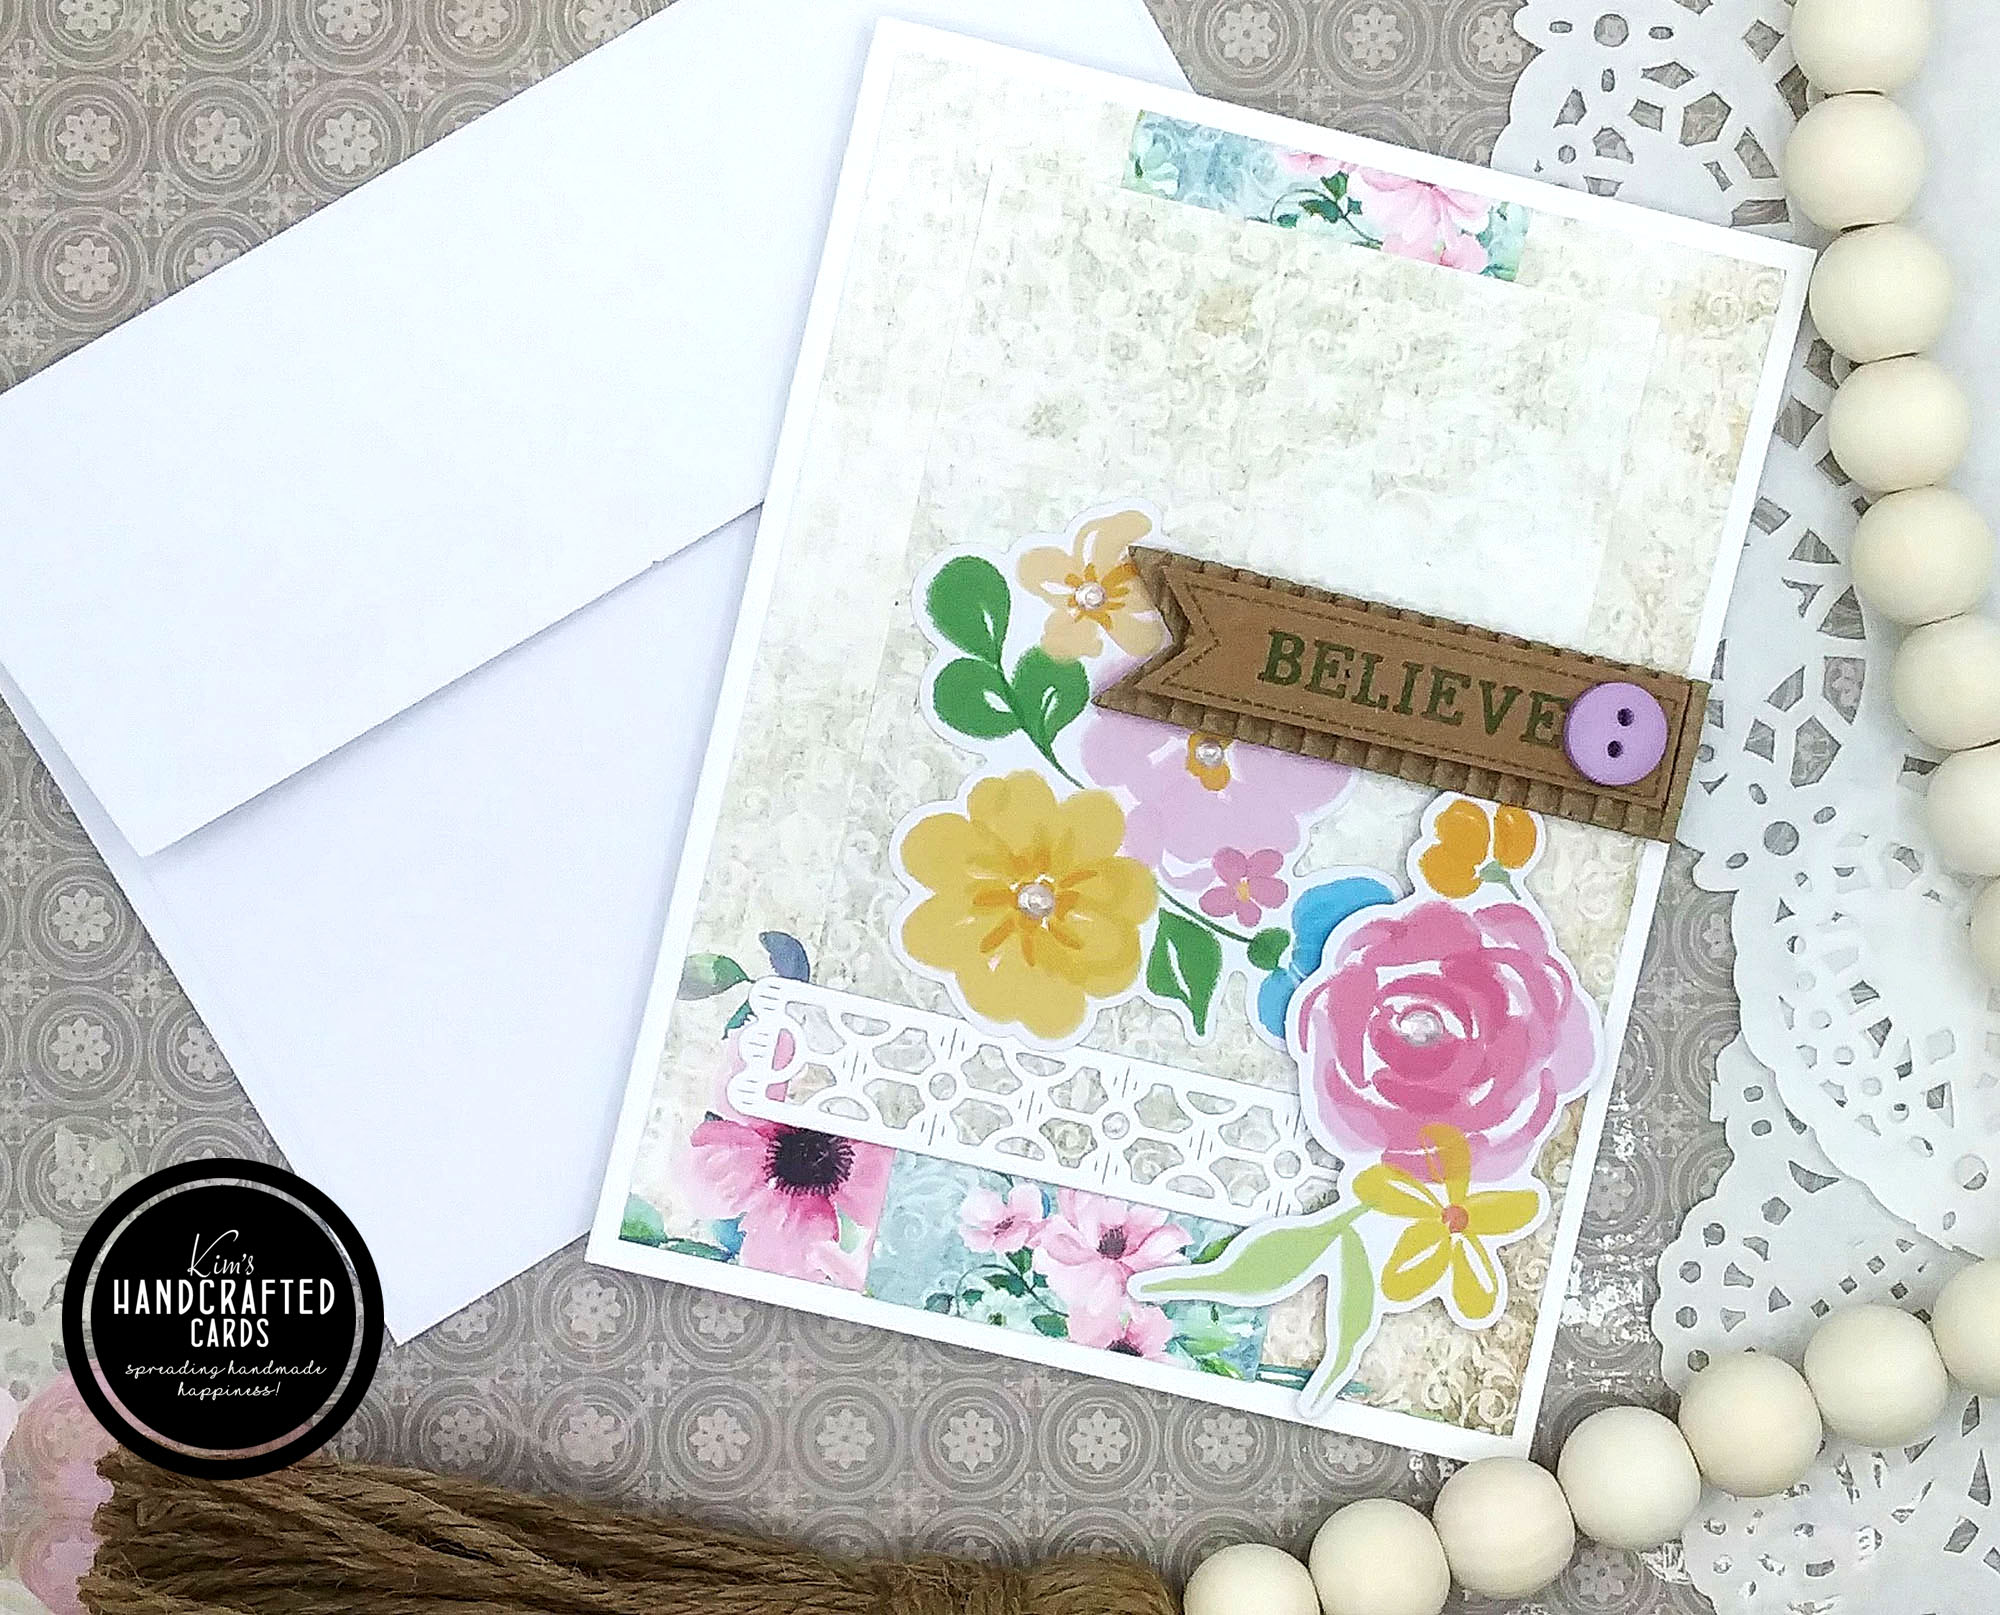
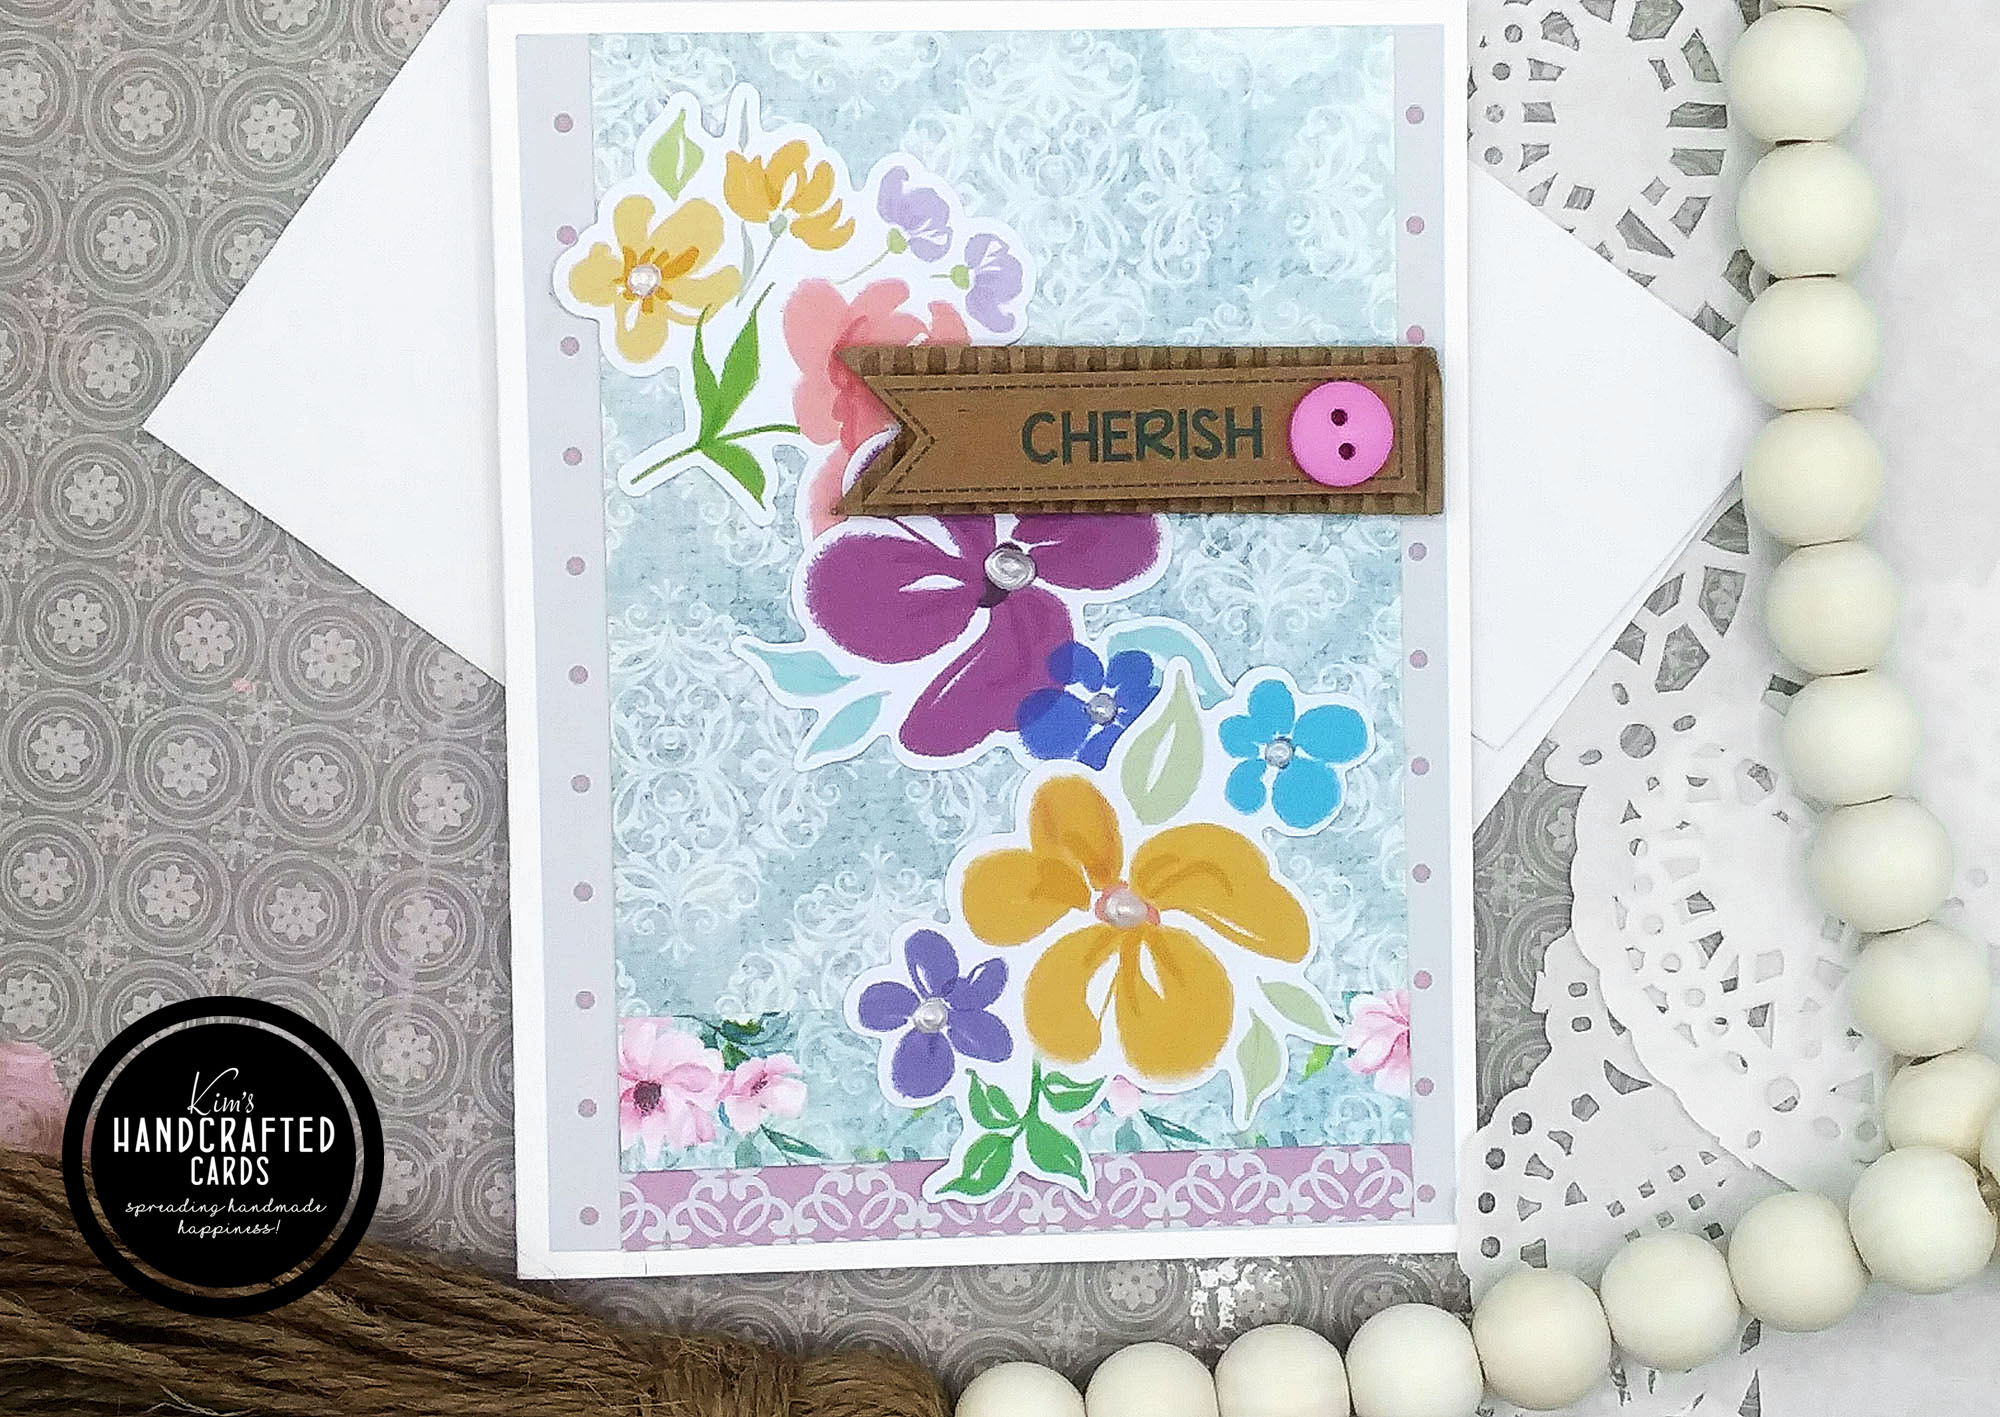
For my final embellishing on 2 of my cards (“Believe” and “Cherish”), I added Liquid Pearls, “White Opal” to the centers of the flowers.
Love these 4 cards! Plus…
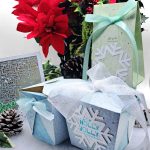
💗 I MADE GIFT BOXES TOO! 💗
I was so excited to watch Kristina Werner’s YT video on the Simon Says Stamp channel where she used the pattern paper pack from their February 2022 card kit to make gift boxes!! I had to try it! 😀 And, they’re so, so easy to make!
Kristina made her boxes from 6″ x 6″ pattern papers and they are cute for small gifts, especially for Valentine’s Day. I wanted to challenge myself to make larger size boxes so I followed her technique using 4 sheets from the same 12″ x 12″ paper pack I used for my cards. My 2 gift boxes measures about 4-1/2″ x 4-1/2″ which is a really nice size!
If you want to make gift boxes this size, you’ll definitely need a large trimmer that can trim 12″ x 12″ papers. I borrowed my hubby’s LOL!

Notes for Making the Liner for Larger Size Boxes
I added the liner on the inside of my boxes too so that, like Kristina mentioned in her video, the top of the box will not close all the way down hiding the pattern design on the bottom of the boxes. But, because I was making a larger size box, my measurements for my liners varied from Kristina’s.
- My liners were trimmed with blue and green cardstock to match the design of each box (sorry didn’t take a picture of that), but be sure to watch the video or visit Simon’s blog post to get a look at Kristina’s photos.
- The inside of my boxes measured 4″ so that’s where I scored my paper to make the liners fit around the corners. Also note, I trimmed my liners to 2-1/2″ wide x 11″ long and I had to use 2 strips to get the liner around the entire inside of my boxes.
- Before I permanently adhered my liners, I folded and placed them in my boxes to ensure they would fit inside perfectly. I glued (using Bearly Art Glue) my two strips together (forming a perfect square) and after that, used double sided tape placing a piece at the bottom on all 4 corners. Then, I put the liners inside pressing against the boxes to ensure the liners would be stuck inside and not move.
- I kept checking to ensure the top of the boxes were closing and that the liner was preventing the top from closing all the way down (you can see how they look below in the 2 pictures below).
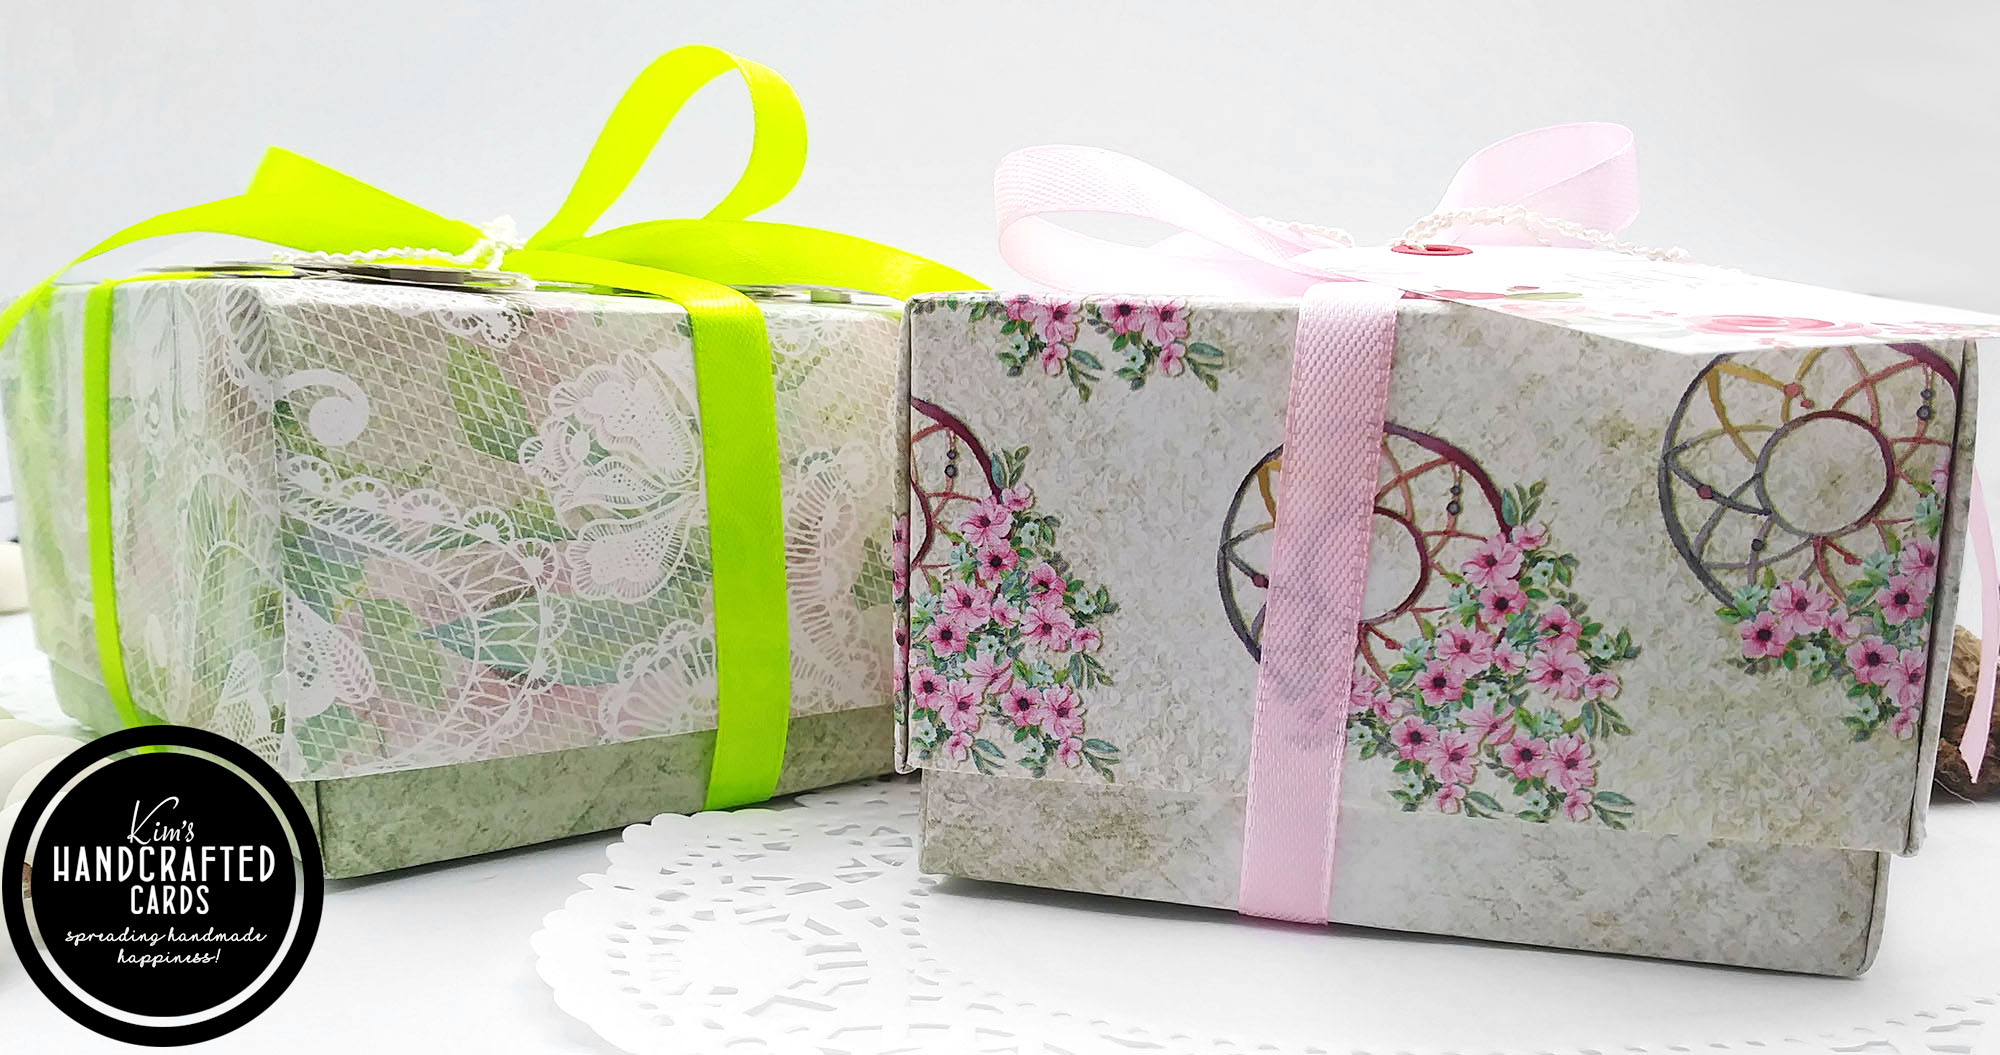
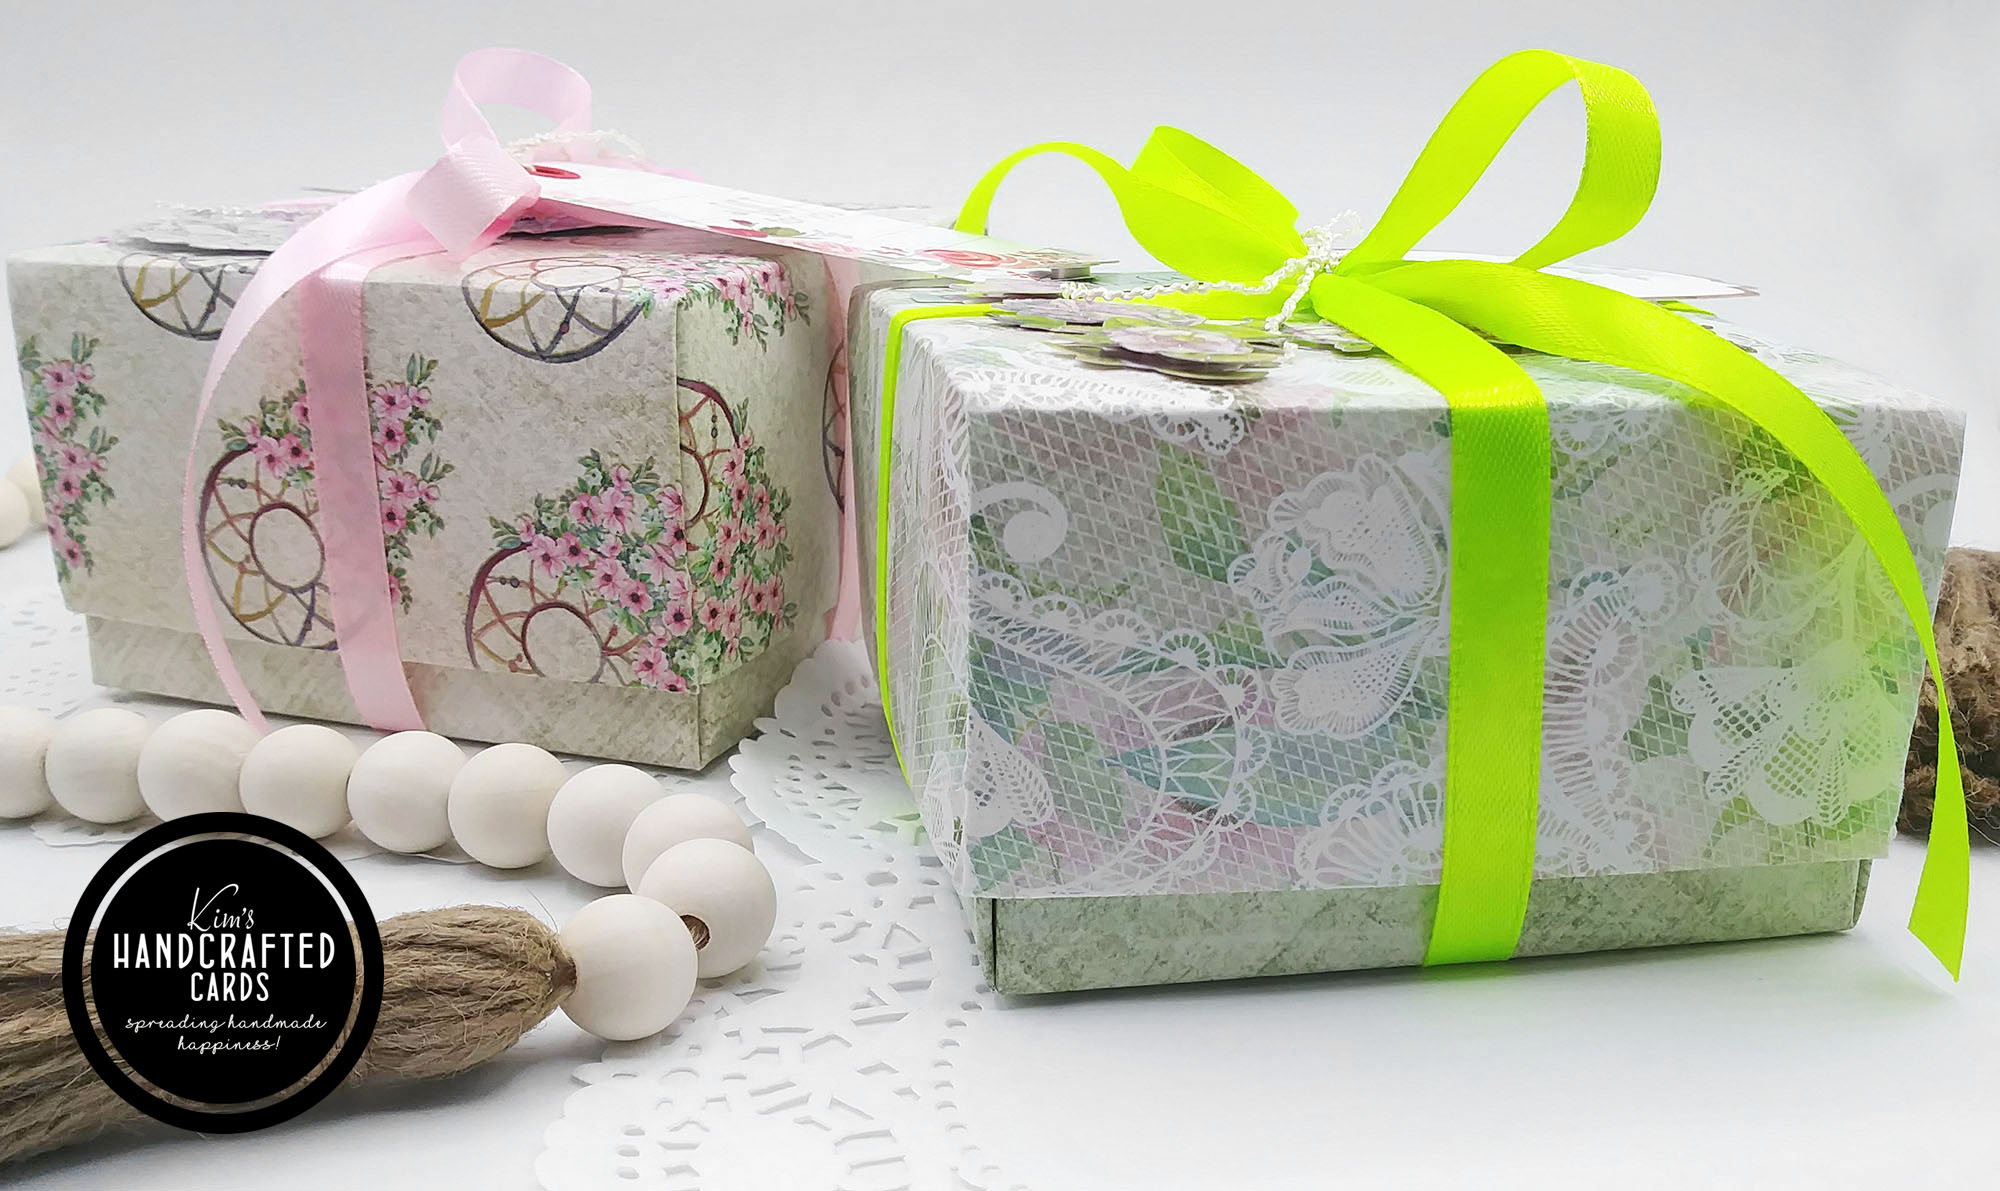
To decorate my boxes, I topped them with some vintage flower 3D stickers from Dollar Tree and tied ribbon from my stash to make the bows, lastly I made the tags.
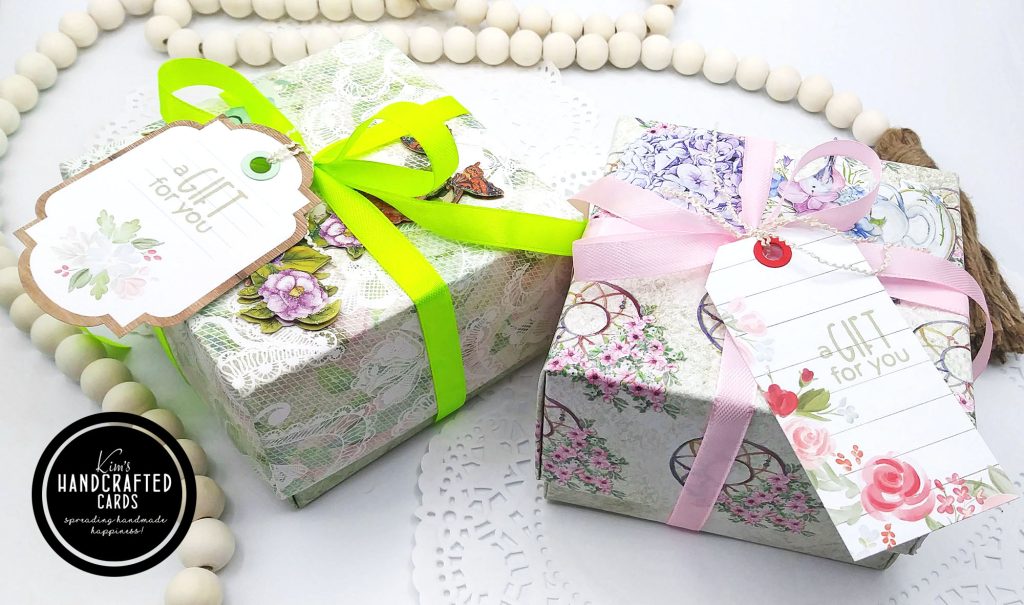
The tags come from Carta Bella Paper’s “Frames & Tags” pack that I picked up on AZ.
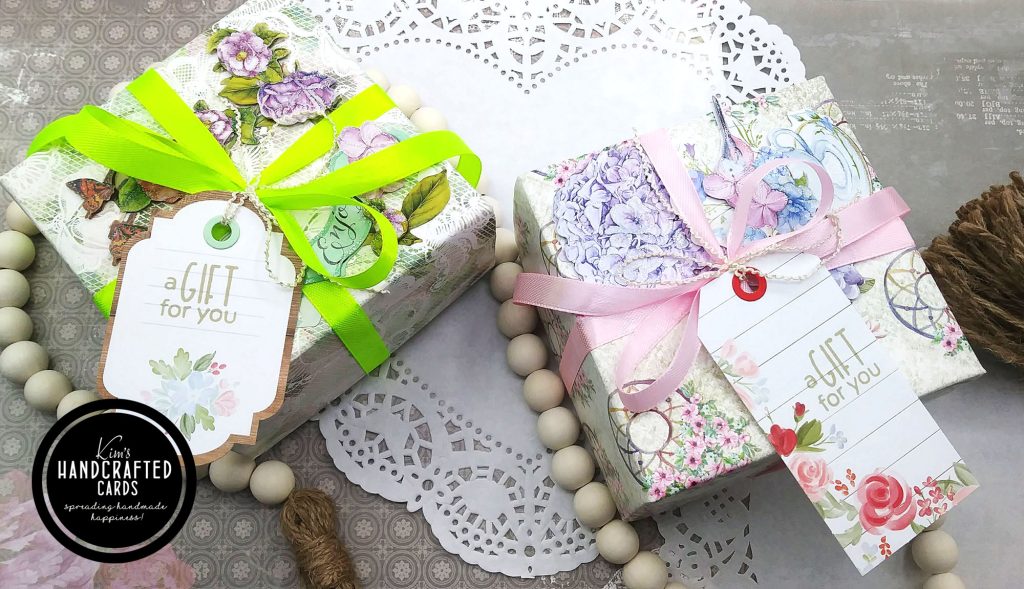
I stamped the sentiment on the tags from Studio Katia’s Winter Gift Tag Greetings stamp set, tied it on the tag and ribbon. Also, for an extra touch, I used Waffle Flower Craft’s “nested tag” die set for the top of the whole punch to reinforce it + to add a little color, I used “Schoolhouse Red” from Simon and Green cardstock from Cardstock Warehouse‘s “Pretty in Pastels” cardstock.
I ABSOLUTELY was blown away with how pretty my boxes turned out! I do have a couple of tips if you want to make these:
- If you have sore shoulders like me, try not to use really heavyweight cardstock. After doing the folding, my arms were hurting bad. I took a bunch of breaks! I think 80 lb. pattern paper would work fine and still be sturdy enough for adding gifts.
- The liner insert is optional. But I do love it, because I can see the bottom of my box’s design but again if you don’t want to make it, that’s fine. The top will just cover the entire box.
I plan to make these gift boxes all year long and especially for Christmas!

- Dress my Craft Magnolias 12 x 12 Paper Pad
- Carta Bella Paper “Frames and Tags” paper pack
- Studio Katia Gift Tag Winter Greetings stamp set
- Assorted Ribbons
- Simon Says Stamp Khaki Ink pad
- Waffle Flower Crafts Nested Tags Die Set
- Cardstock Warehouse “Pretty in Pastels” Cardstock
- Simon Says Stamp “Schoolhouse Red” cardstock
- Spellbinders Arched A2 & Slimline Card Creator – Small Die of the Month
- Pinkfresh Studio “Keeping it Real” Floral Ephemera Pack
- Scor-Buddy Scoreboard
- Bearly Art Glue
- Ranger Liquid Pearls, “White Opal”