Last night, I was on YT (no surprise right?!) watching Nichol Sphor’s video on using Simon Says Stamp’s new Gift Tag Kit. She made shaker tags and I’ve seen her make many but for some reason this video prompted me to try it. SSS’s Limited Edition Holiday Tag Kit was just released and since of course I don’t have it, I looked through my own stash. And, no surprise I used Simple Stories Vintage Rustic Christmas collection! You know how much I’ve been loving this release, I’ve already made several cards with it. You can read those posts here, here and here.
I’ve made a LOT of shaker cards, they’re my favorite interactive cards to make, but interestingly enough I have never made shaker tags/ornaments! Go figure! Nichol made circular tags and I thought that was brilliant so here’s a short list of the supplies I used to make mine:
- Waffle Flower Crafts Additional Circles Nested Dies
- Simple Stories Vintage Rustic Bits & Pieces
- Simple Stories Vintage Rustic Paper Pack
- Nuvo confetti & sequins
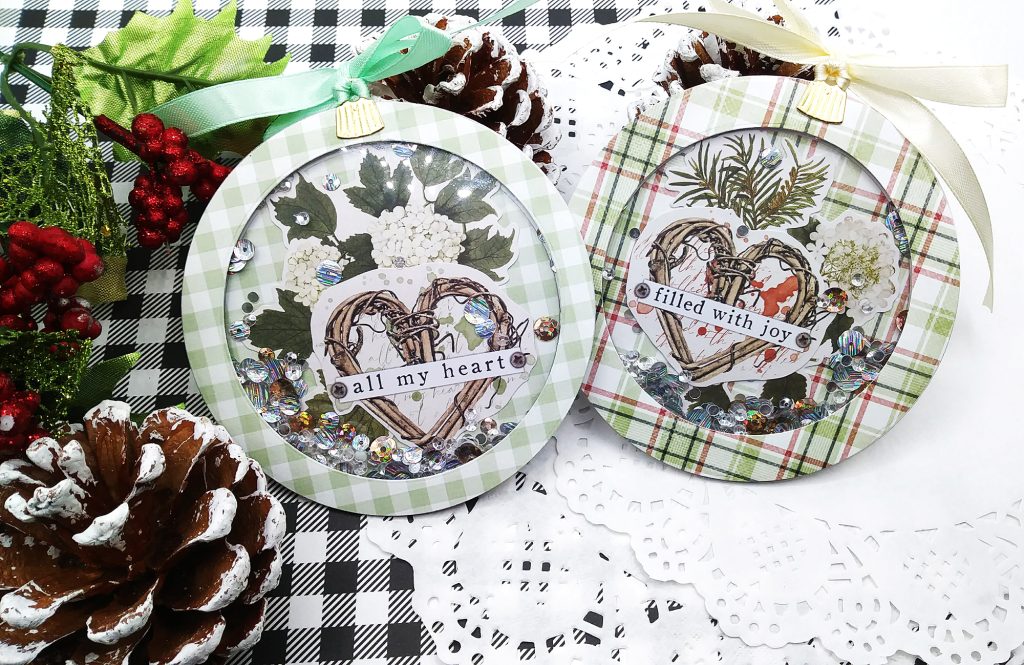
I LOVE making things for Christmas, it is my favorite holiday to make cards and crafts for! These tags/ornaments were so so fun to make!
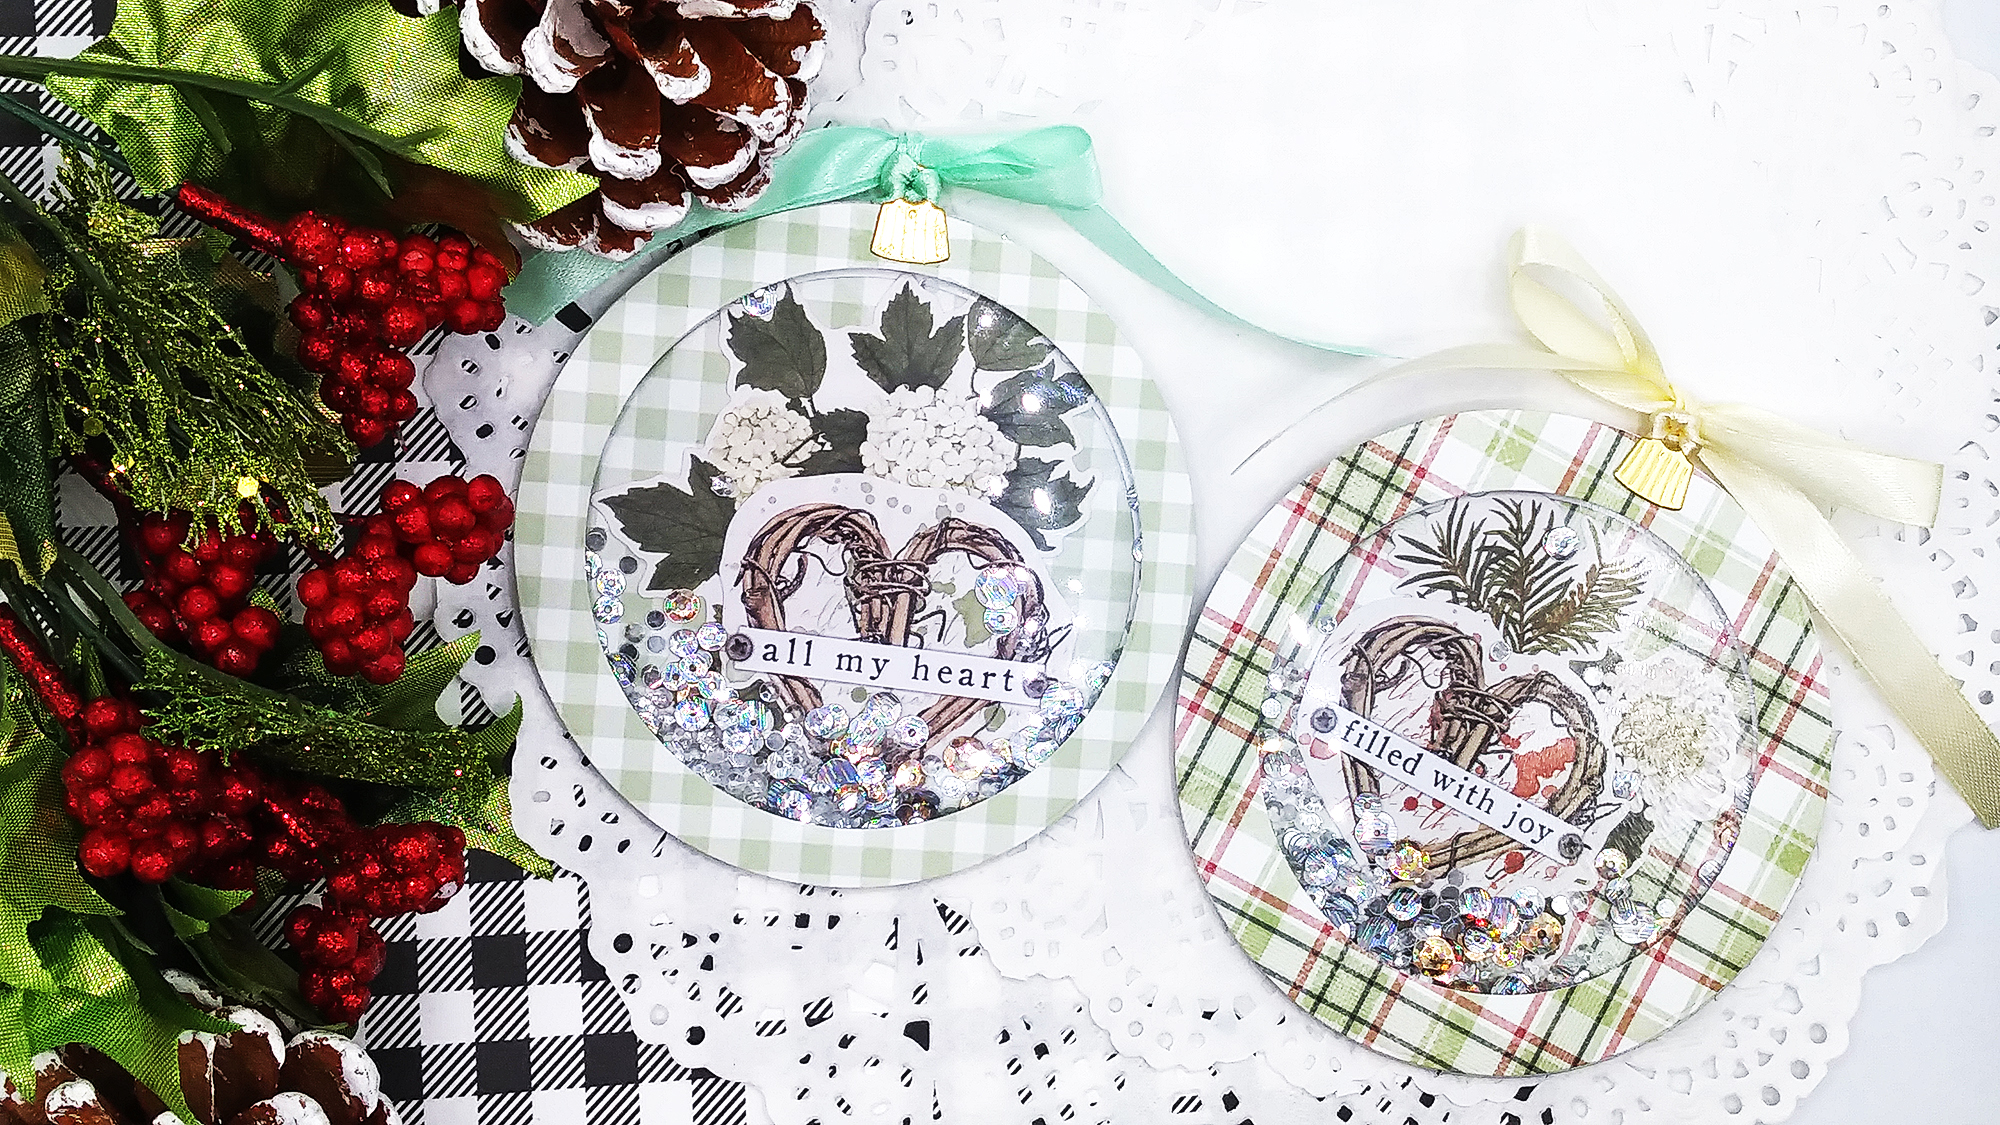
I used a couple of the check patterns for my backgrounds and with the largest circle die, I die cut those out and I also make backers by die cutting a couple from heavyweight white cardstock. This gave my tags/ornaments some strength.
For the centers which is also the back of the tag, I decorated it with some of the Simple Stories pre-cut images that also had the sentiments. Meanwhile, I had to deal with the front of the tag.
I die cut some acetate with that largest circle die again. I added liquid glue to the negative space left from the 1st die cut I made with the pattern paper and placed my acetate on top. On the back of the acetate, I put double sided foam tape from Darice to make my shaker well. I love how thin these strips are and after removing the white strip to reveal the sticky part, they were easy to stretch around my circles. I placed this piece aside.
On the backside of the tag/ornament, I topped it with my shaker goodies (tiny white gems, Nuvo silver rain and pure sheen sequins and Nuvo ice white circles confetti). Then, I carefully lined up the front with the foam tape as best I could to keep the pattern seamless from the center to the front.
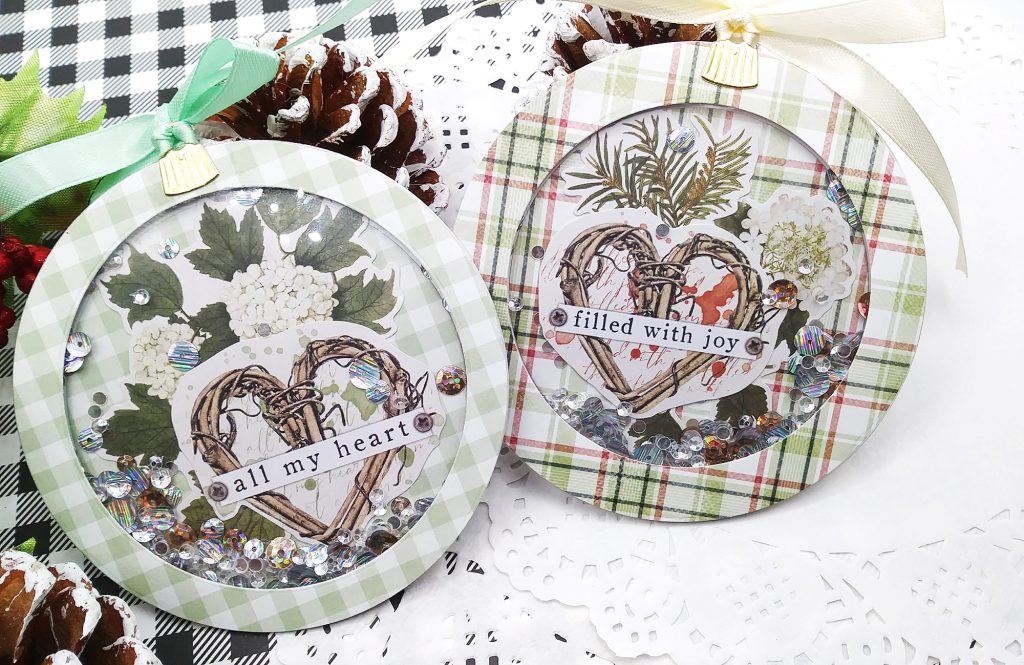
See how the pattern is lining up on the front to the center of these tags? It may be a little off, but not much 🙂 I’m pretty happy cause I don’t always have a steady hand.
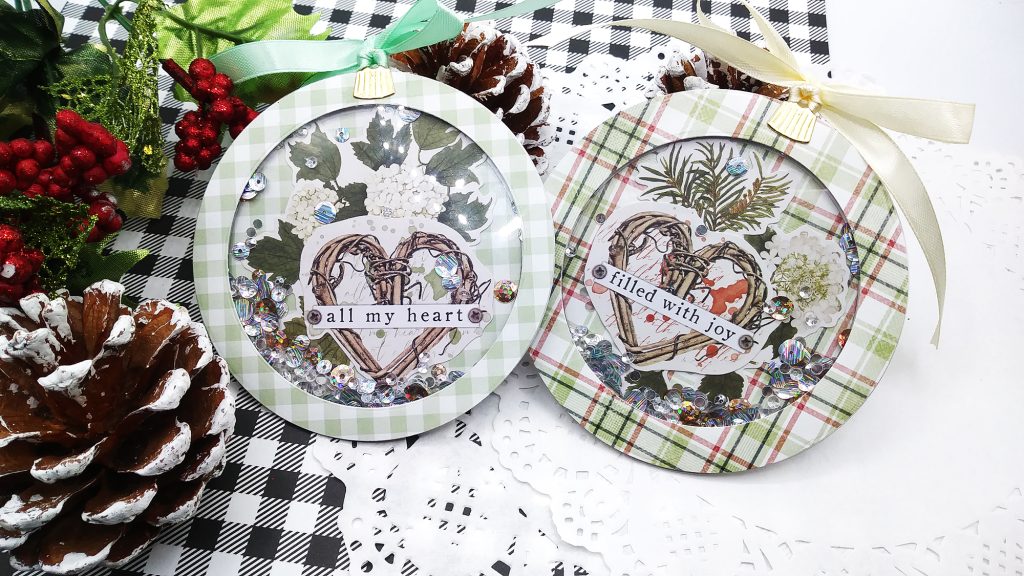
Next was to make a topper so that I could add ribbon. This way, these can be a gift tag or an ornament to hang up or as a keepsake. I didn’t want to hole punch through my tags so, for this part, I used the toppers from the Spellbinders Christmas Wishes Dies set. I die cut 4 of these, 2 for each tag out of gold metallic paper from my stash.
Lastly, I added my ribbon and that was it! My shaker tags/ornaments were born! I have GOT to make more!
I forgot to mention that I stamped “Merry Christmas” and “To/From” from Waffle Flower Crafts “Classic Holiday Sentiments” on the back of both tags with Simon Says Stamp’s “Khaki” ink. I completely forgot to take pics of the back too, Apologies! I did the stamping on the back right after die cutting the circles on the white cardstock.

- Simple Stories Vintage Rustic Christmas 6 x 8 Paper Pad
- Simple Stories Vintage Rustic Woodland Bits
- Simple Stories Vintage Rustic Bits & Pieces
- Waffle Flower Crafts Additional Circles Nested Dies
- Heat Resistant Acetate Sheets
- Spellbinders Christmas Wishes – from the November 2019 card kit (no longer available) – these topper dies are close enough here or here
- Darice Foam Strips
- Nuvo “Mirrorball” Confetti (part of a set of 4 “Nuvo Pure Sheen Confetti”)
- Nuvo Sequins Pack
- Assorted Ribbons
- Simon Says Stamp Khaki Ink pad
- Waffle flower Crafts “Classic Holiday Sentiments” here or here

