Hi everyone! Today’s post is actually a bonus card. I crafted on Thanksgiving, YAY! I had just finished making another collection of cards and while I had all my items out on my craft table, I decided to make this card!
I am just loving the Simple Stories Vintage Rustic Paper pack and the Bits & Pieces. I’ve already made a couple of cards here and still have so much left to make more!
Also, I’m excited to share some tips for how you can use pattern paper packs to make your cards still have that “handmade” look even if you’re using 90% pre-cut items.
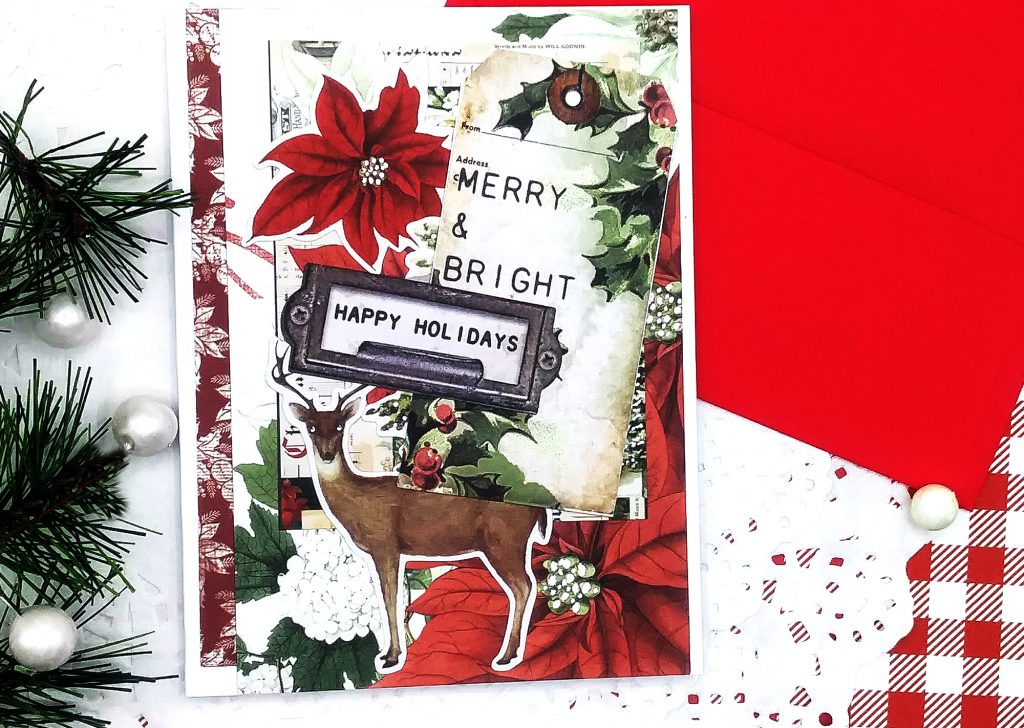
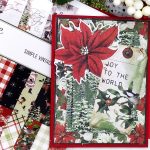
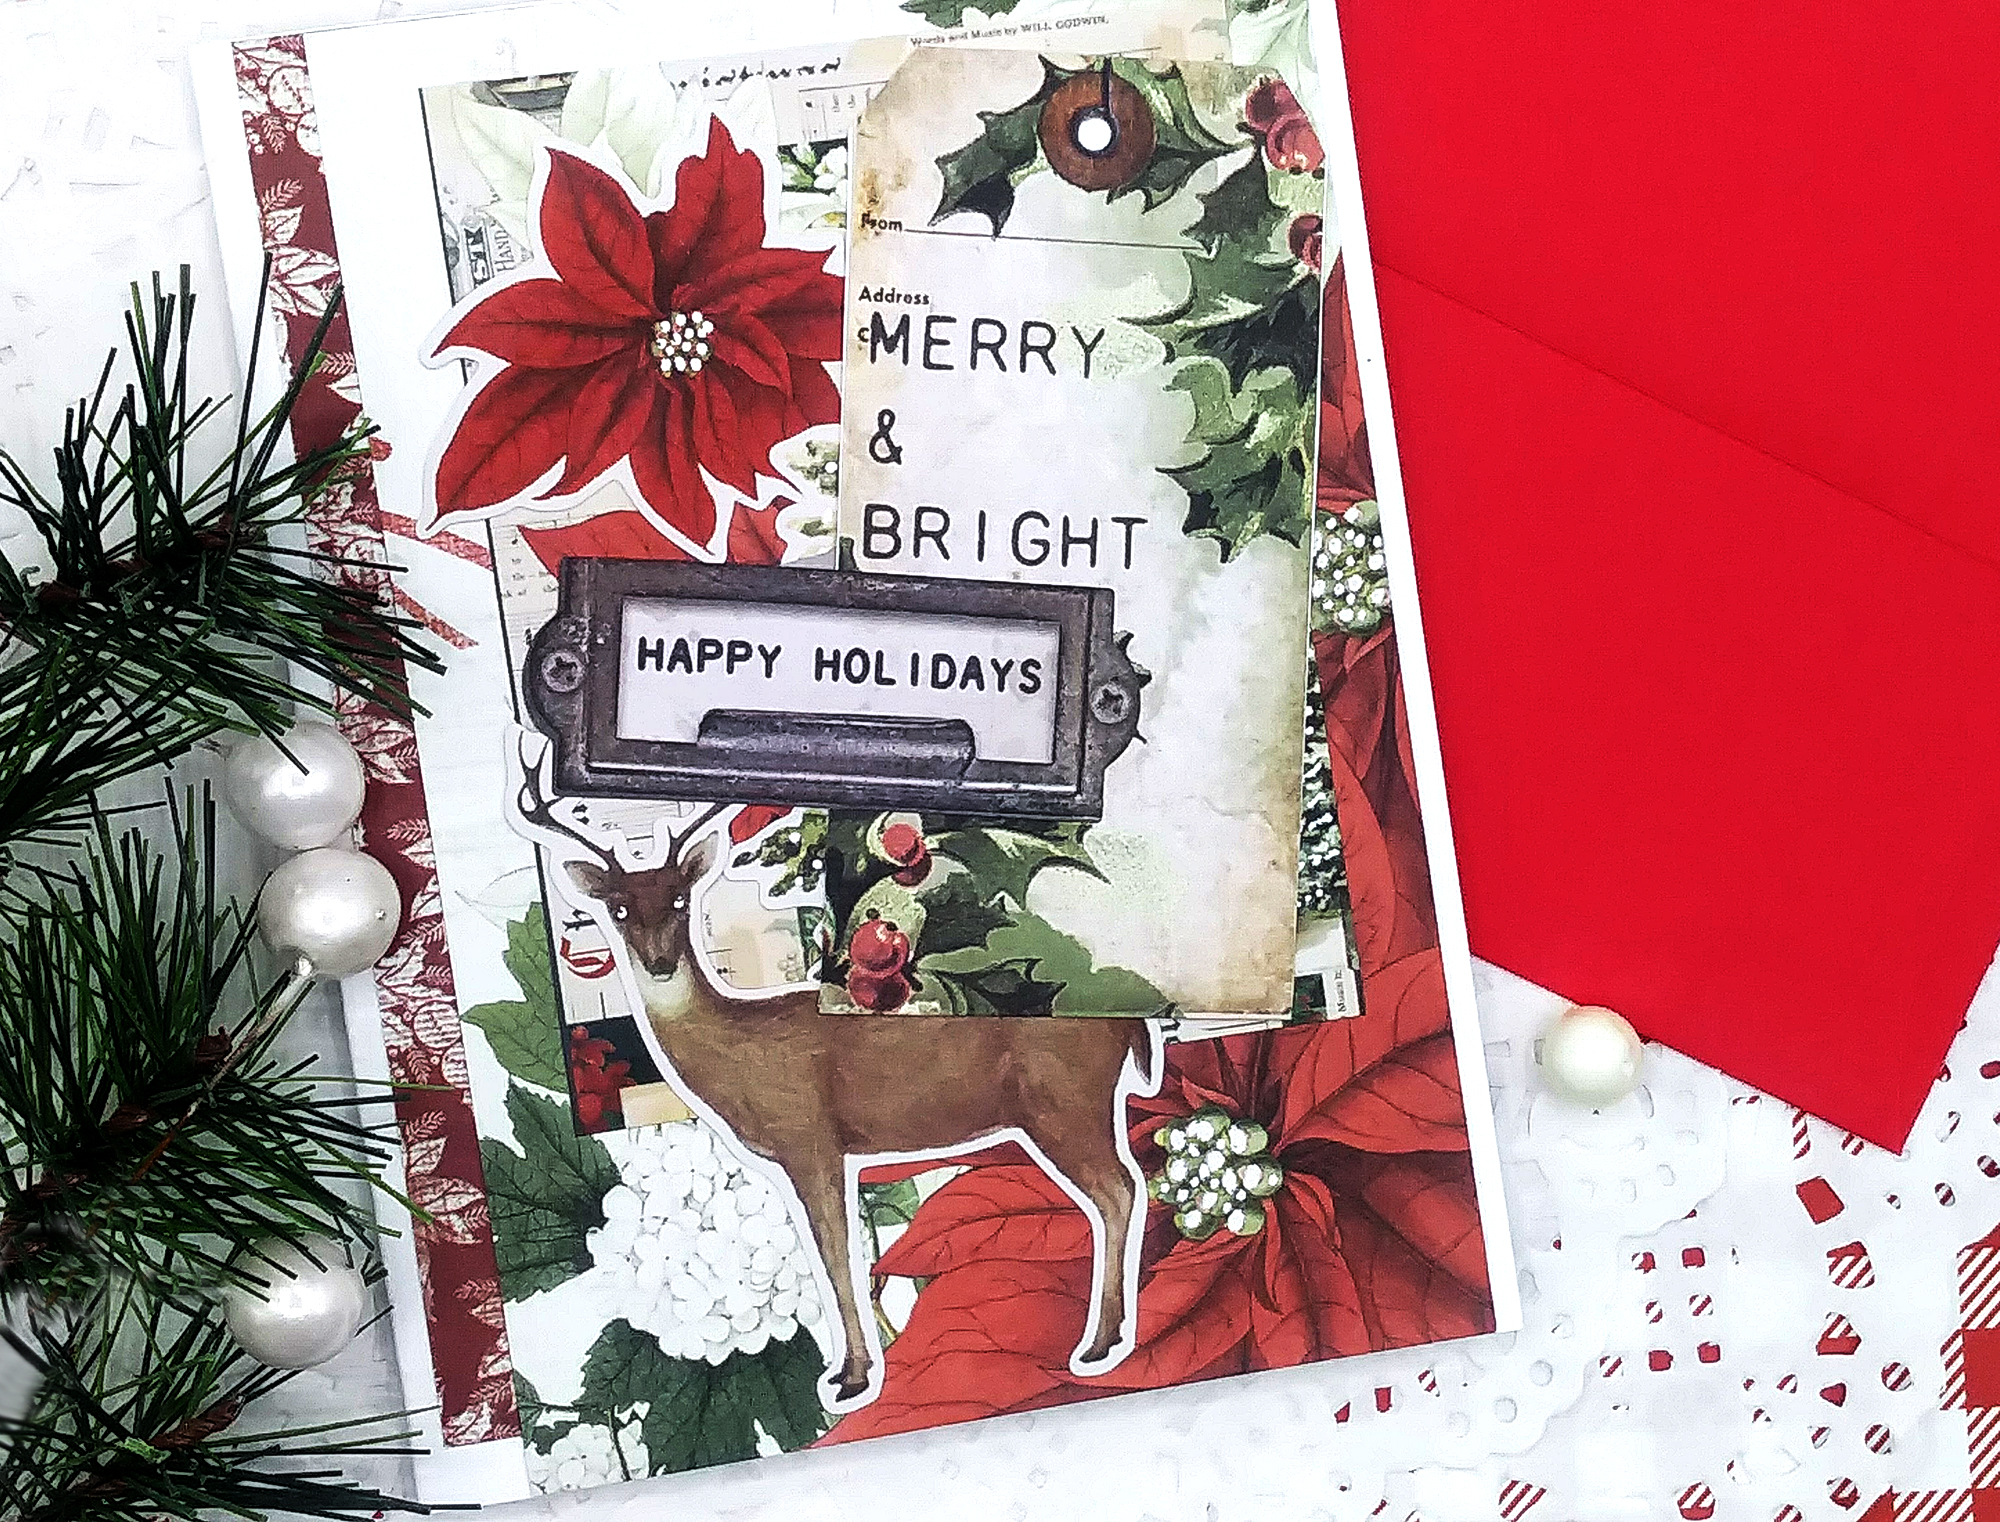
I used the poinsettia pattern paper for my background and you can see when I placed the next 2 layers of patterns I overlapped them a bit on the bottom left for added interest. And, I really like that the patterns are different but look good together.
TIP #1
I think one of many things to do when using pattern papers to make the card have a more “handmade” feel is to trim them down in various sizes and lengths and then overlap them which I did for all 3 layers of the papers for this card.
Also, angling the different layers would also make a great design, I didn’t do that for this card but it’s a great way to add interest.
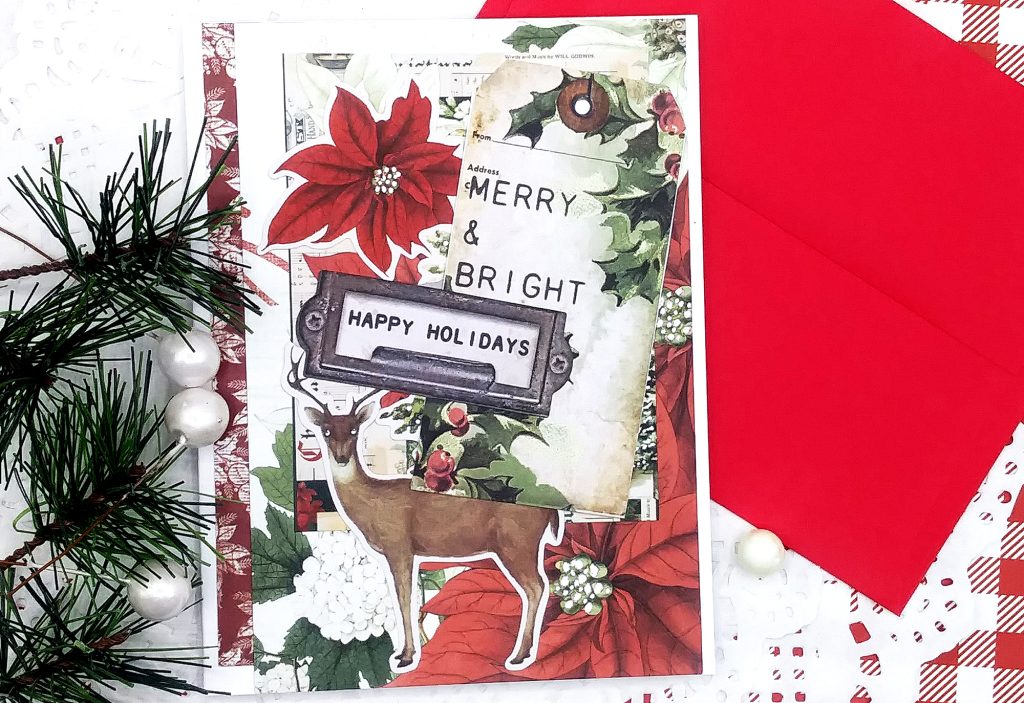
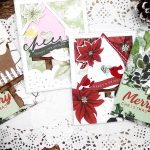
Next, it was time to add more images, so I picked a deer, the “Merry & Bright” tag, Happy Holidays sentiment and a poinsietta.
TIP #2
Use multiple pre-cut imagery. I love to use several images to place them over my card panel to create a nice scene. I try not to overdo it, but having a few items and placing them at different angles gives the card a vintage or even mixed media feel.
I also sometimes will play with placement before I adhere anything down to my card panel in case I end up changing my mind.

TIP #3
Use double sided foam tape or double up the cardstock under images to add dimension. I did this for the “Merry & Bright” tag. I added more cardstock under the tag to prop it up and then I angled it and I really like how it looks. Dimension really makes a card come to life!
The other images (poinsettia, Happy Holidays sentiment and the deer) I simply glued onto the card. Having some images pop out with dimension and others not really adds a fun design to your cards.
TIP #4
Try using other embellishments. Twine, ribbons, pearls, gems, sequins, enamel dots or Nuvo drops comes to mind. I wish I had had matching twine for this card, cause I would love to have had some red/white twine to tie a bow through the tag.
For my card, I didn’t add any extra embellishments because I felt the design was busy enough. But, if your design doesn’t seem to be complete, try adding some extra bling!
TIP #5
Use Glitter or Shimmer Spray. This is a trick I love to do. I have Hero Arts Iridescent Shimmer Spray and Distress Glitter, but I also have a load of other glitters in a bunch of colors. After I’m done with the card, I like to spray with the shimmer spray and then I add some glitter and shake off any excess. The glitter will stick to the spray and give your card that shiny finish!
Another thing for this tip is to add paint splatters with a small artist brush. I love to use Distress “Picket Fence” paint but there’s other brands too. You can even use your distress ink pads with a little water and splatter over your card which gives it a more artistic look.
BONUS TIP
My last tip is to do a little coloring. I love using my white Gelly roll pen and I used it on the deer’s eyes to make his face pop out more, I also used it on the centers of all the poinsettias and on the Christmas tree that’s underneath the tag.
I usually will make small dots with my pen for snowflakes or flower centers and I’ve used it to draw stars on a background as I did for this card in this post.
I hope these simple tips will help you if you’re making cards with pre-cut, pre-made paper collections. There’s some really beautiful collections available like this one from Simple Stories and they’re also terrific for when you need to make a card fast!

- Simple Stories Vintage Rustic Christmas 6 x 8 Paper Pad
- Simple Stories Vintage Rustic Woodland Bits
- Simple Stories Vintage Rustic Bits & Pieces
- White #10 Gelly Roll Pen
- Distress “Picket Fence” paint
- Hero Arts White Iridescent Shimmer Spray
- Stampers Anonymous Glitter Duster
- White #10 Gelly Roll Pen
- Distress Glitter
- Foam Squares 217pk, Set of 10 – white / black