Sometimes as a cardmaker, we mess up and have to find ways to correct it. I have to say it happens to me almost every time I make a card and I would normally get angry, but I’m learning to just keep calm and think of ways to rebound instead.
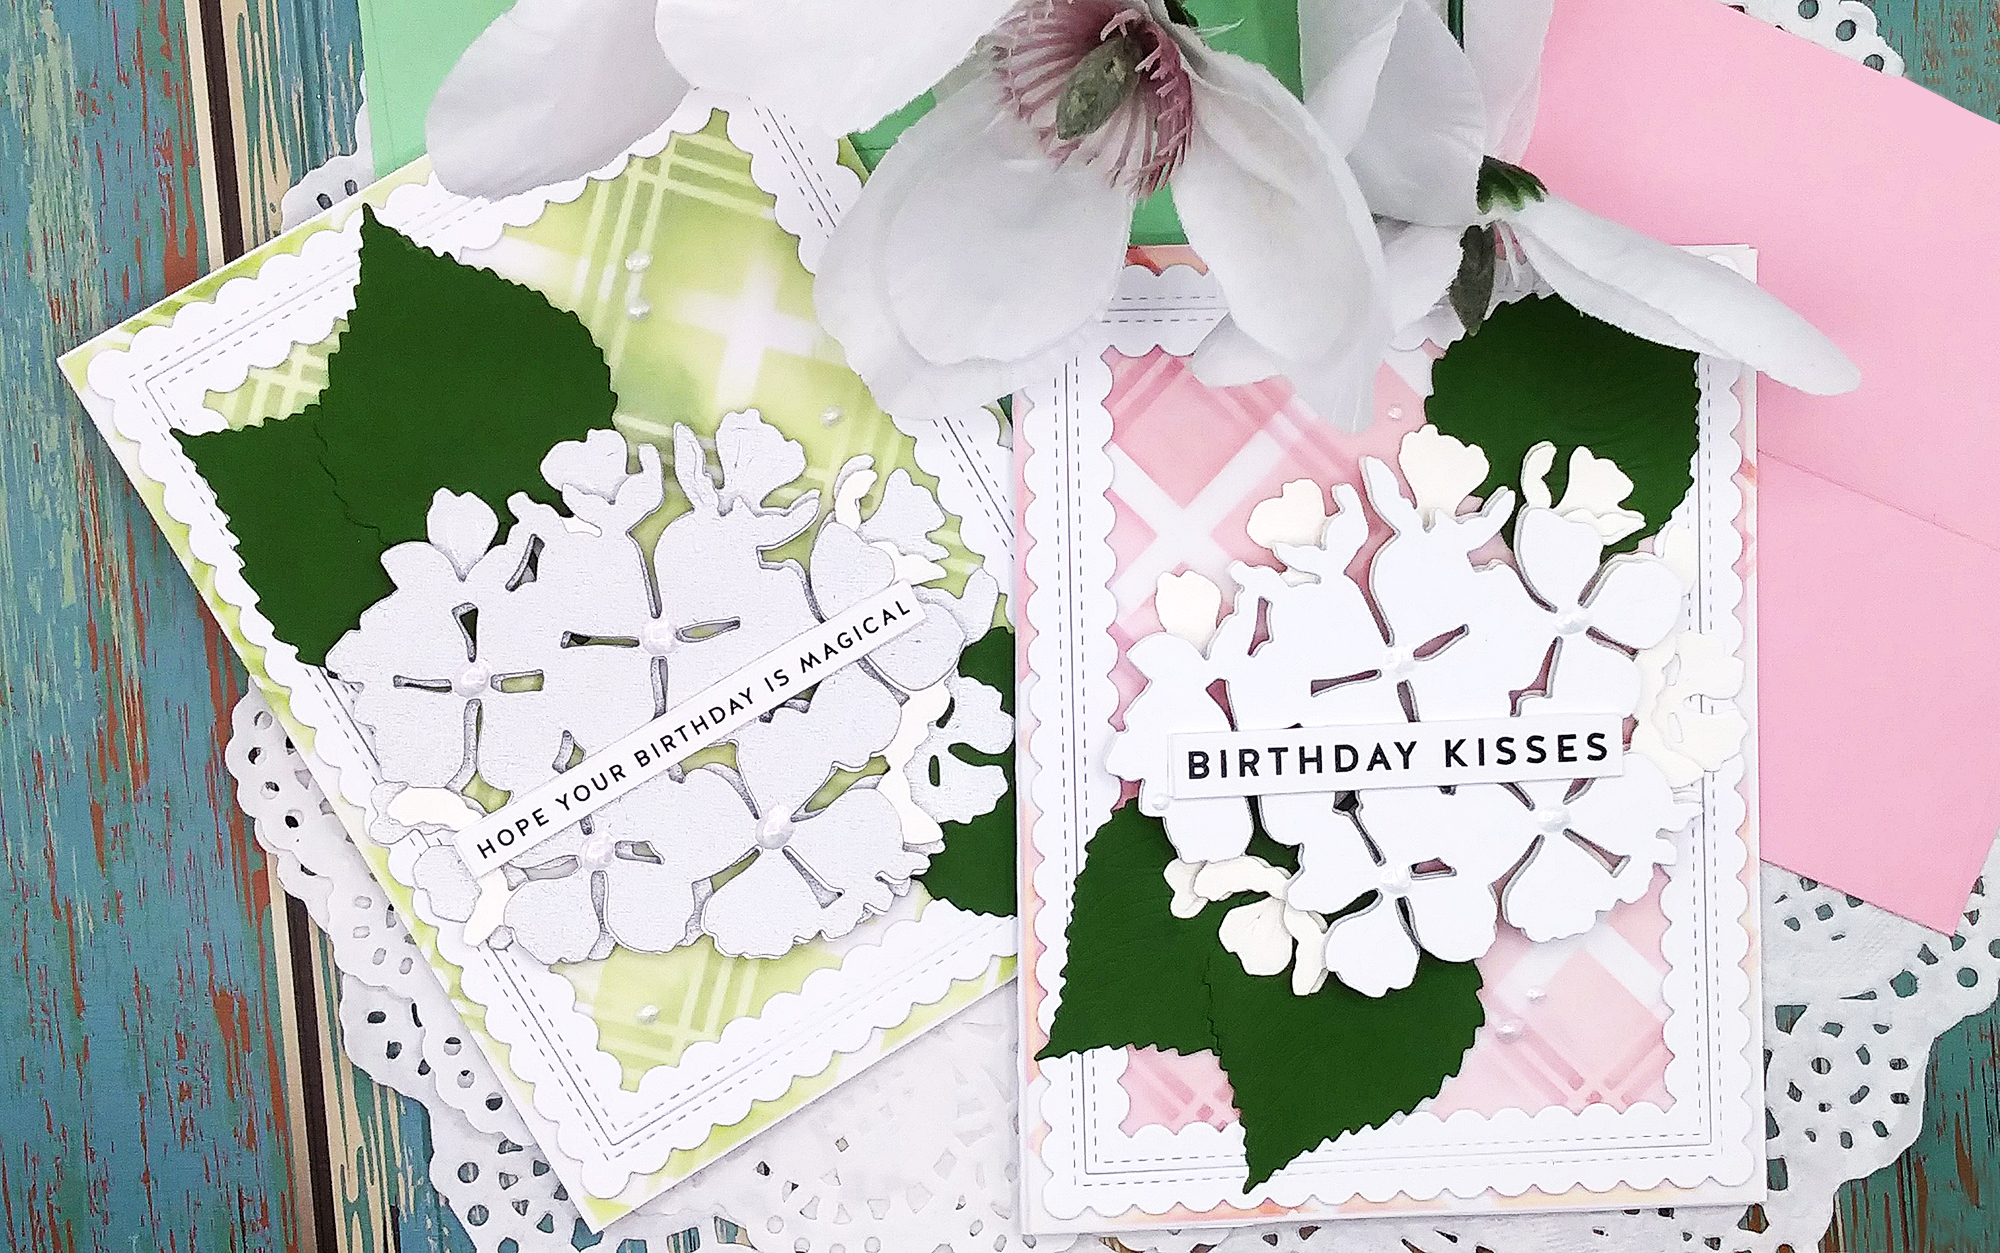
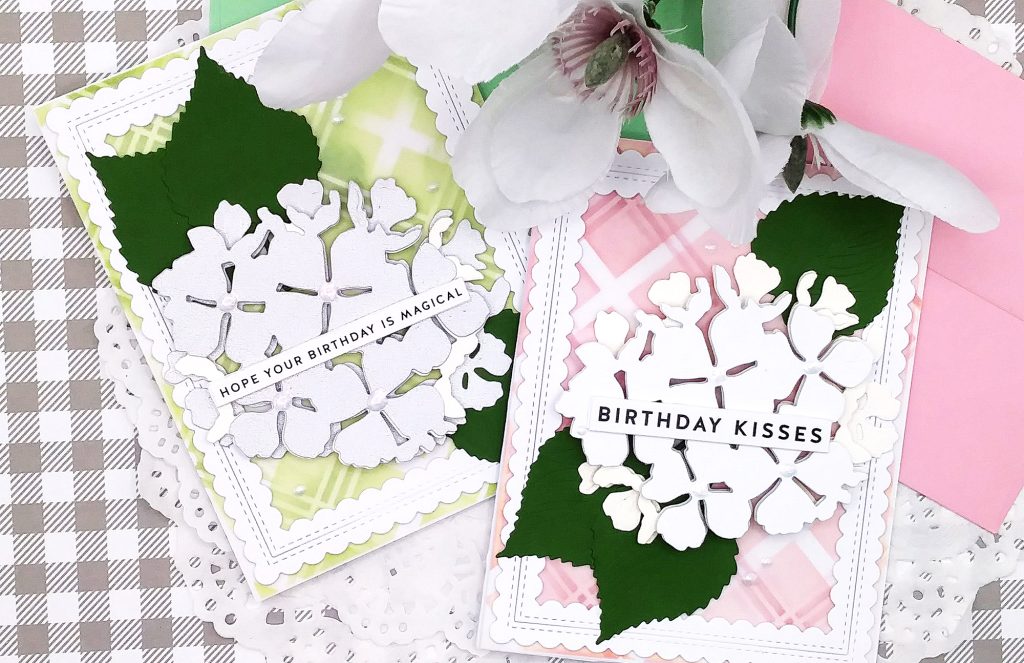
That’s the gist of these 2 cards today. They’re not perfect at all! In fact, I really goofed up both backgrounds, the flower petals and even adding the Nuvo Dream Drops, but nevertheless I’m sharing them because I persevered and finished both cards in spite of these imperfections.
I’ll tell you what mistakes I made and how I tried to overcome them. I don’t want to use this post to rag on myself, I love to remain positive. I only want to point out that even though we don’t always make a perfect card, we still can share it and gift it to someone.
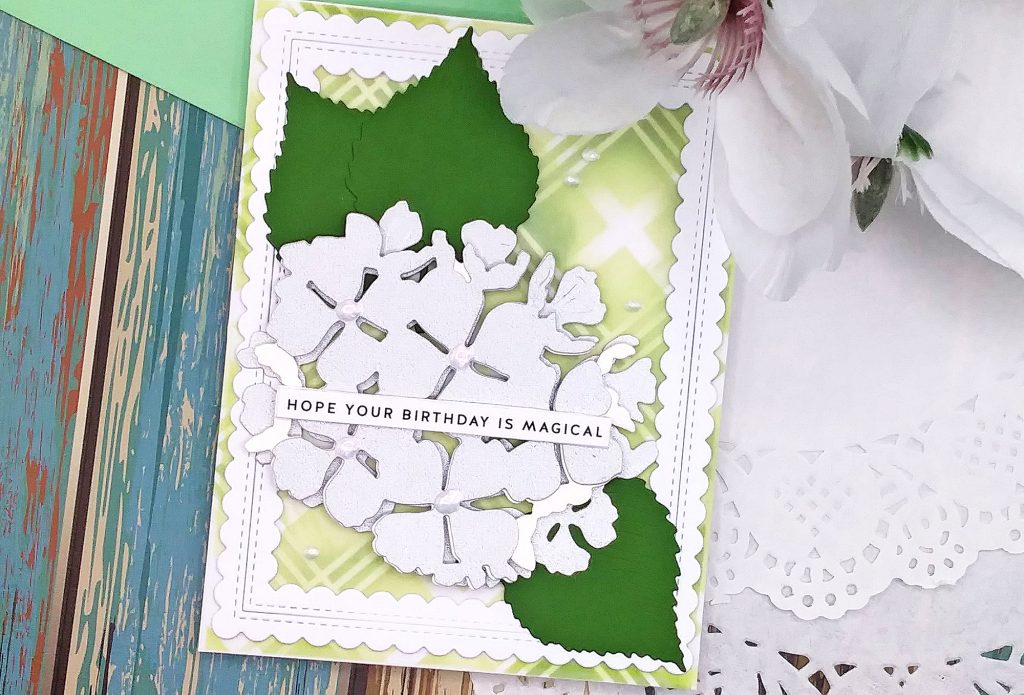
The first thing I wanted to do was use my Pinkfresh Diamond Plaid Stencil set, it comes in 2 layers. I applied ink to the first layer down just fine with regular blending brushes on the green card using “Grassy Knoll” ink for my lighter color from Pinkfresh Studio.
However, for the second layer which is the accent part of the pattern, I used the same size blending brush with a darker color, “Key Lime”, but I botched up the design. Well, I put the card panel aside and started working on my 2nd card thinking that I should use a much smaller brush for that 2nd layered stencil. I have Altenew’s Detailed blending brushes which has 3 different sized brushes in the set. These are great for getting into tight spots or for adding little color.
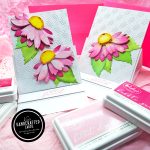
So, on the pink card, the first layer went down fine using “Ballet Slipper”. The second layer, I used “Bubble Gum” and I was a lot more meticulous, but still blotched it in some places too. By this time I was very frustrated! 😤
I put both panels down at this point and I took a deep breath and said to myself, “okay Kim, what can you do to fix this?” First thing I thought of was using a frame die to possibly cover up those blotches but I knew the frame wouldn’t be able to cover them all. Then, it hit me to use Vellum as well. Vellum is so wonderful as it not only mutes a busy design but it’s elegant too.
For the frames, I reached for Pinkfresh Studio’s Essentials Stitched Scallop frame die set. It makes the scallops on the outside and inside or you can choose which one you want. I wanted both the inside and out to cover as much of those imperfect places as possible. I then trimmed down my vellum to A2 size and placed that over the backgrounds and then placed the frame on top of that. I held it down for awhile as the vellum tends to curl up.
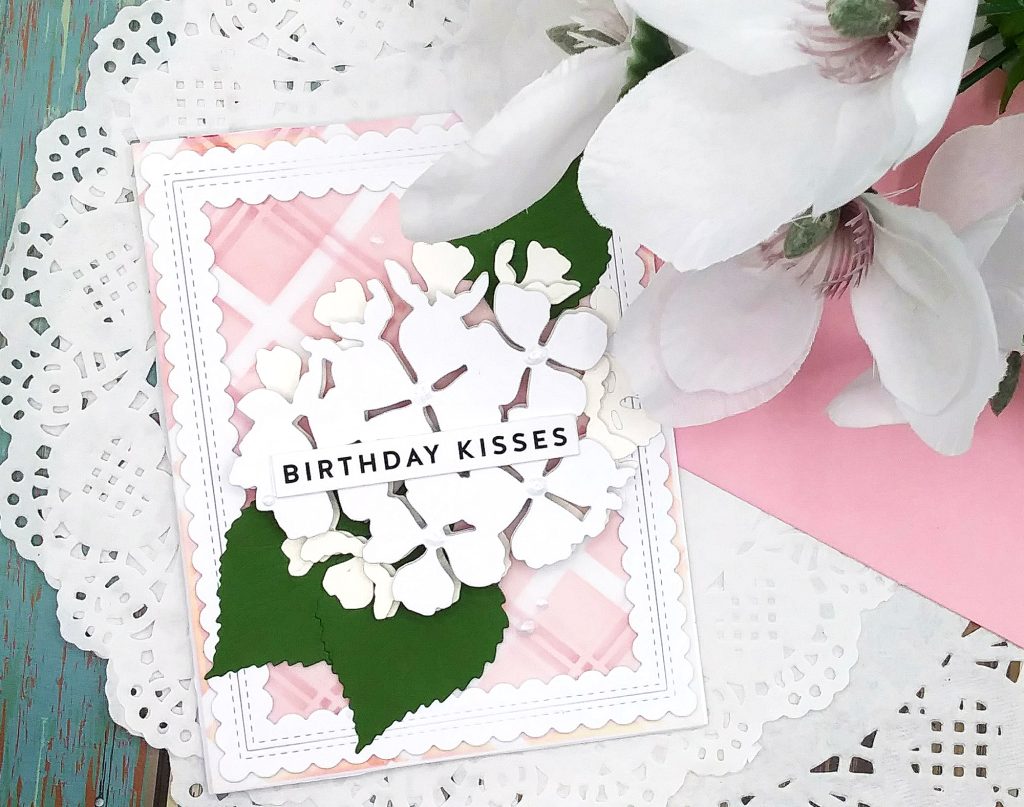
Okay, I got through that hump so time to move on and decide how to decorate the top and add a sentiment. I opted to use “Honey Bee Stamps Hydrangeas flower die set“. I loved die cutting these in my slimline card that I made in this post so I figured it is large enough to cover any additional blotches but still show some of the vellum too.
I die cut all the layers and leaves. I used silver metallic and white cardstock from my stash for the petals and Lawn Fawn green cardstock from their Rainbow pack for the leaves. And here’s where the 2nd goof happened! As I was layering the petals on the green card, I didn’t line them up perfectly so you’ll see that when you look at the flowers. And, because they were so delicate I didn’t want to take a chance of trying to remove them to try lining them up again especially with foam squares underneath. That would have been a nightmare to remove. So, I left them alone and just “sighed”. 😩
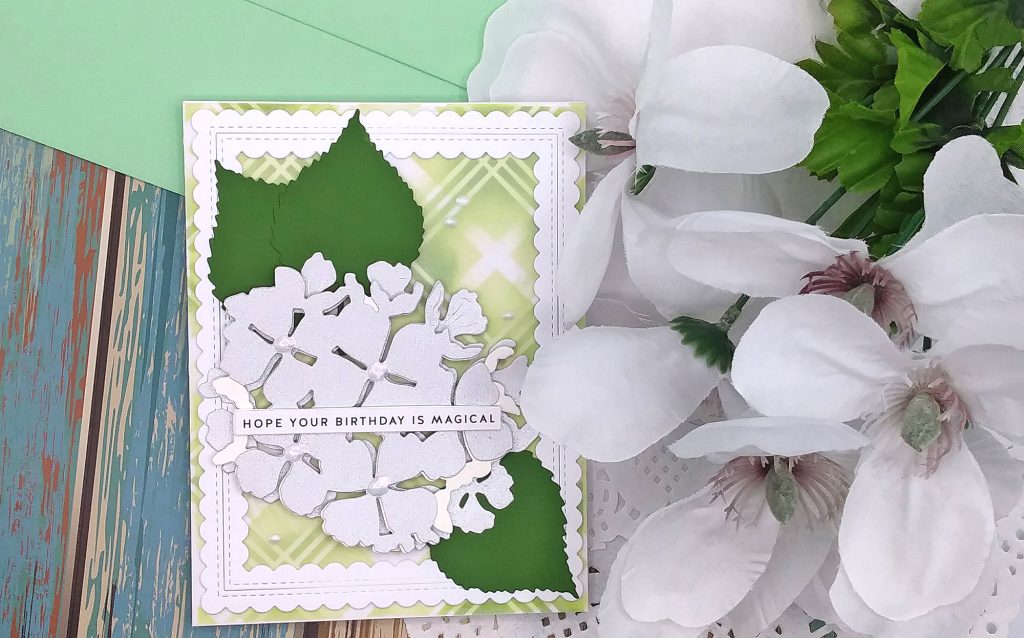
You can really see how the petals aren’t perfectly lined up on top of each other in this card. Well, moving on again, I added the flower clusters on the cards and again took a deep breath! 😮💨
It was time for the sentiments. I was ready to be finished by this time so I wanted an easy way to add the sentiments. For this, I used Simon Says Stamp birthday sentiment strips. I put a little dimension behind these and added them to the center of the hydrangeas.
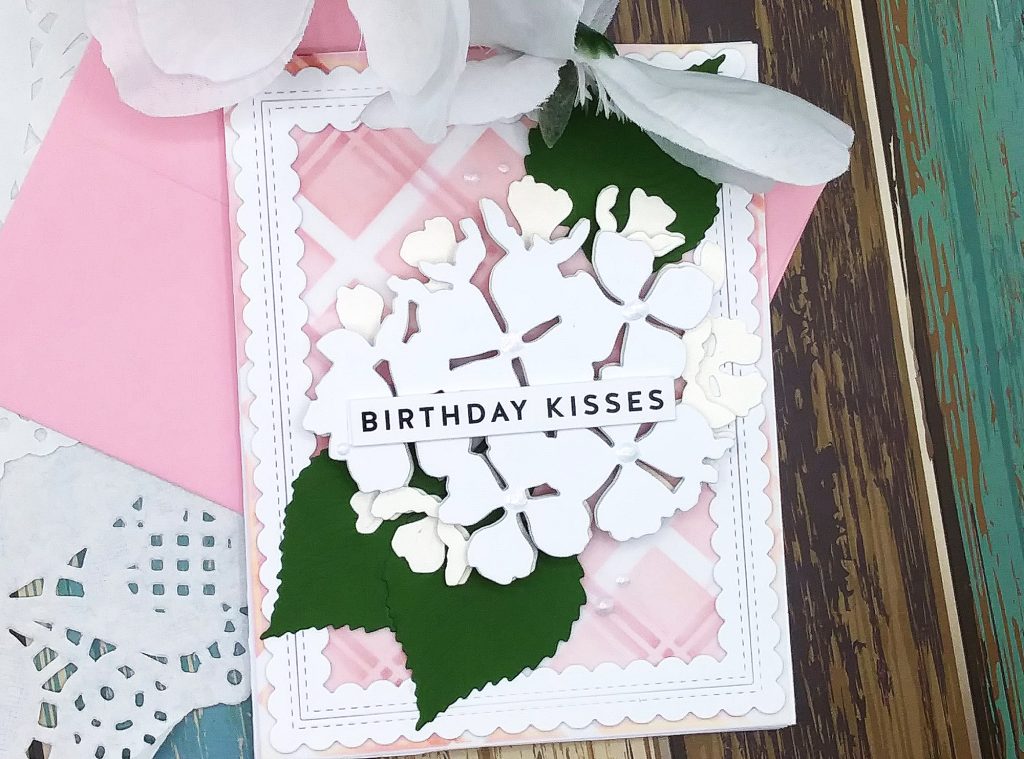
Okay, I kept going! I wanted to decorate the center of the flowers and add it a bit on the outside of the cards too so I used Nuvo Cloud Dream Drops. I LOVE these even more than the Crystal Drops but I didn’t apply it perfectly and you’ll see that on some of the flowers. Now, I know how to use this product, it just wasn’t coming together this day! LOL! 😕
I did a bit better with the pink card. Sometimes, you get smarter when you’re making more than 1 card! I put the cards down to completely dry. Finally done! I went onto to doing something else and later I took another look at both cards and I didn’t think they were half bad.
I’m glad I kept going and didn’t give up. It’s a learning experience and my cards will continue to improve and it’s important that I enjoy the creation process and not look so hard at all my mistakes. 😌
I know these are not my best cards and I do plan to try making these again learning from where things went wrong. And hopefully, I’ll do better next time!
So as a cardmaker or paper crafter, how do you rebound from a mistake? I’d love to hear your stories so please leave a comment below! If you’re interested in any products I used today, check out the links below and thanks for reading! 😊

- Pinkfresh Studio Diamond Plaid Stencil Set
- Honey Bee Stamps Hydrangeas Die Set
- Pinkfresh Studio Inks or get the bundle here
- Pinkfresh Studio Essentials Stitched Scallop Frame Die Set
- Simon Says Stamp Heavyweight Vellum
- Simon Says Stamp Birthday sentiment strips
- Nuvo “Cloud” Dream Drops
- Lawn Fawn Rainbow Cardstock
- Altenew Detailed Blending Brushes
- Blending Brushes (I bought this 2 sets on AZUS)