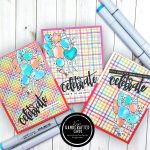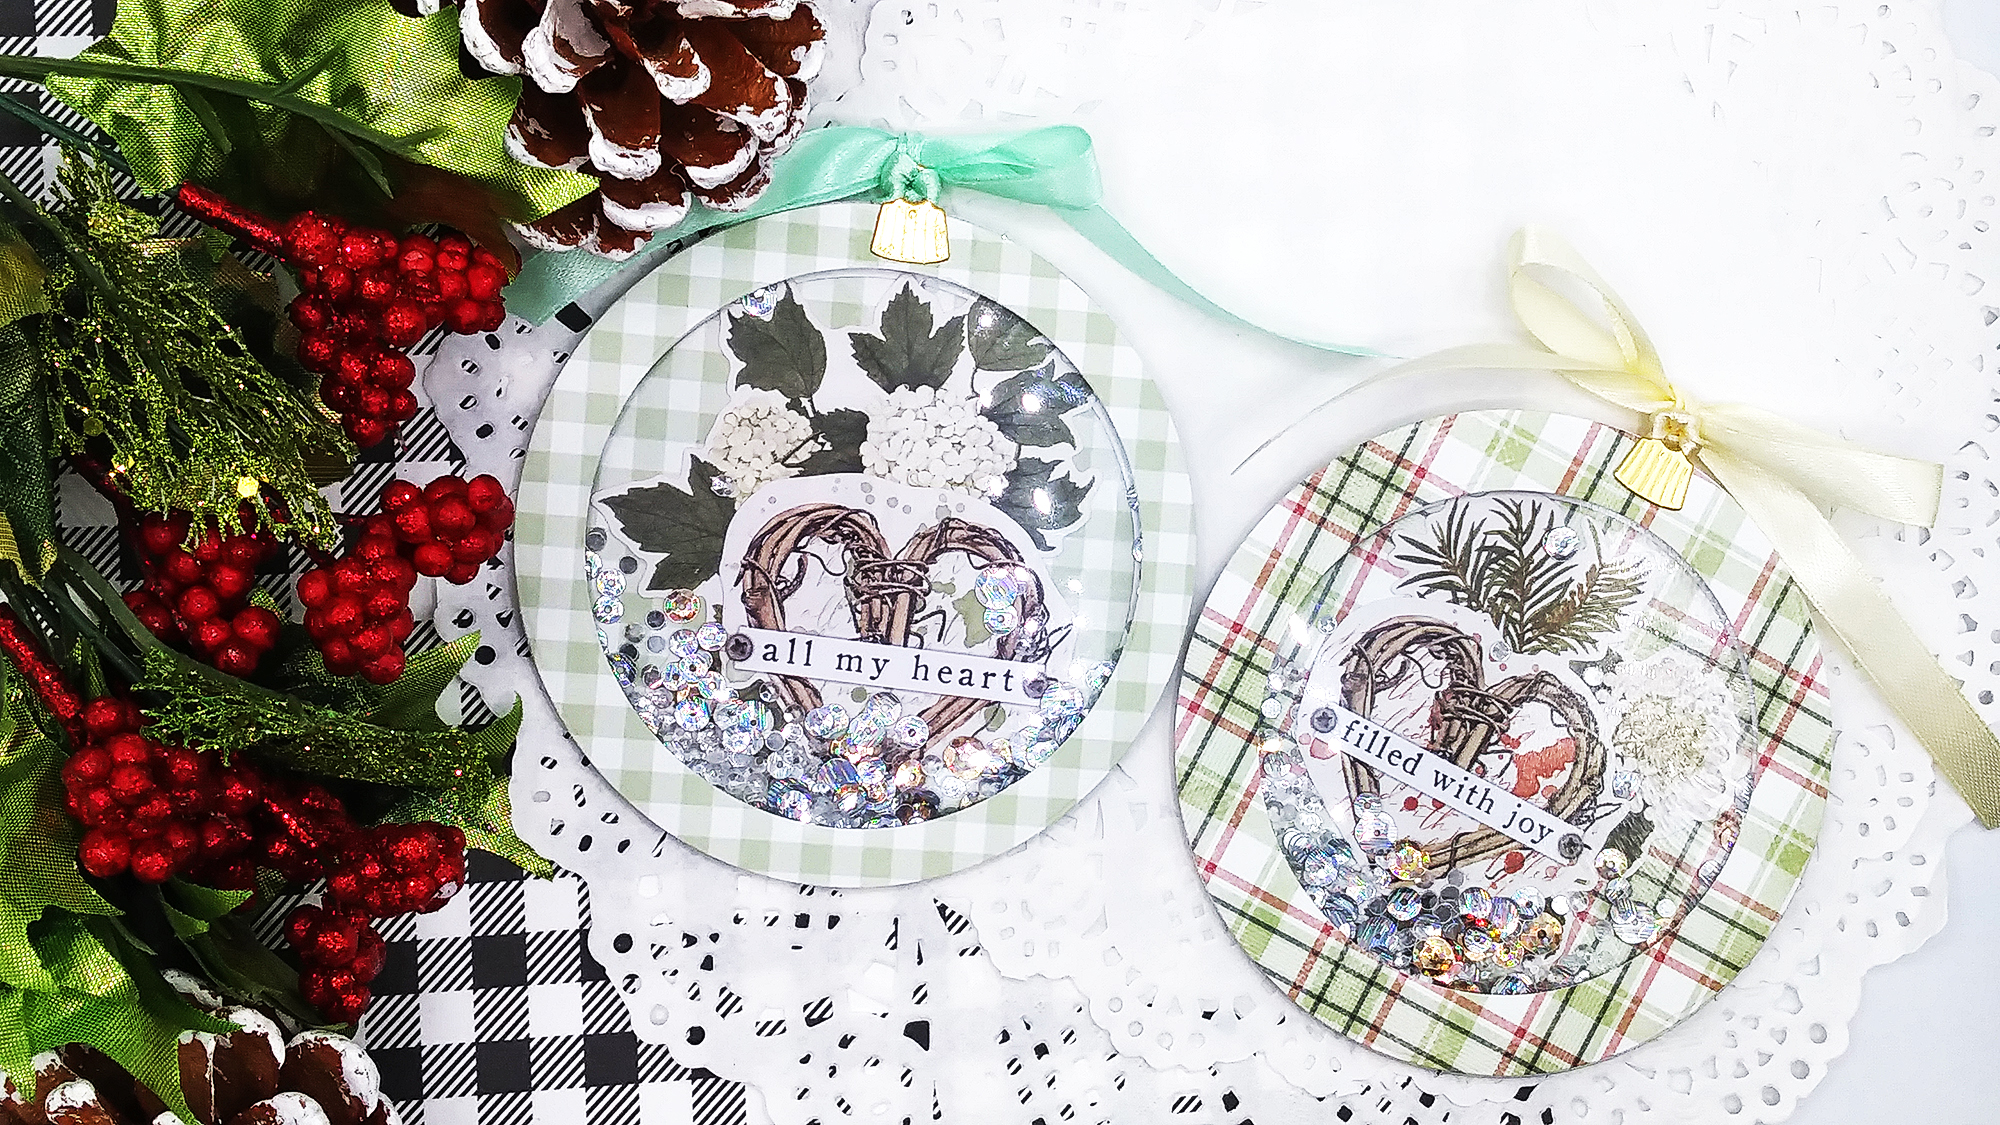
Hi friends! I have 2nd set of cards I finished up tonight and these cards were not even planned! Inspiration comes from so many places and as creators, we’re always looking for that. Well, I was just going through emails and came across Scrapbook.com’s email showcasing projects. I saw shaker square cards and there was a video tutorial with it! Immediately, I watched it and got some excited that I got to work right away! Check out the video here!
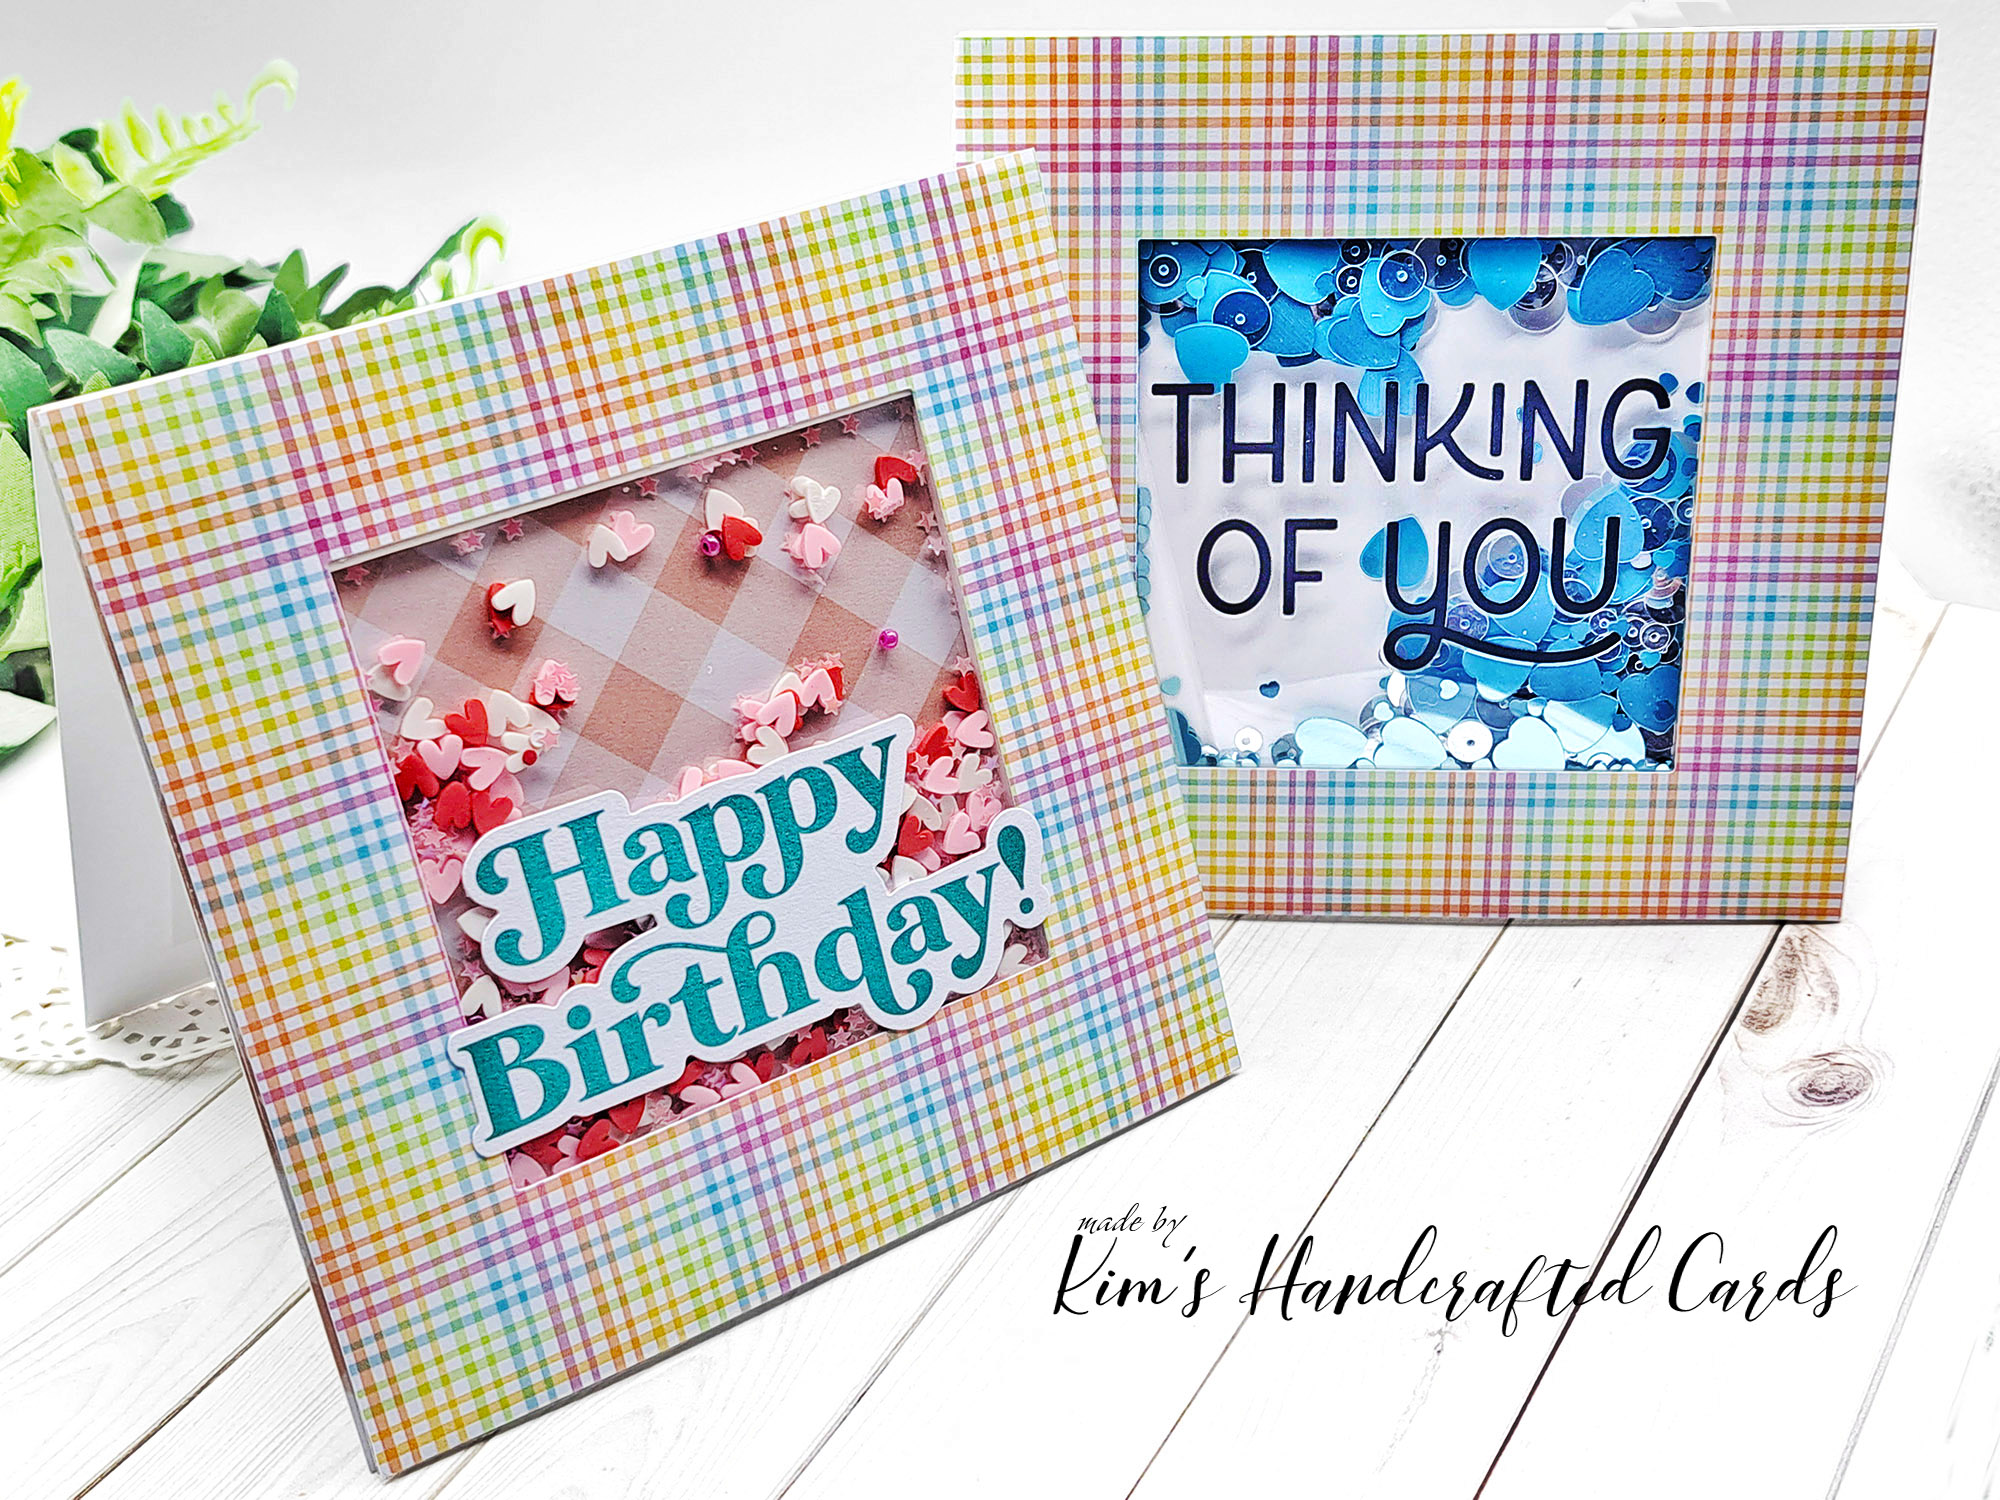
I ended up making two 5″ x 5″ square shaker cards and normally I only make A2 cards but one of my goals this year is to make different sizes, fun folds and just stretch my cardmaking more. If you’re interested in reading that post about my crafty goals this year, click here.
Making square cardbases are even easier than A2 sizes. For mine, I took an 8-1/2 x 11 cardstock (120 lb.) trimmed it to 10″ in height and 5″ in width. Then I scored it at 5″ and that makes a top-fold square card. I even ordered envelopes to fit that I hadn’t used.
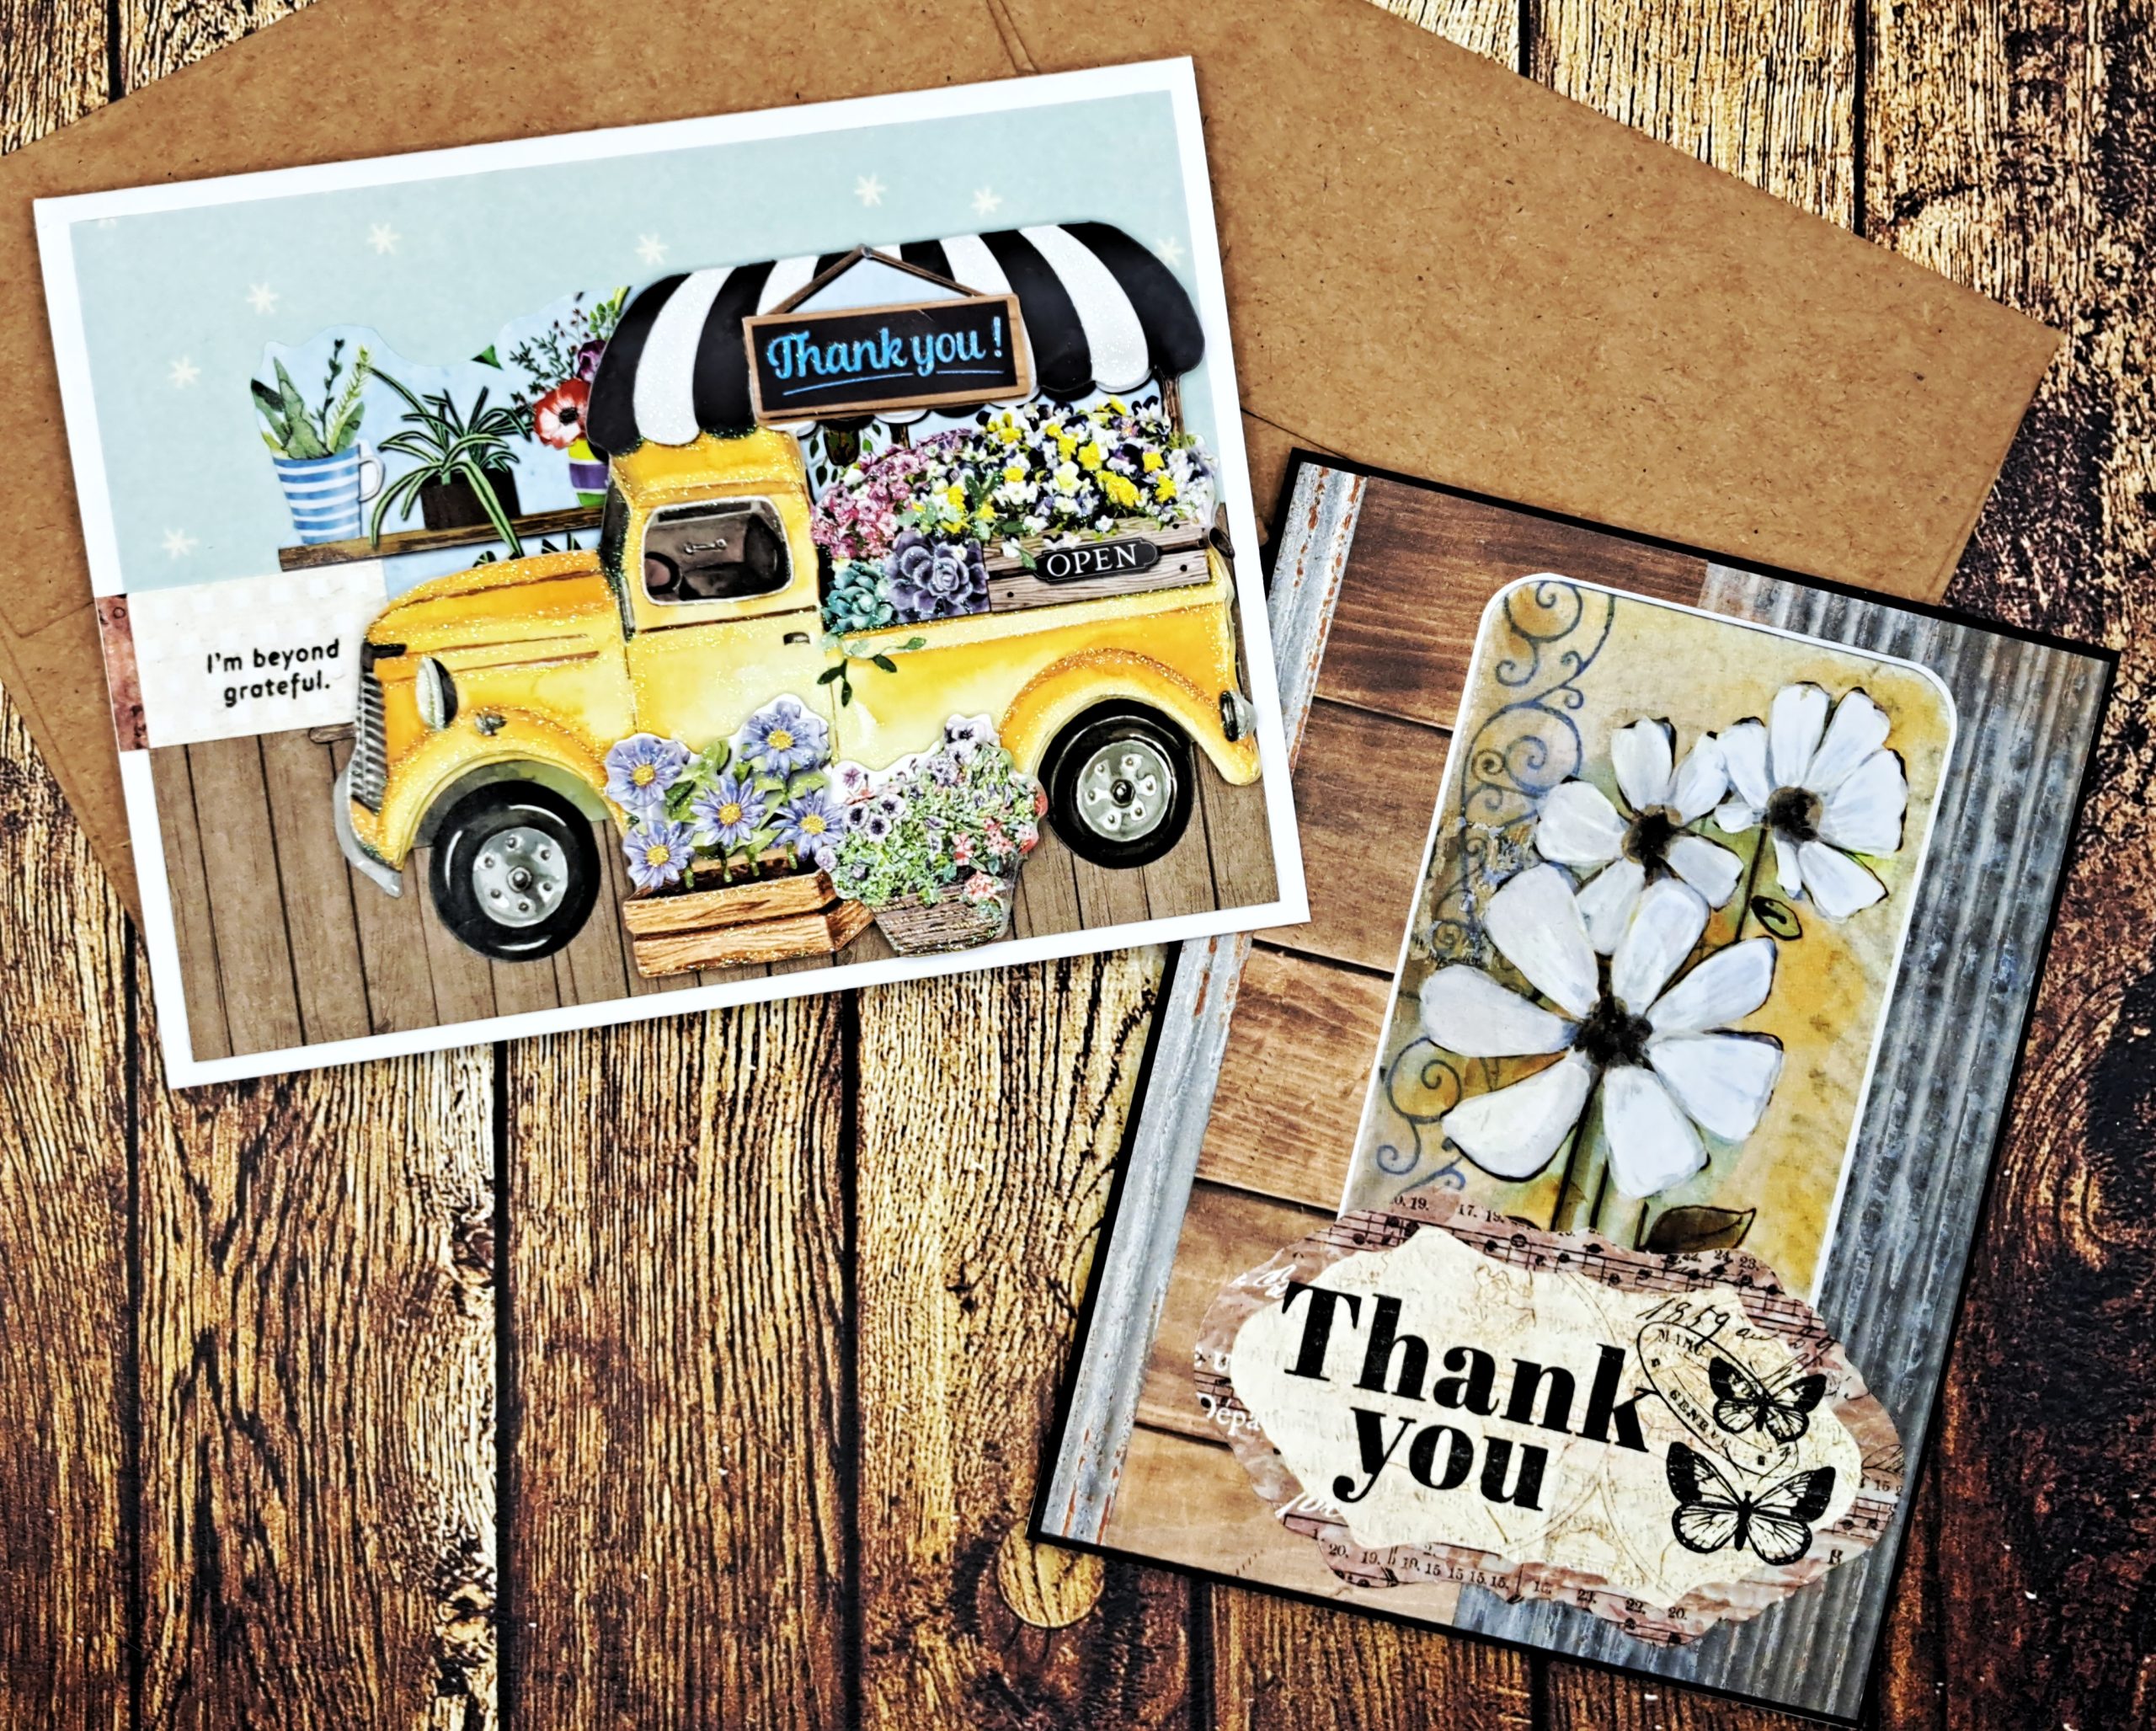
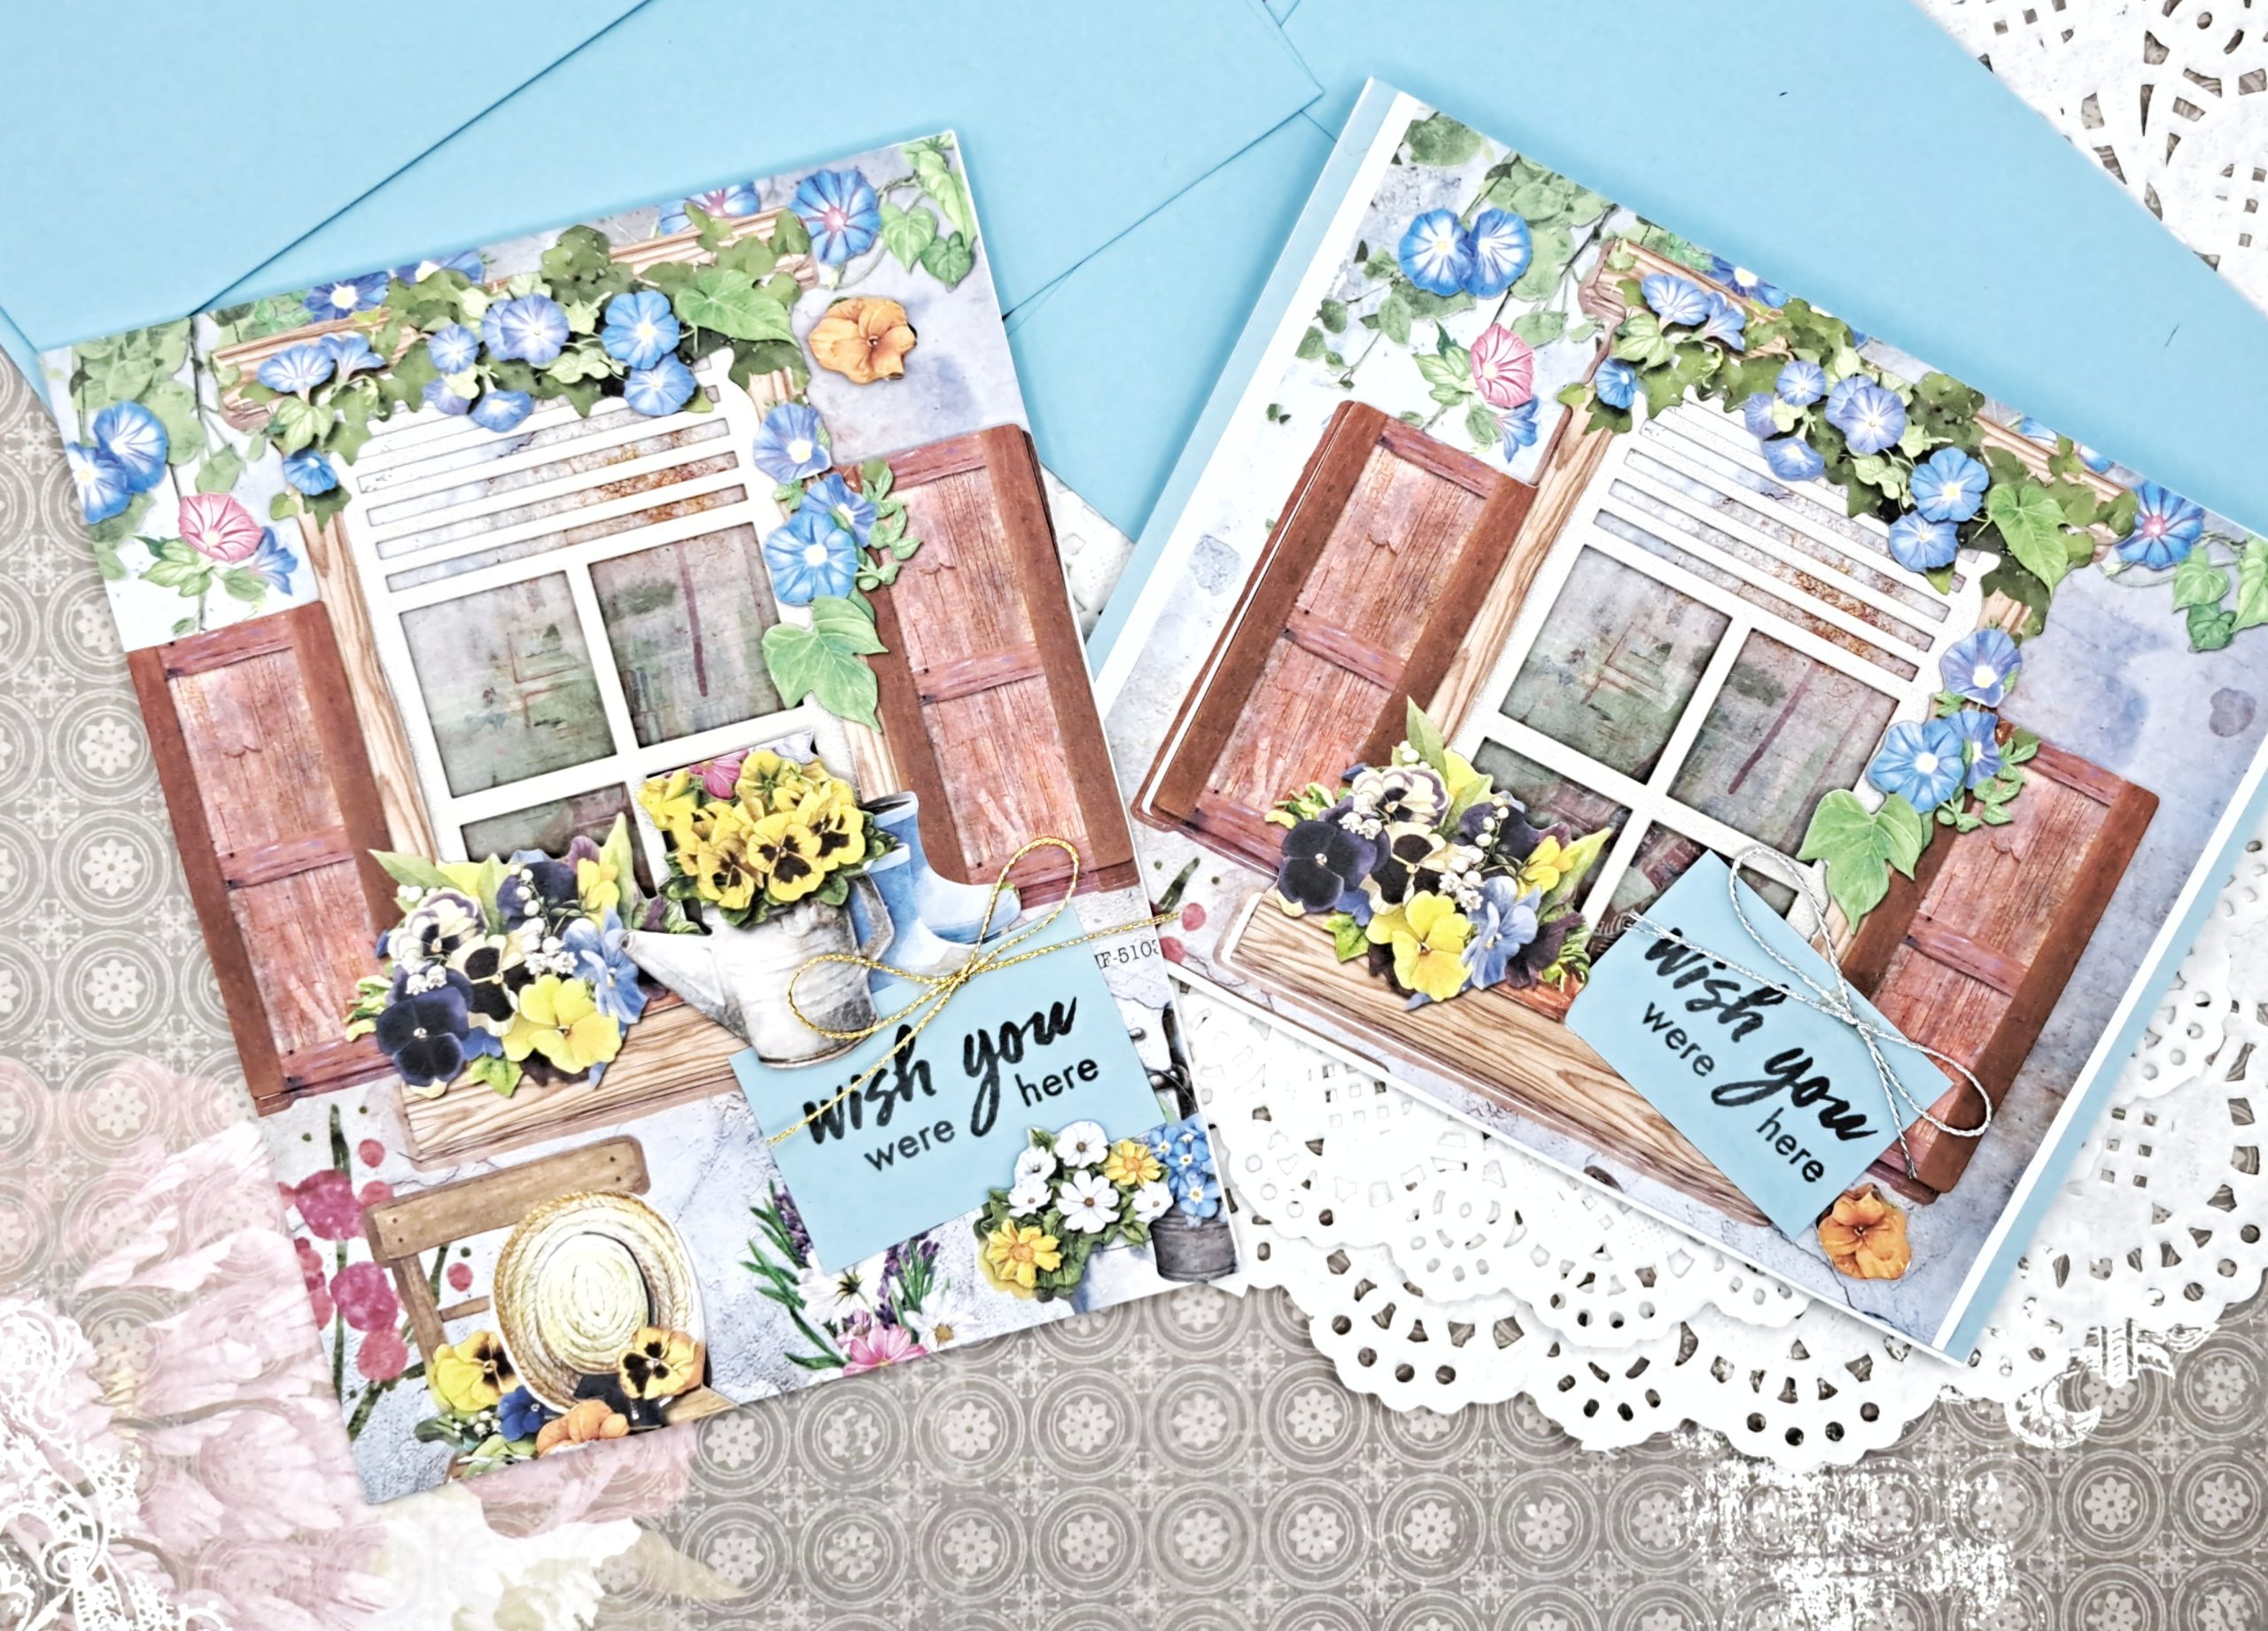
I used pattern papers from My Favorite Things, one is a birthday card I’ll be sending to a dear friend and the other is a friendship card. I used the largest size nested square die to cut my openings. One cardbase is just white but for the birthday card, I added another sheet of pattern paper for my panel. It shows through nicely with the shaker bits.
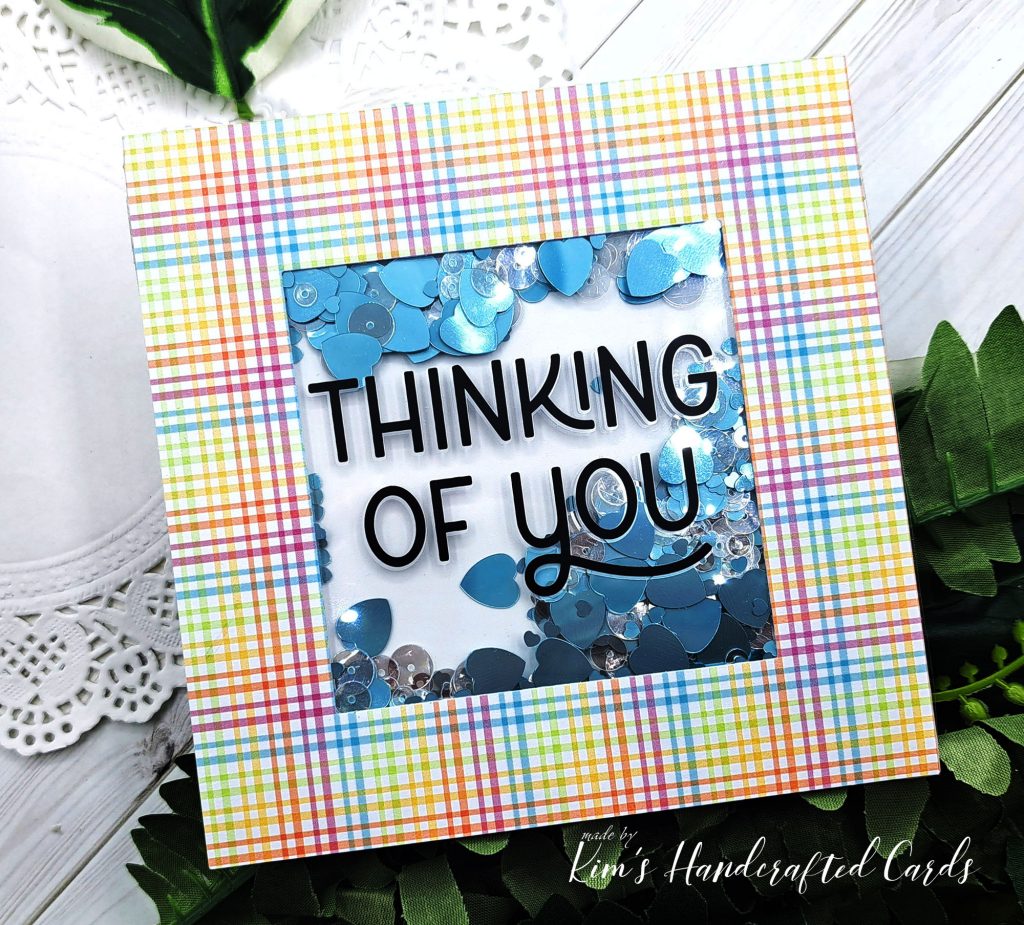
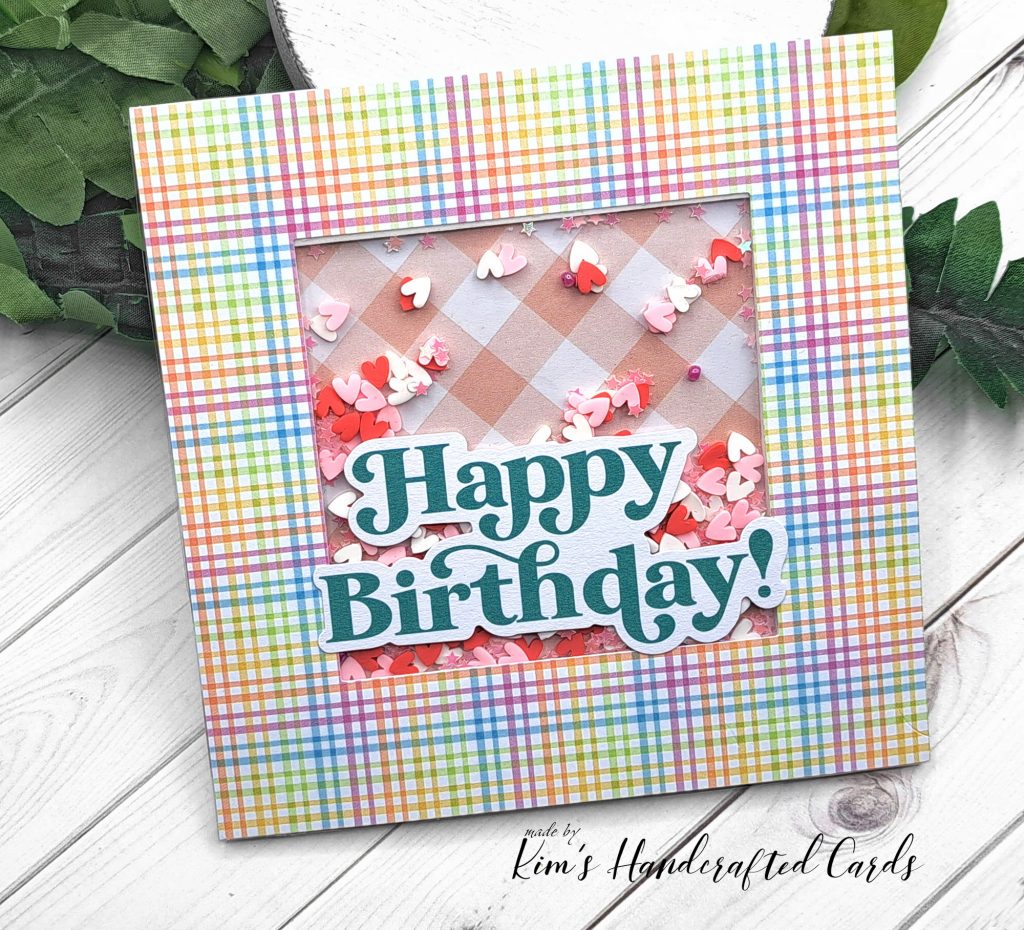
I used 2 sheets acetate that I trimmed to 5″ x 5″ for my shaker window. One sheet went down on top of my pattern paper frame, then I added double-sided foam tape from Scrapbook.com. To keep my shaker bits from getting stuck in the corners of my cards, I added some anti-static powder around the all 4 edges.
Then I filled my shake wells with hearts, stars and sequins from Sizzix and Pretty Pink Posh. After that, I carefully and slowly removed my foam tape. Here’s a hack… after doing that I added liquid glue on top of the exposed tape (learned this from that video). It helps to give you wiggle room while you place the other acetate sheet on top. Genius! I cut off any extra acetate from the sides and not my shaker card is secure. I added foam tape on top of that 2nd acetate sheet and liquid glue again, then place it over my cardbases. My shaker cards are made!
For the sentiment on the friendship card, I turned to my rub-on transfers again, told you I’m hooked! And the rub-ons are easier to adhere to acetate than cardstock! Turned out beautiful! For the birthday card, I used Pinkfresh Studio’s “Rainbow” sentiment pack. I also trimmed down another sheet of white cardstock for the inside to make it more stronger to hold up the shaker part. LOVE these cards!
NOTE: if you want to make a smaller square card like a 4″ x 4″, trim your cardstock to 8″ in length and 4″ in width, then score at the 4″ mark.
Thanks for Reading!
Some of the links to the products I used are affiliate links which means that when you shop with them, I’ll receive a small commission at no extra cost to you. Your support helps me run my small crafty business. Thank you so much!

- My Favorite Things “Pretty in Plaid” Pattern Paper Pack
- Scrapbook.com – Card Maker Sentiments – Rub-On Transfers – 6×8 – 2 Sheets
- Sizzix Sequins and Beads Collection
- Pretty Pink Posh Sequins
- Acetate Sheets
- Pinkfresh Studio “Rainbow” sentiment strips
- Double-sided Tape (AZ), (Scrapbook.com)
- Double Sided Foam Tape
- Glassboard Craft Mat → Use my Code → KIMCARDS20 at checkout
- Paper Trimmer: Tim Holtz here (Ranger), here (Scrapbook.com) or here (AZ)
- Accents 100 lb. White Cardstock
- Scor-Buddy Scoreboard
- Bearly Art Glue
- Teflon bone folder (I bought mine on AZ in 2018, no longer available), but here’s a similar one from Honey Bee Stamps here
- Craft Reverse Tweezers by EK Tools (great for picking up die cut pieces)
- Crafter’s Edge Crossover II Fabric/paper Die Cutting Machine