One valuable lesson I’m learning about cardmaking and I believe this applies to any art form is, knowing what kind of crafter you are. What I mean is, as a cardmaker, what kind of cards do you like to create?, (ex., are you a scene builder?, do you like making CAS cards?, do you love to color and paint?, or maybe you love to just die cut and stamp a sentiment.) What techniques have you had the most success with? (ex., ink blending, distress resist, pattern paper piecing, etc.)
I was on a Facebook group the other day when someone had posted a question and one of the comments really stood out to me, she said something like “get card ideas or inspiration by following cardmakers on YT whose style is similar to yours, know what type of cards you like to make…” I’m paraphrasing here but the message was clear: know what type of cardmaker I am.
While I LOVE seeing all the beautiful cards other crafters make, I know that some of those (maybe most) are not my jam. Either I’m not confident in that technique and it frustrates me or I just don’t have joy trying to make that particular card design. And, that’s okay. We can’t be everything!
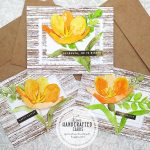
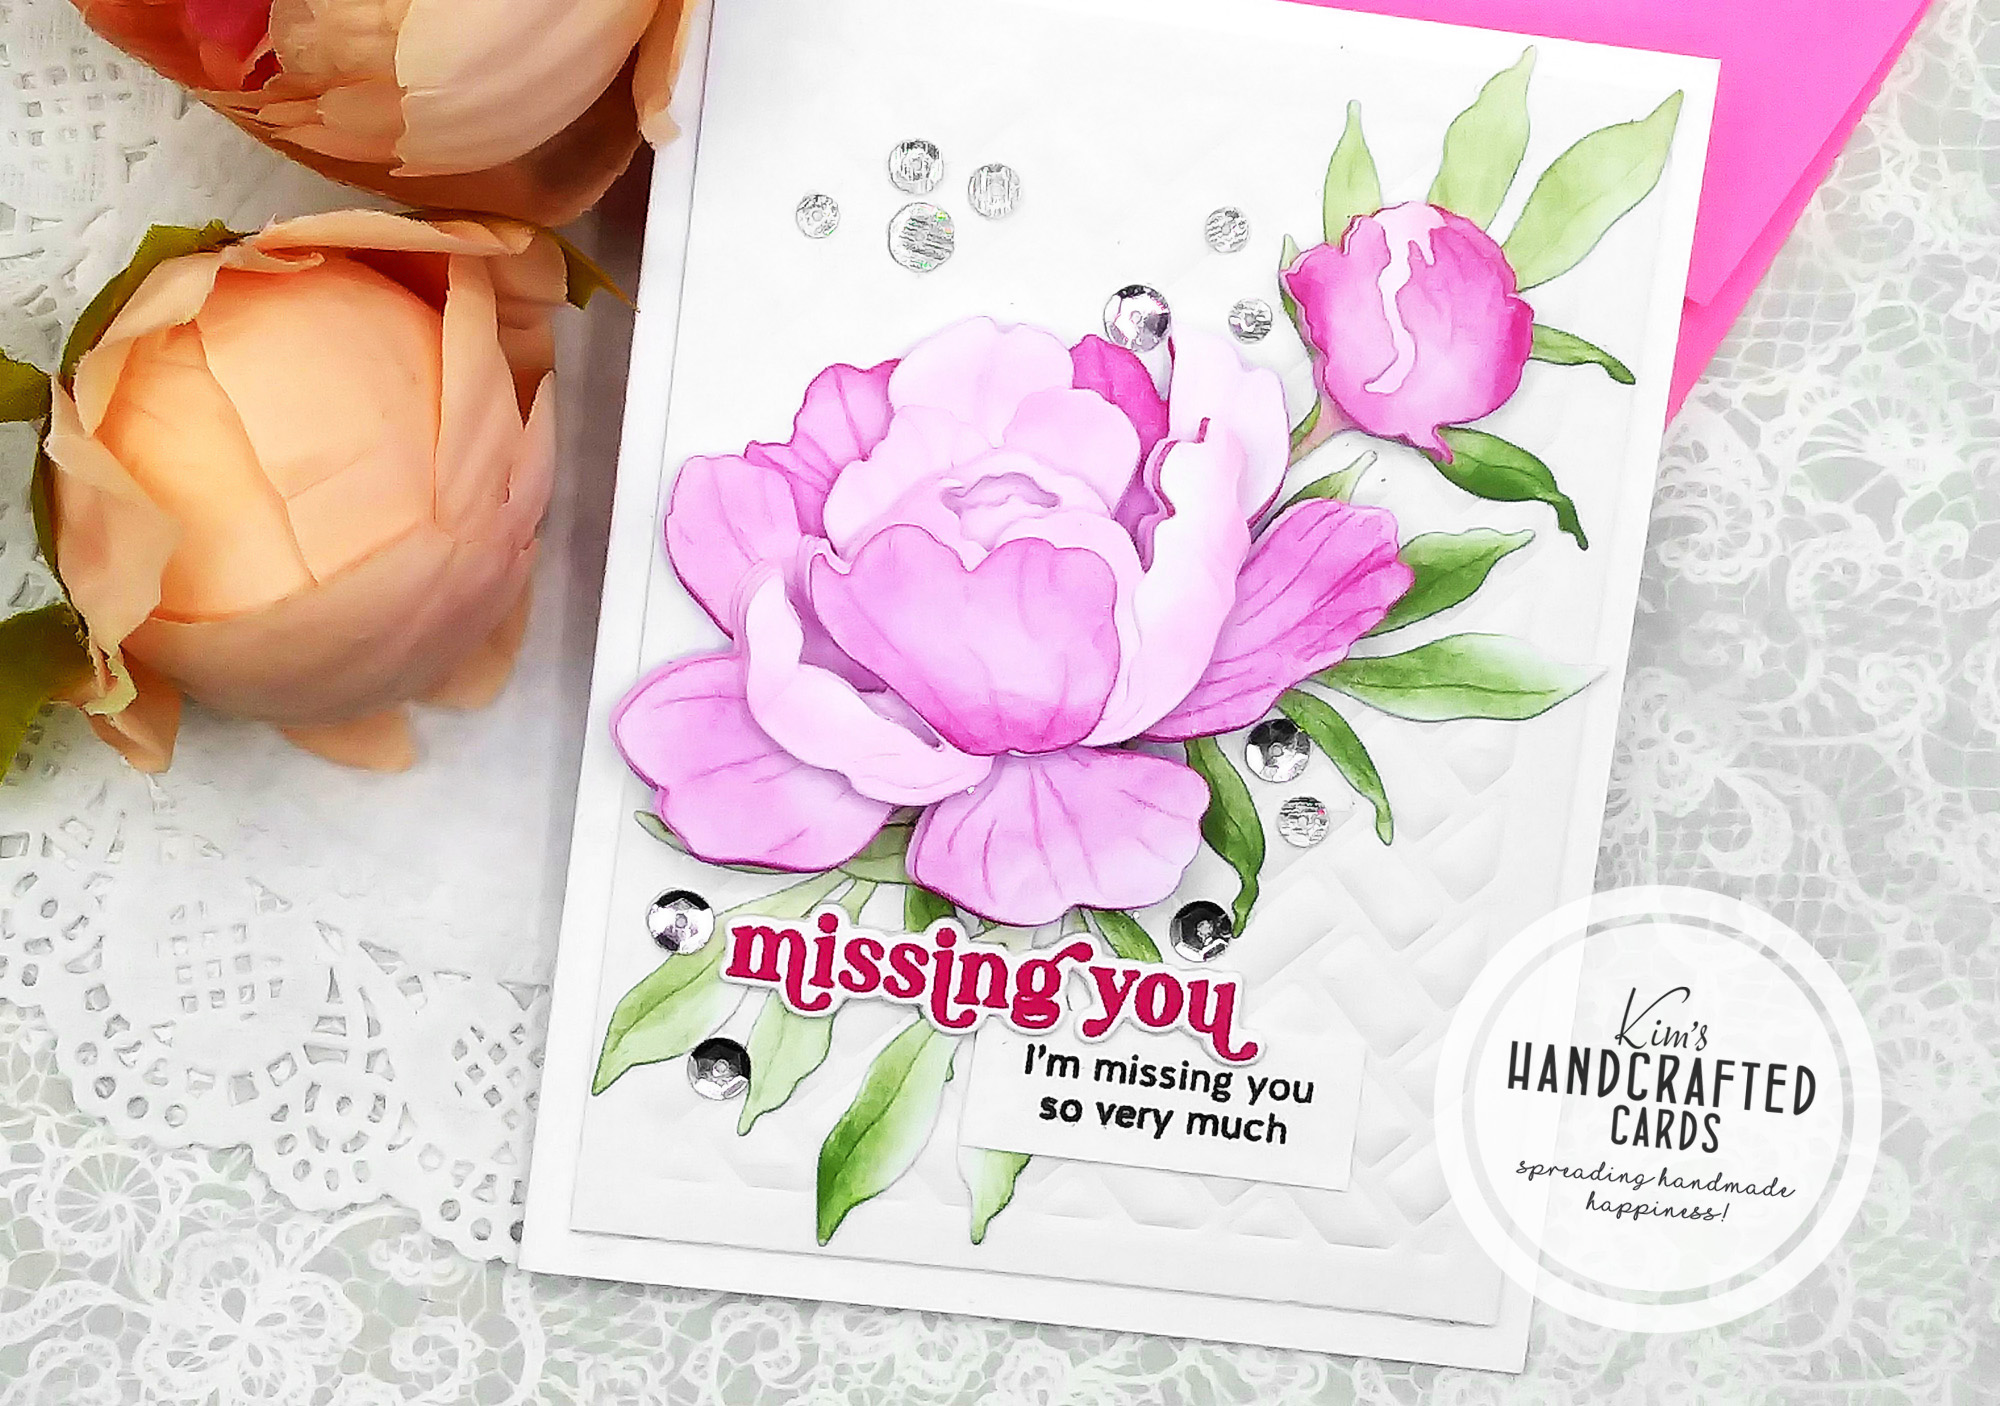
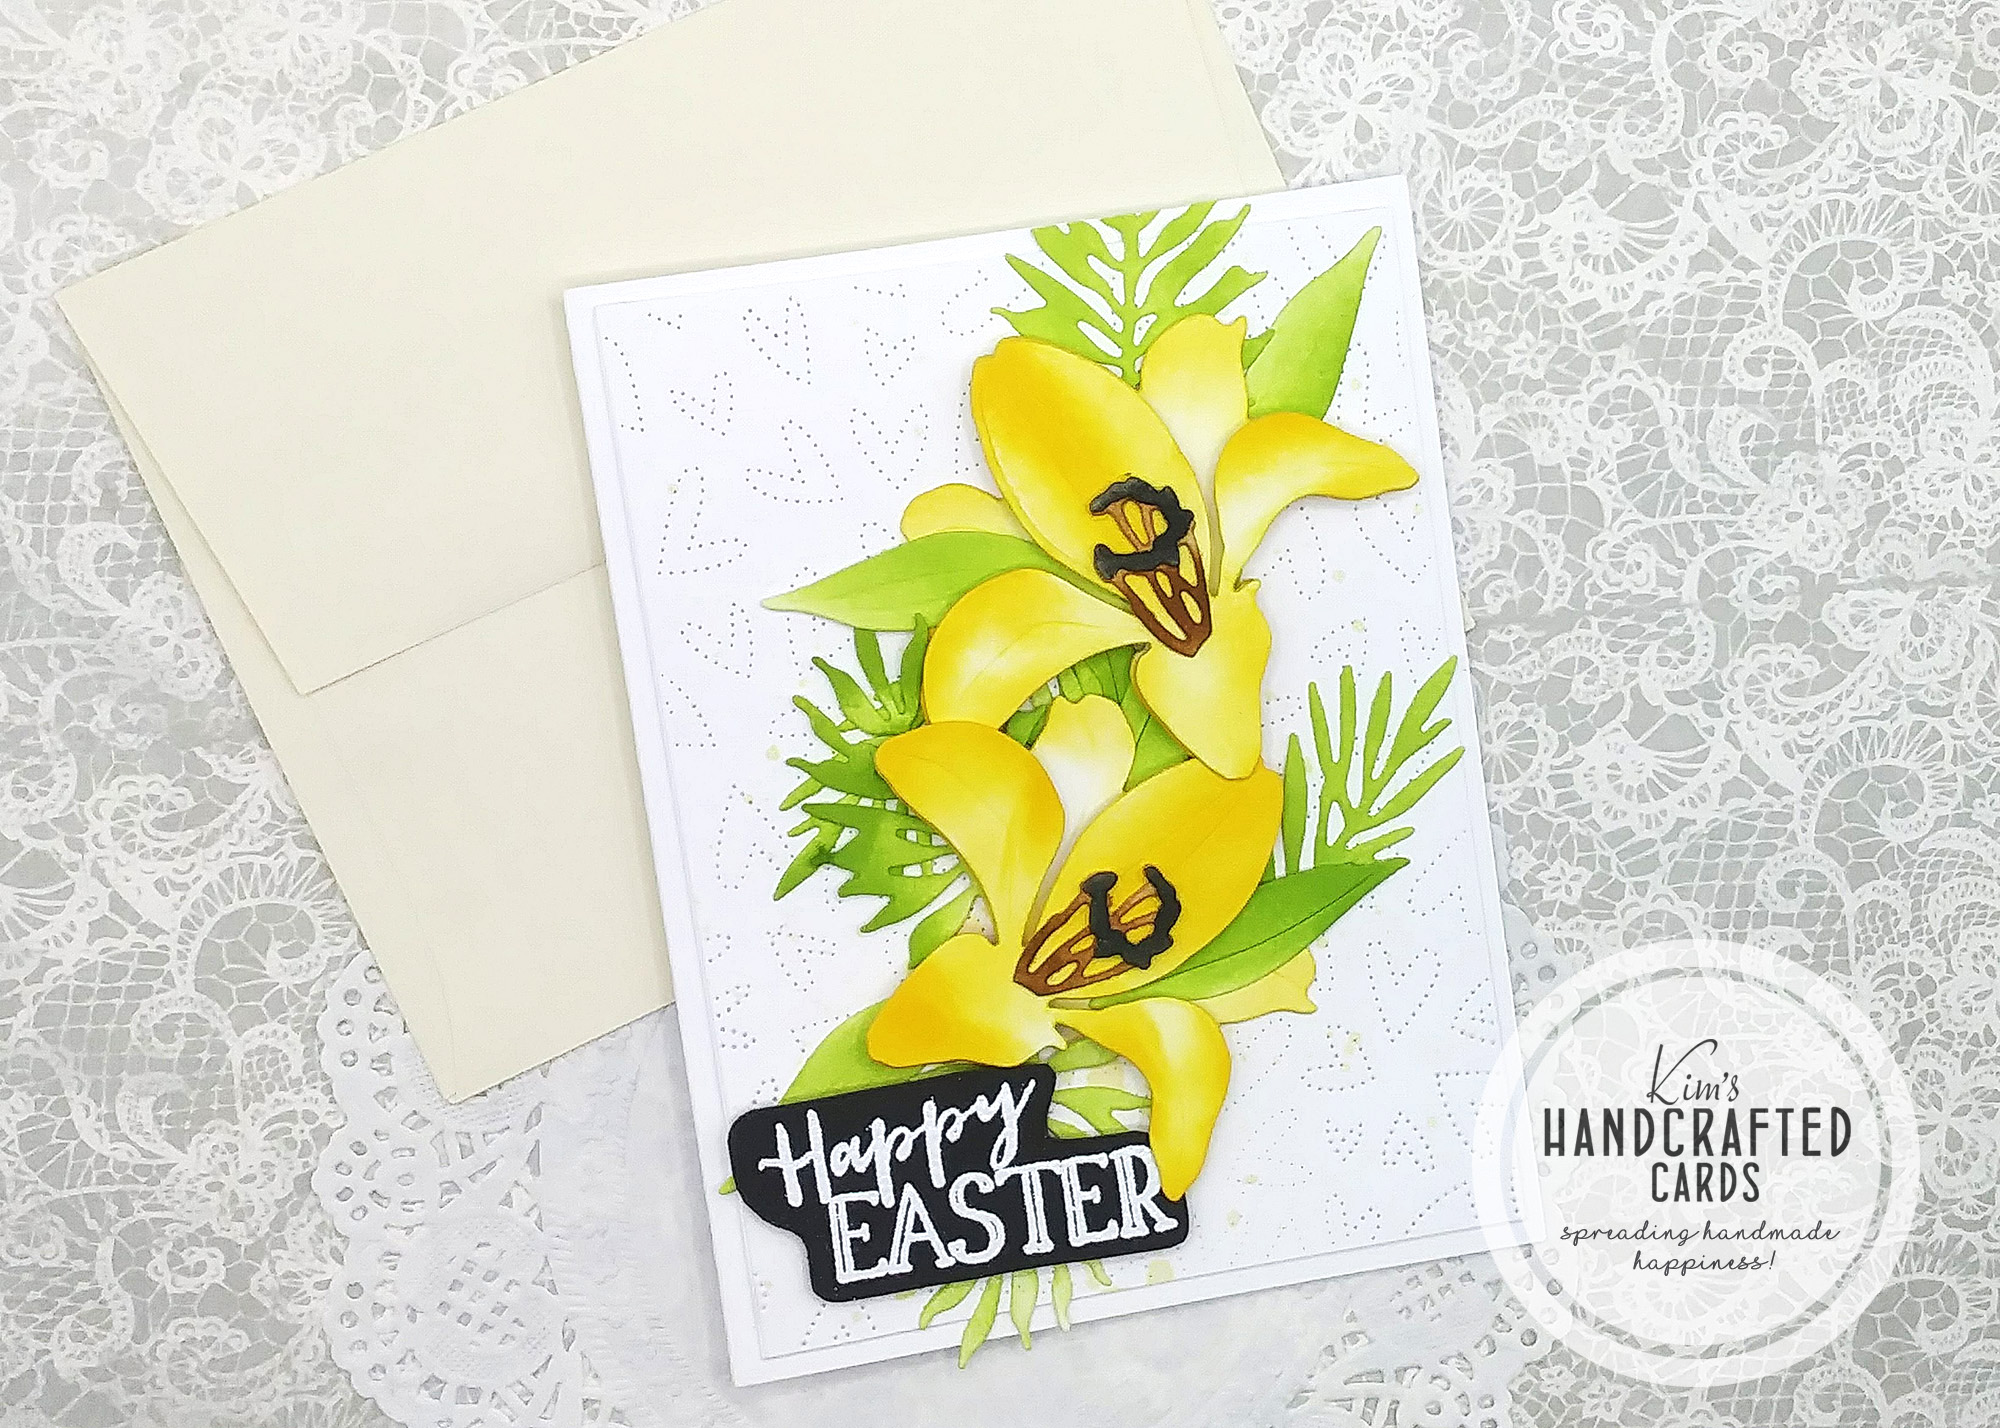
So as I was pondering over this question, I thought about the 2 die sets sitting on my craft table that recently arrived from Honey Bee Stamps! I got the Lovely Layers “Tulips” and “Easter Lily” + the “Fluttering hearts” cover die! And then it hit me! Flowers!!! I LOVE FLOWERS! I reminisced to the times when hubby and I would go out with our cameras for a shooting session and what did I always take pictures of?, FLOWERS! I enjoy die cutting the layers and coloring them either with Copics, Zig Clean Color Markers or ink blending with Distress Inks and water and adding paint droplets to them. I enjoy building dimension under the petals with double-sided foam tape for my cards and adding simple sentiments.
It really was a stress reliever to figure that out! I had been trying so many things in my almost 3 years of cardmaking. I’m surrounded by so many talented artists that I forgot to be me. I wanted my cards to look like theirs and when it didn’t, I felt failure. It was beginning to get to me, being transparent, and I contemplated quitting cardmaking altogether just the other day!
I’m so thankful that God led me to that post on the FB group and I stopped, got quiet and then the answer came! The reality is there’s enough ideas, tips, techniques, tools, products in paper crafting for everyone and anyone to make all kinds of cards. There’s no chance of boredom or repetition between makers. The key is being comfortable with the kind of cardmaker I am and want to be. There’s no shame…if I don’t create box cards with cute critters sticking out or creating that pop up card with a slider or spinner element or if I never become an expert Copic colorist that can turn a flower die into a Picasso on paper! It’s okay to be who I am because all of us can encourage others with whatever cards we make. The key again is being comfortable with the stories we want to tell through our crafting. And, it should ALWAYS BE FUN! So, if you’re reading this and can relate, I hope you will consider what type of crafter you want to be and aim for that.
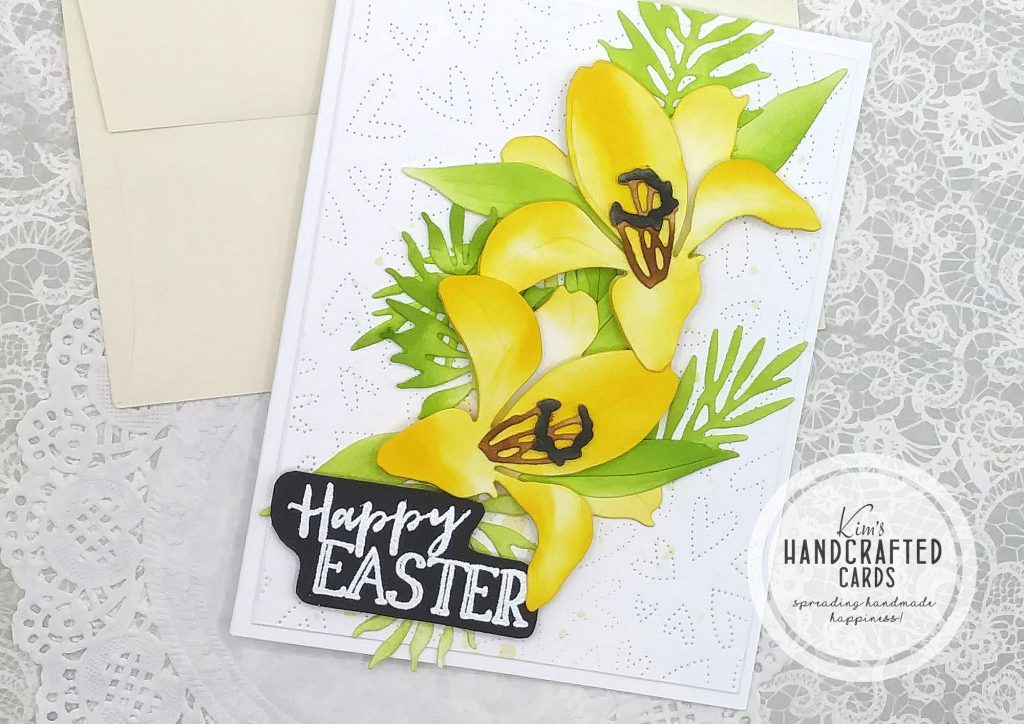
Now with all said, let’s get to the cards I made for Part 1 of this post. I started out with the “Easter Lily” die set. Before that though, I took some white cardstock and die cut the “Fluttering Hearts” to have a nice background and this die has that piercing pattern which is subtle enough that it won’t compete with the card design but adds interest rather than plain white. I trimmed it down to 4″ x 5-1/4″ and adhered it to an A2 size card base.

Aren’t those flowers just beautiful? I die cut all the layers on white cardstock. Then I ink blended these layers using Simon’s Pawsitively Saturated inks in “Citrine” (darkest color) and “Sunbeam” and for the leaves “Pearfection” (darkest) and “Limelicious” (mid-tone). For the centers, I used Distress Traditional Inks, “Vintage Photo” and “Black Soot“.
My Ink Blending Process: I started with the darkest color on the bottom of my petals working up a little and then added my mid-tone color and continued ink blending up the petal and going back to the darkest color around the edges. It adds texture and that ombre look to the flowers.
I glued the layers together with liquid glue and then began to work on my sentiment, this came from a stamp set I have that I bought on AZ (couldn’t find it to link it 🙁 ). I white heat embossed it with Gina K. Designs’ fine white embossing powder over Simon’s “dark chocolate” cardstock. I fussy cut it! YES!, I did with my new scissors and placed everything on my card panel.
And that finishes my card! I LOVE how it turned out, it is just Me and how I like to make cards! Now, I have a direction and I can be more comfortable with future card designs 🙂

- Honey Bee Stamps “Lovely Layers” Easter Lily Dies here or here
- Honey Bee Stamps “Fluttering Hearts” Cover Die here or here
- Simon Says Stamp Pawsitively Saturated Inks – Collection #1
- Distress Inks “Vintage Photo” and “Black Soot“
- Bearly Art Liquid Glue
- EK Tools Precision Scissors (great for fussy cutting)
- Simon Says Stamp “Dark Chocolate” cardstock
- Accents Opaque 100 lb. White Cardstock
- Gina K. Designs Fine White Embossing Powder
- EK Tools Anti-static Powder Tool
- VersaMark embossing ink
- Wagner Heat Gun