Hi my Crafty friends! Today, I’m sharing a 9-card project that I have been working on for more than a year! Yeah, you read that right! I started this early last year and I’ll talk about the inspo for this project in a bit. Anyway, I made the first 2 cards I think and then put it down because I was working on other things at the same time.
Well, I’d pick it up here and there and work on it but so many things happened in my personal life that I had to put the project on hold. Well, as I am trying to get back to some kind of normalcy, I went through my pending projects and saw this one. I made up my mind to finish it this week. Happy to say I did!
The inspiration came from my crafty friend, Ilda from “I Love Doing All Things Crafty“. Here’s the link to her post so you can see her beautiful cards! She, like myself, adore Honey Bee Stamps’ Lovely Layers die collection. I have 10 including their Greenery set. When I saw her cards showcasing each flower, I knew I wanted to make some too.
For my cards, I used inks from Simon Says Stamp, but as I don’t have all their Pawsitively Saturated colors, I used Pink Fresh Studio cause I have all their inks.
This was such a fun project and worth all the work!
Okay, let me apologize upfront, I did not write down all the specific colors I used on each flower. I am really trying to break that habit! But any colors you choose will make these flowers pop, they are so beautiful!
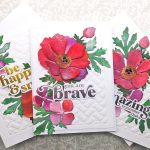
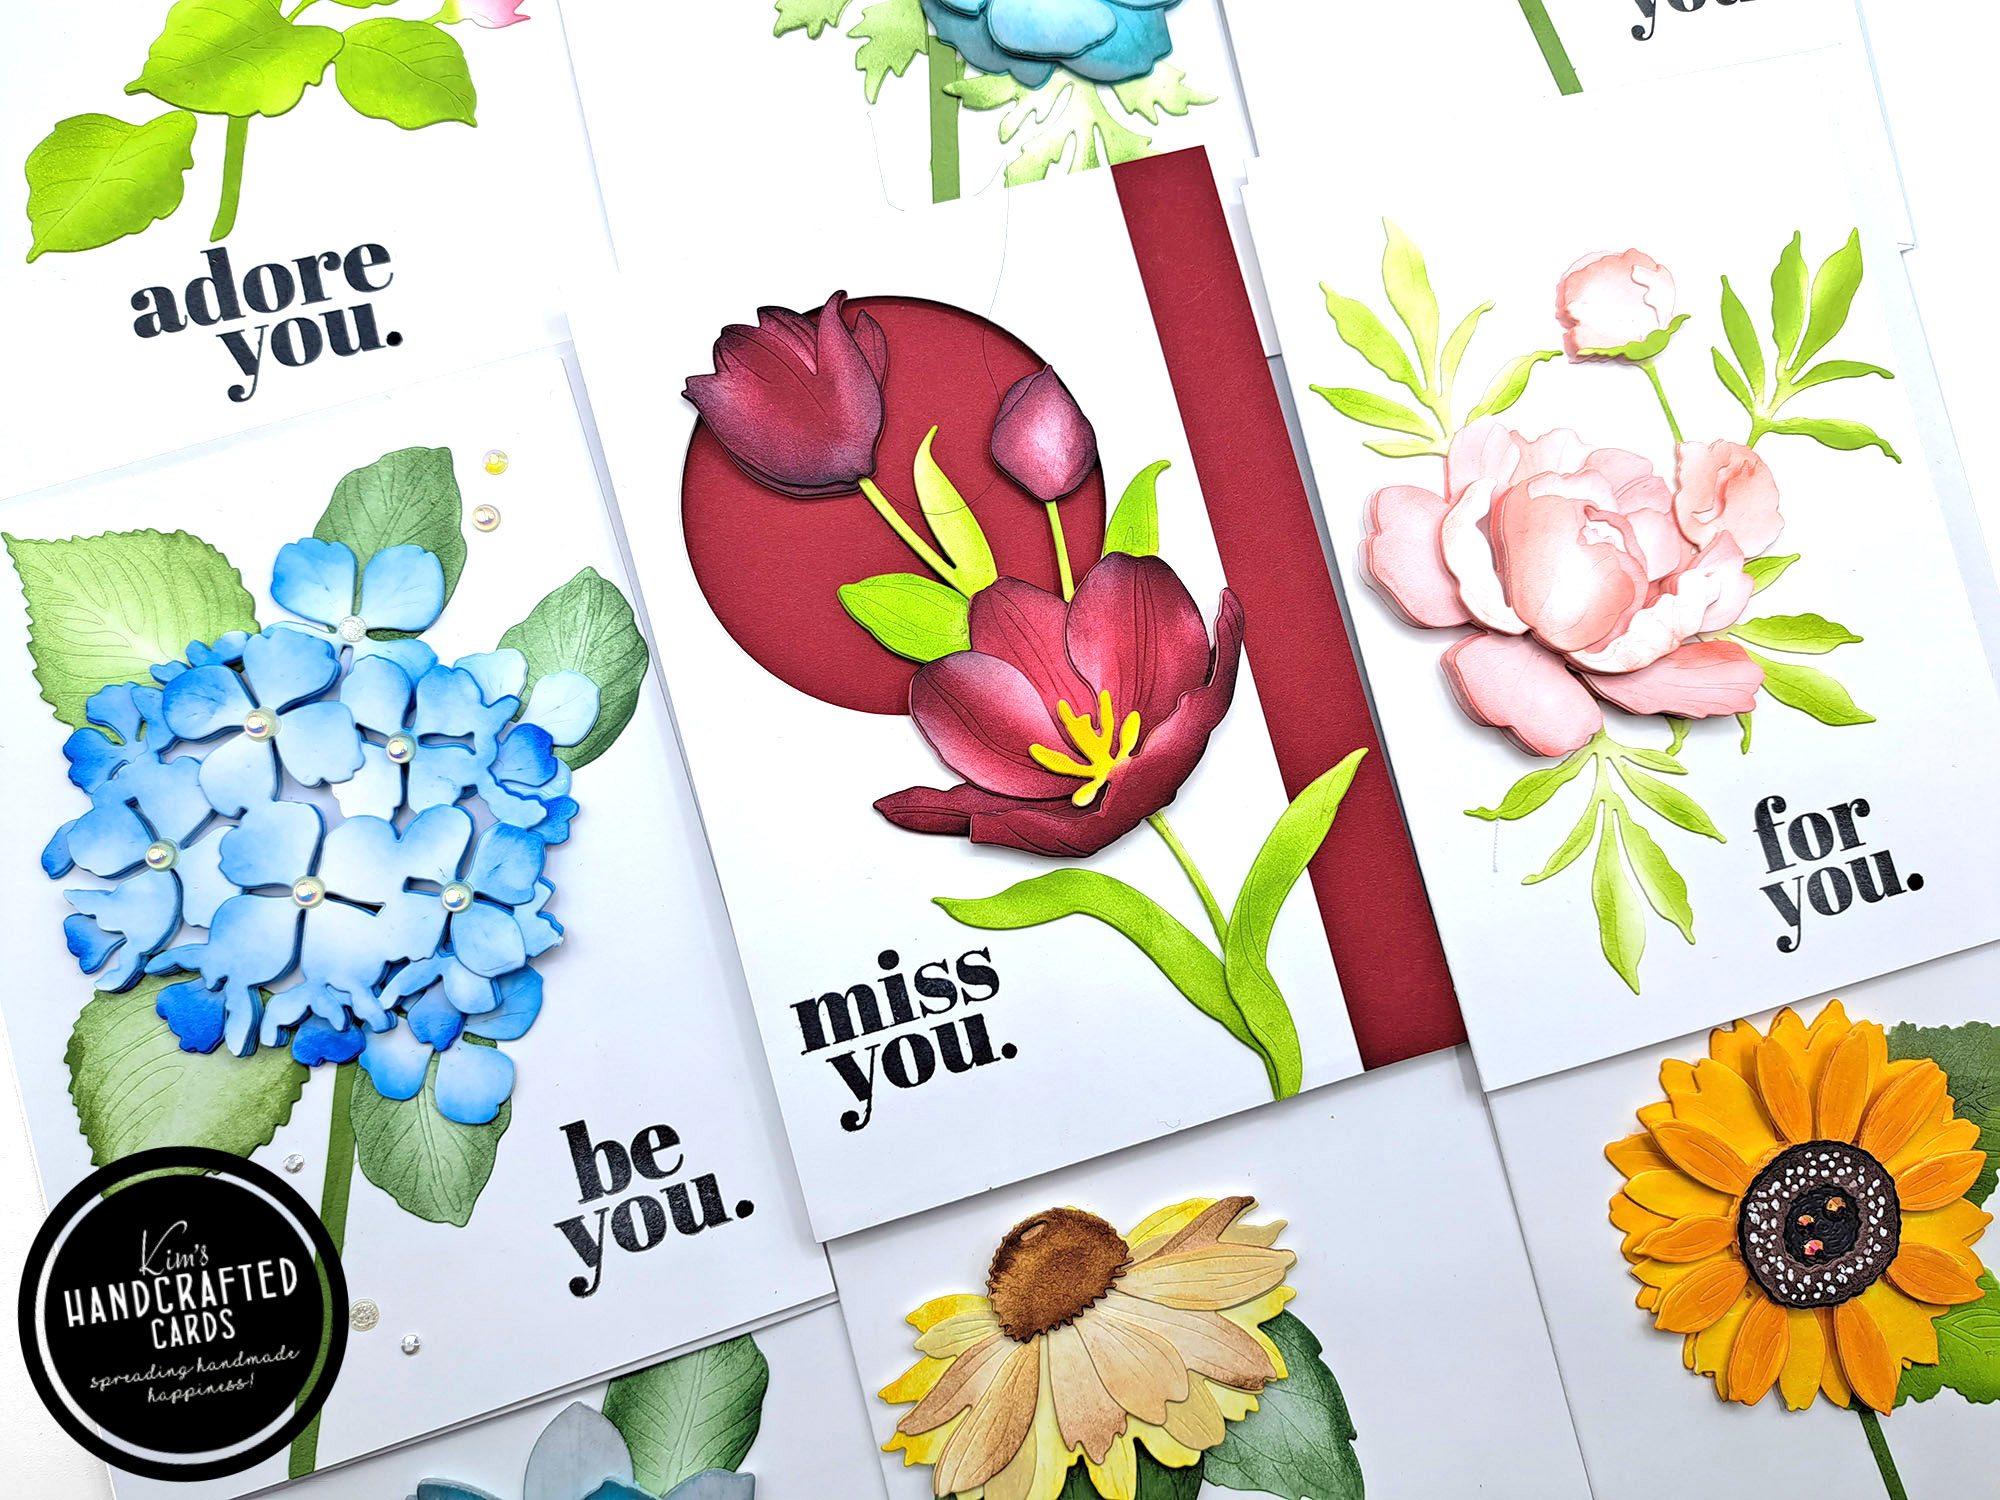
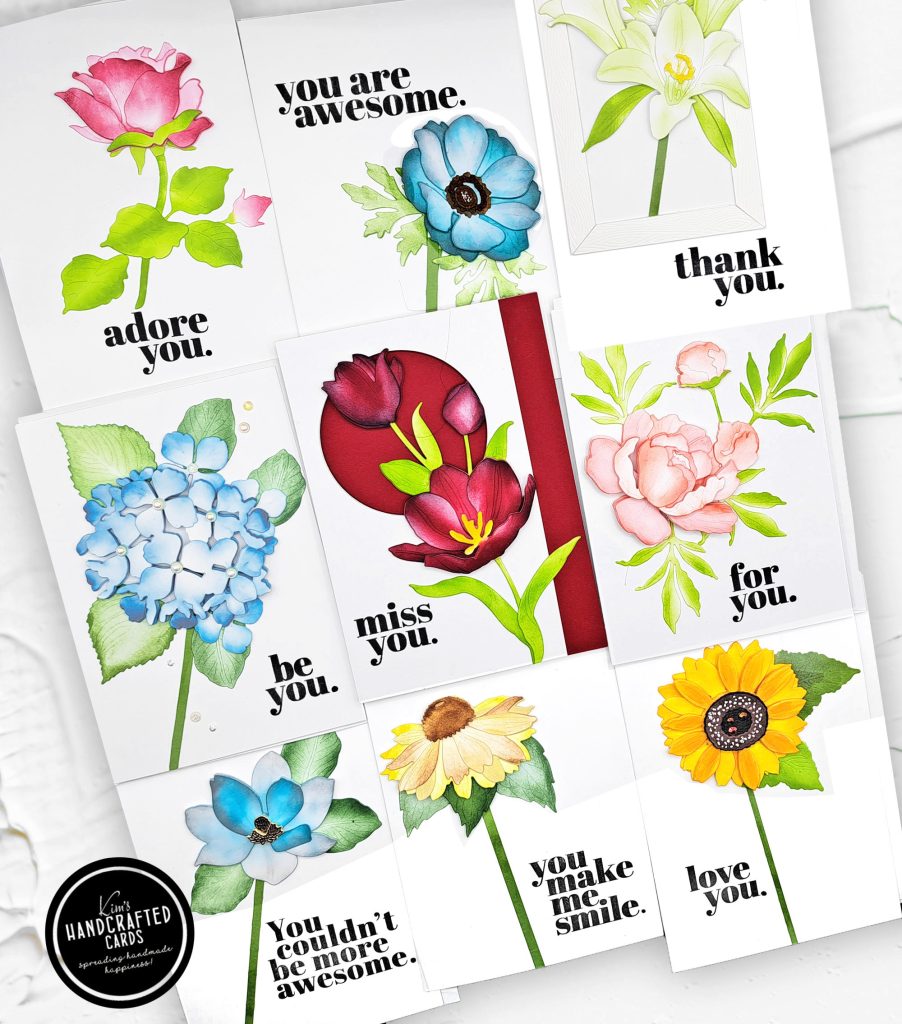
To do this project, I used the assembly line technique. First off, these are all 5 x 7 cards. I usually stick with A2 card size, but the flowers are large and I wanted to have dimension and really show more of them plus I also wanted to create stems like Ilda did so a larger card size worked best.
So, I got started with making my card bases. I used Hammermill’s 100 lb. smooth cardstock. It’s great for stamping and foiling too. I put those aside and trimmed some strips of green cardstock for the stems. I ink blended them with Simon’s “Pearfection” Saturated Ink and placed those aside.
Next, I wrote down each flower and researched what colors I wanted each one to be. Then, I worked on the flowers one by one. I die cut them all with white cardstock and at least 3 times for each petal to add the dimension.
My favorite part was ink blending each layer and gluing them down to form the flowers. I used “limelicious” and “pearfection” for all my leaves. The centers were all colored differently. Next it was time to form the cluster and how it would look on the cardbases. All but 1 are one-layer cards. I used Press ‘N Seal to keep the clusters together and set aside so I could do my stamping.
For my sentiments, I used Simon’s “Thankful Flowers” and “All About You” sets and Simon’s intense black ink. I wanted each card to have its own look, so you’ll see that I placed the sentiments in different places as well as the flowers. So, let’s talk about each card:
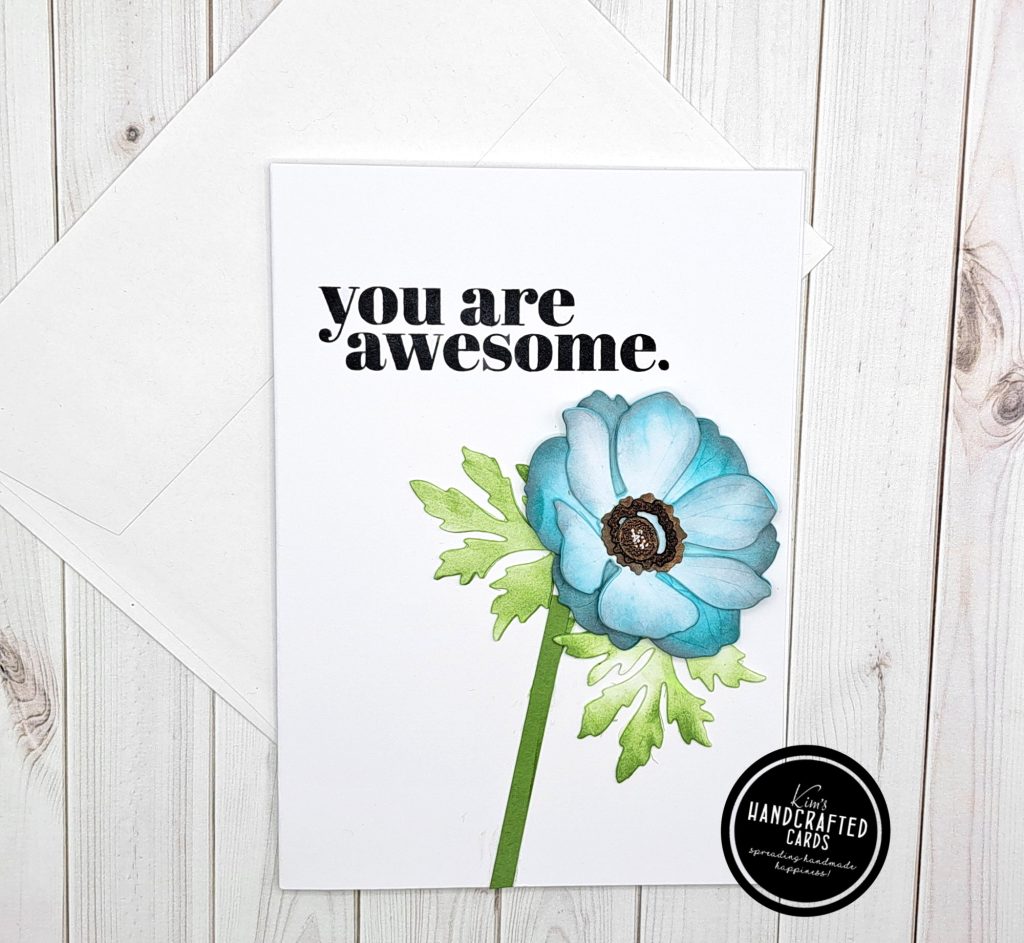
With the Anemone, I chose Simon’s Ocean and Seafoam Pawsitively Saturated Inks.
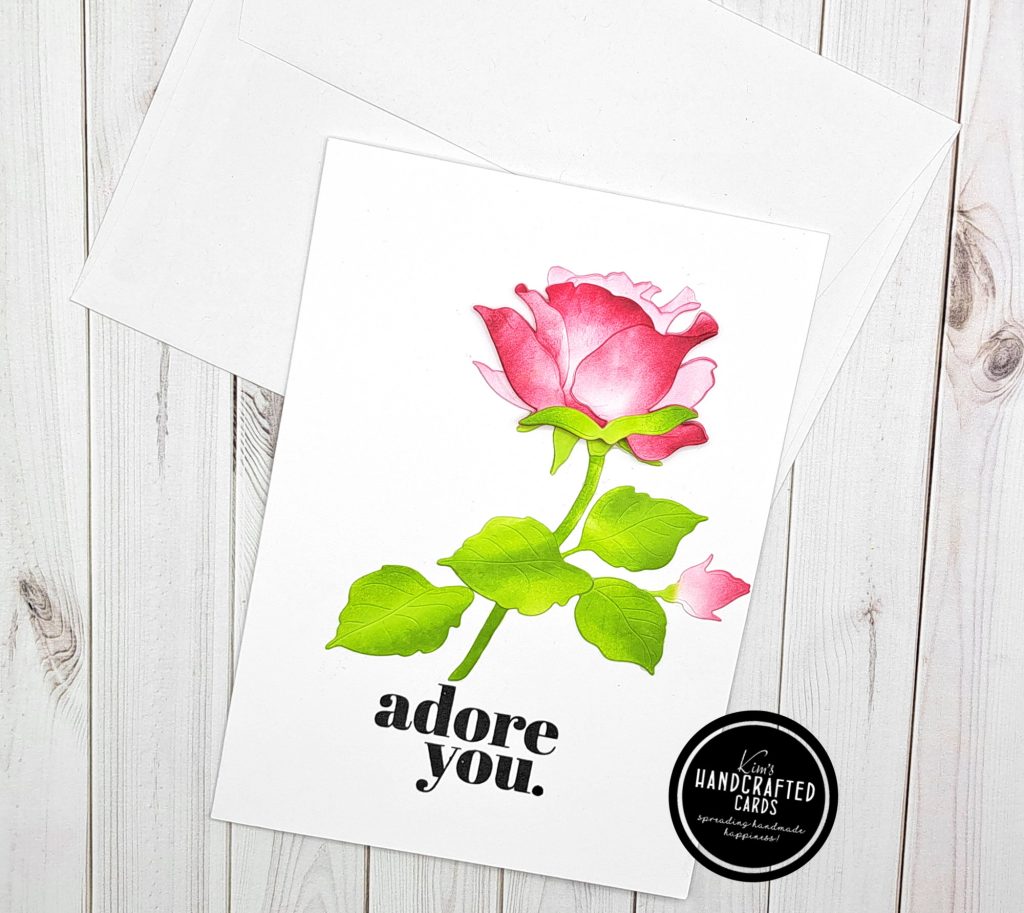
I mixed Pinkfresh Studio’s Raspberry and Bubble Gum inks.
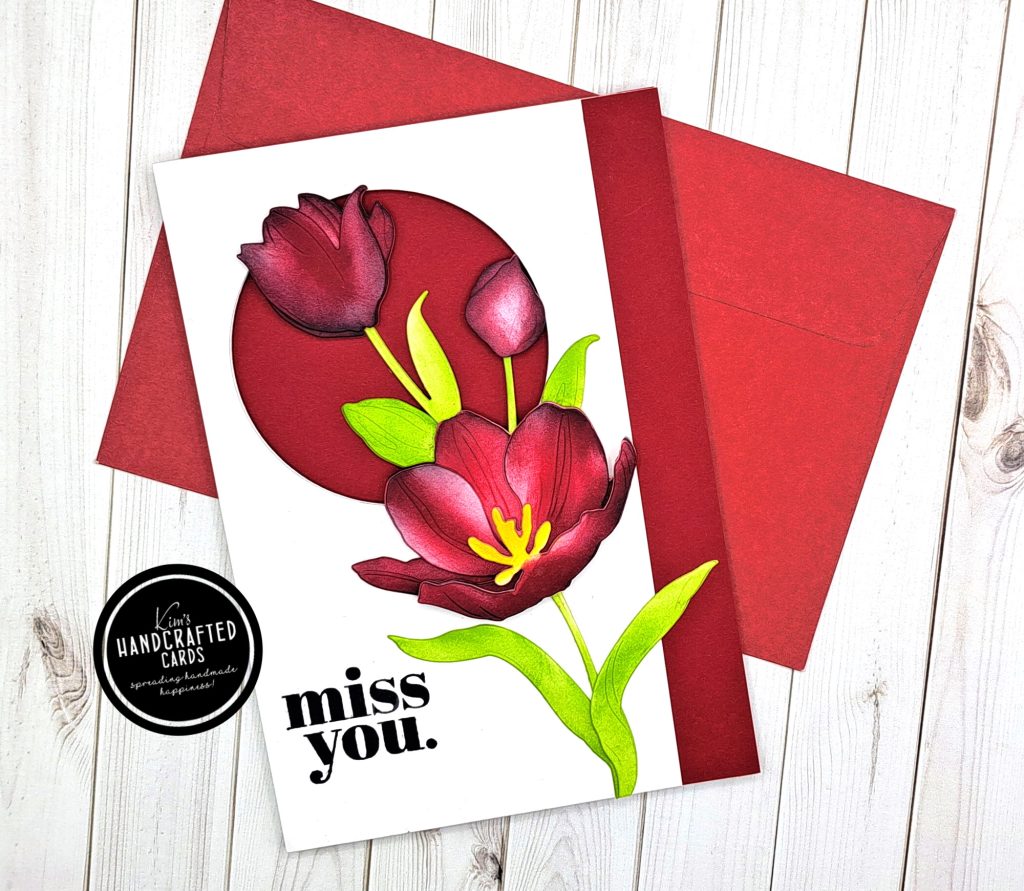
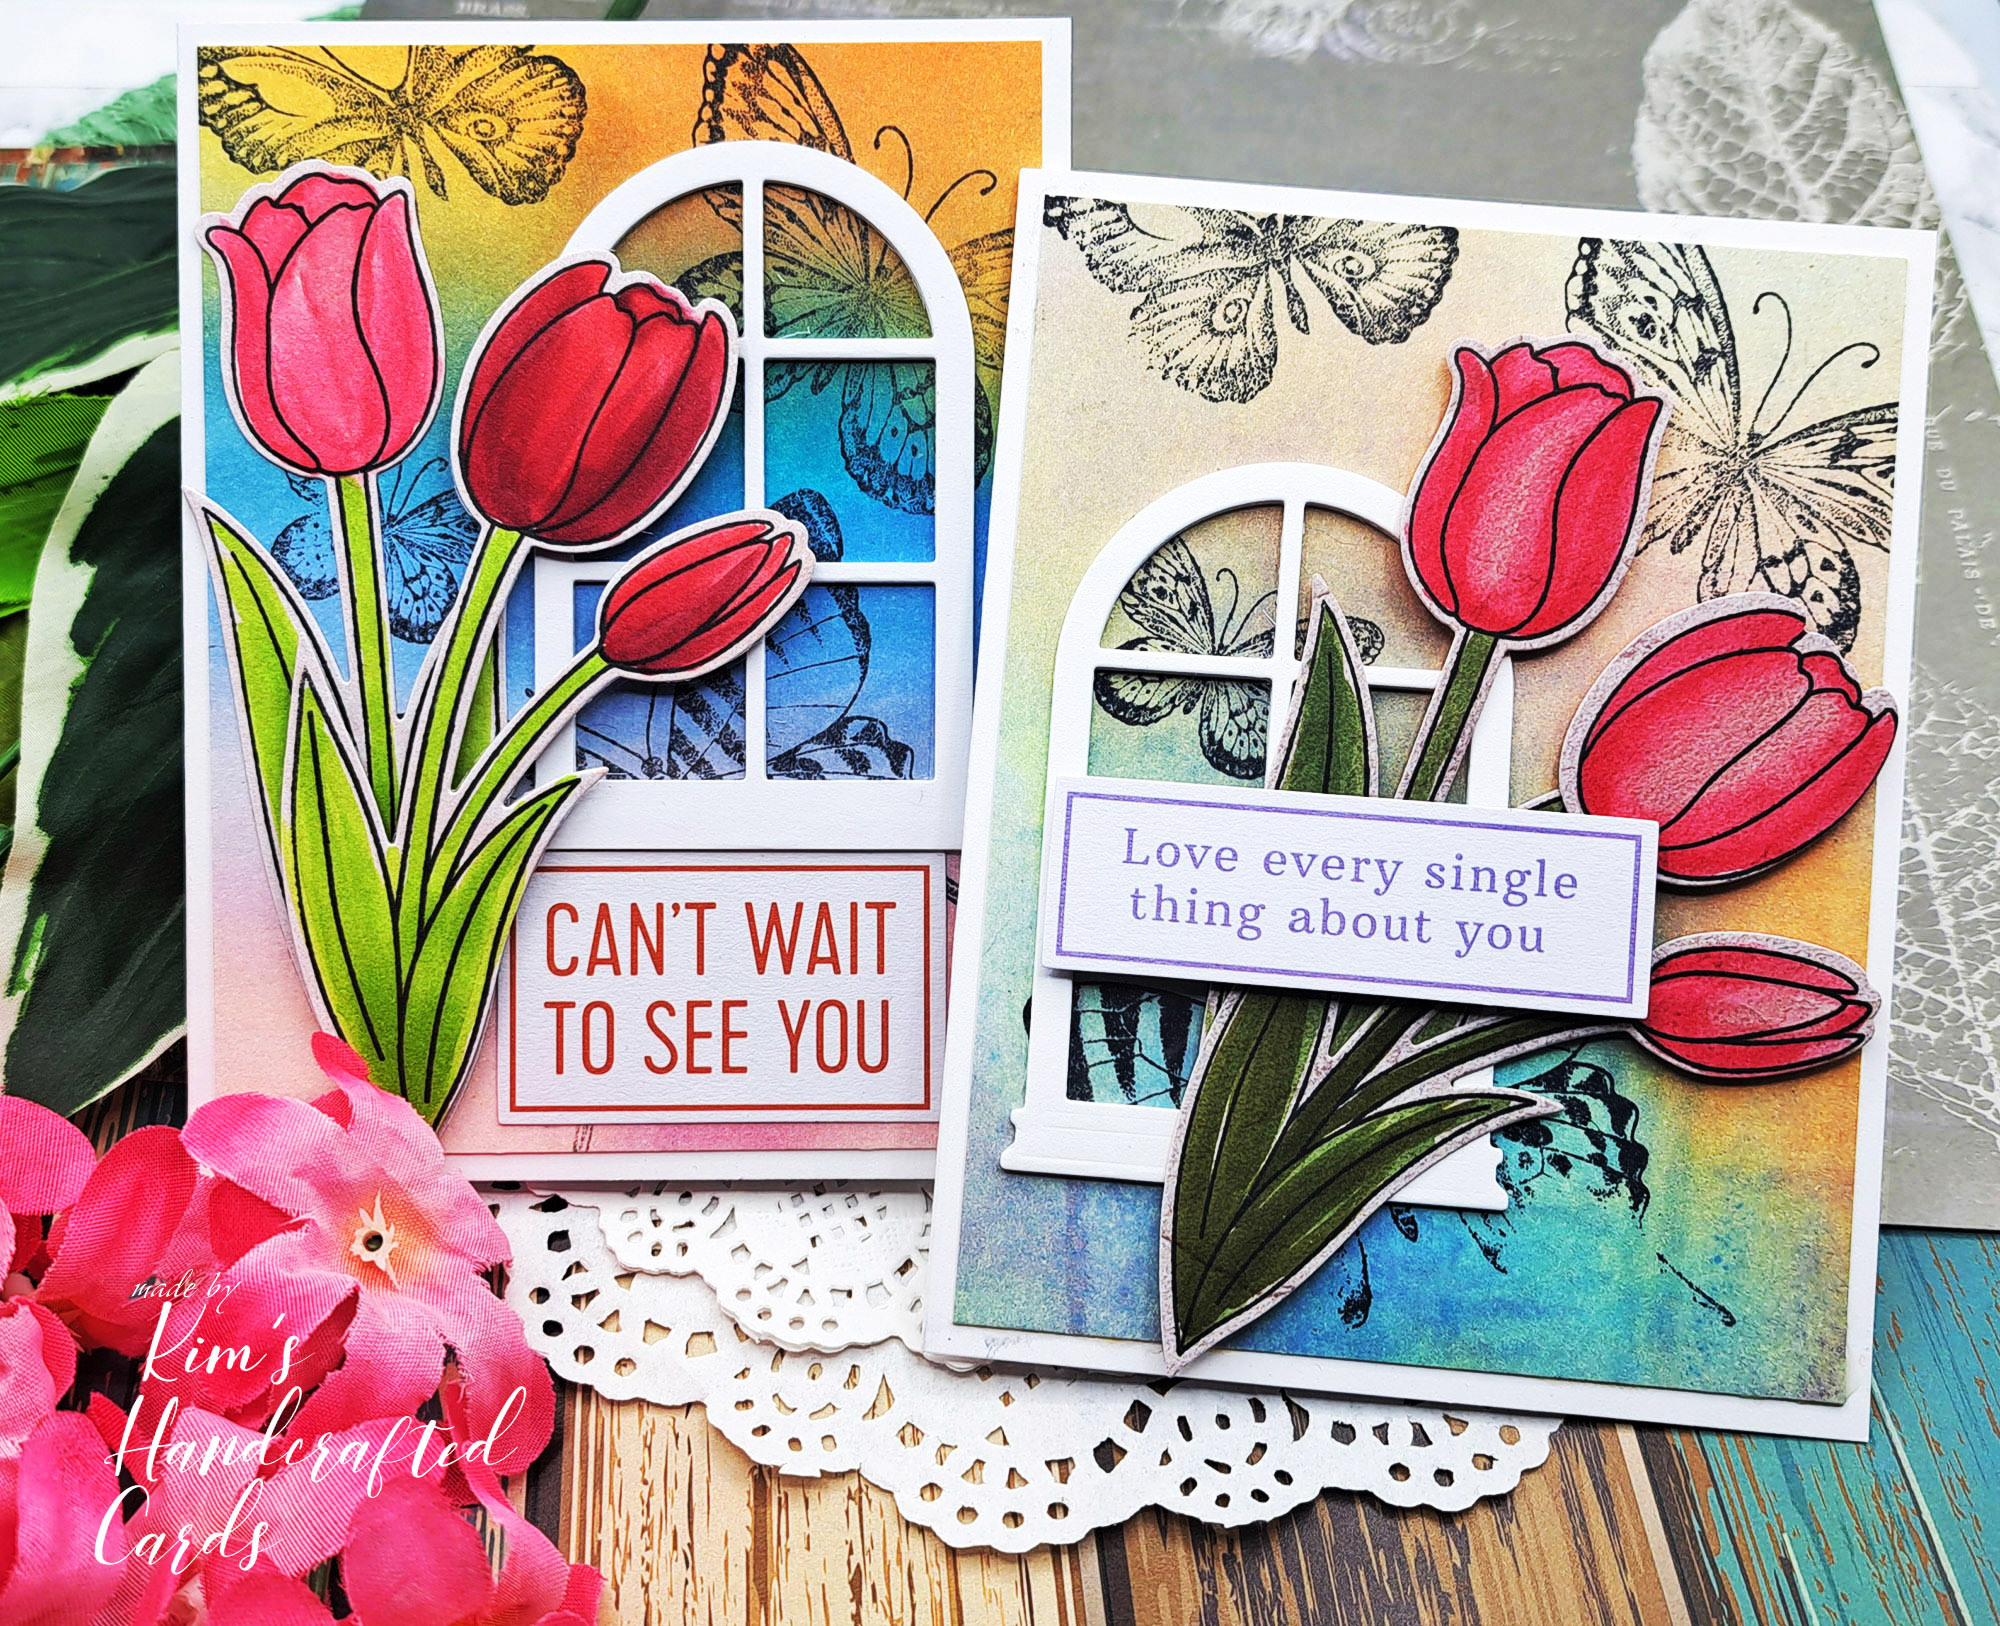
This card by far took the longest and it didn’t go the way I wanted. I made a huge mistake but had gone too far to start over. For Plan B, I decided to make a circle window cut out and place red cardstock behind the circle for part of the tulip to sit inside it. I trimmed down another strip of red cardstock and added it to the right side of the card.
So, it’s not 1-layer, in fact, it’s got some serious dimension. I had to use a larger envelope to fit it in. But, it turned out to be my favorite of all these cards! I used Simon’s Cherry and Watermelon Pawsitively Saturated Inks.
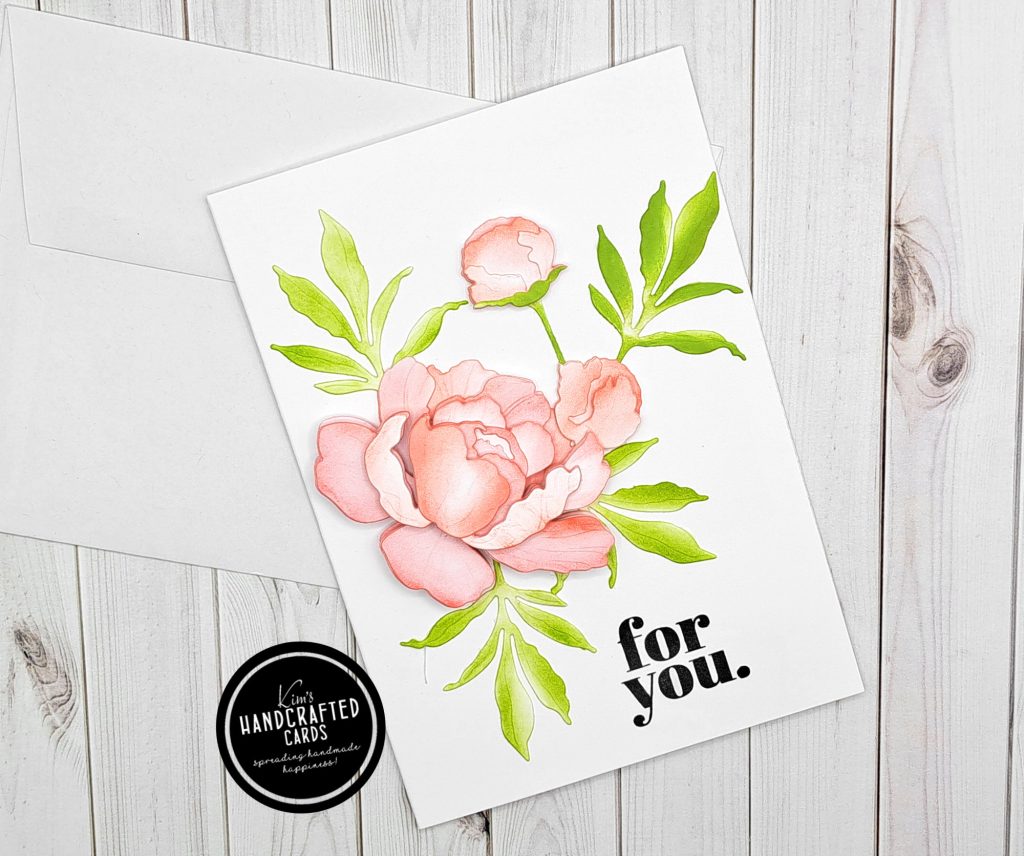
For this pretty peony, I went with a peachy color using Simon’s “Cheeky” and “Blush” Pawsitively Saturated Inks.
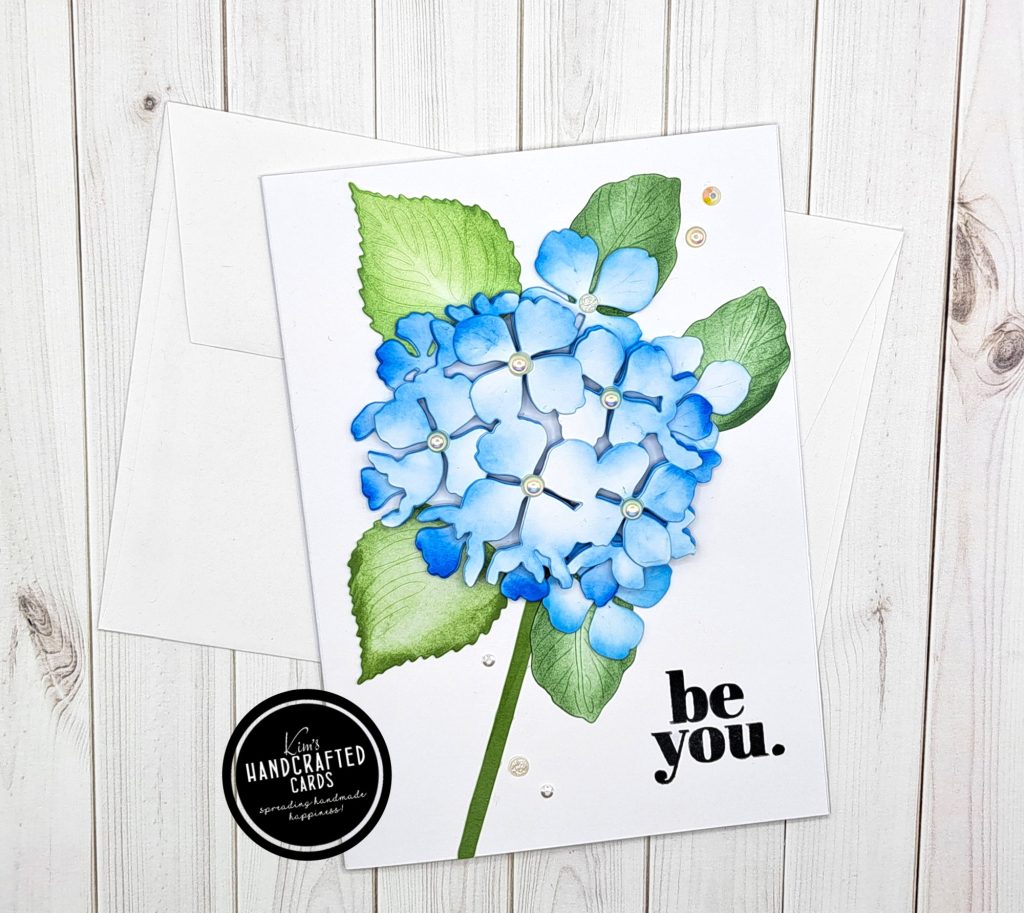
I love the hydrangea, I decided to go with blues using Pinkfresh Studio’s “Summer Shower” and “Seaside” inks.
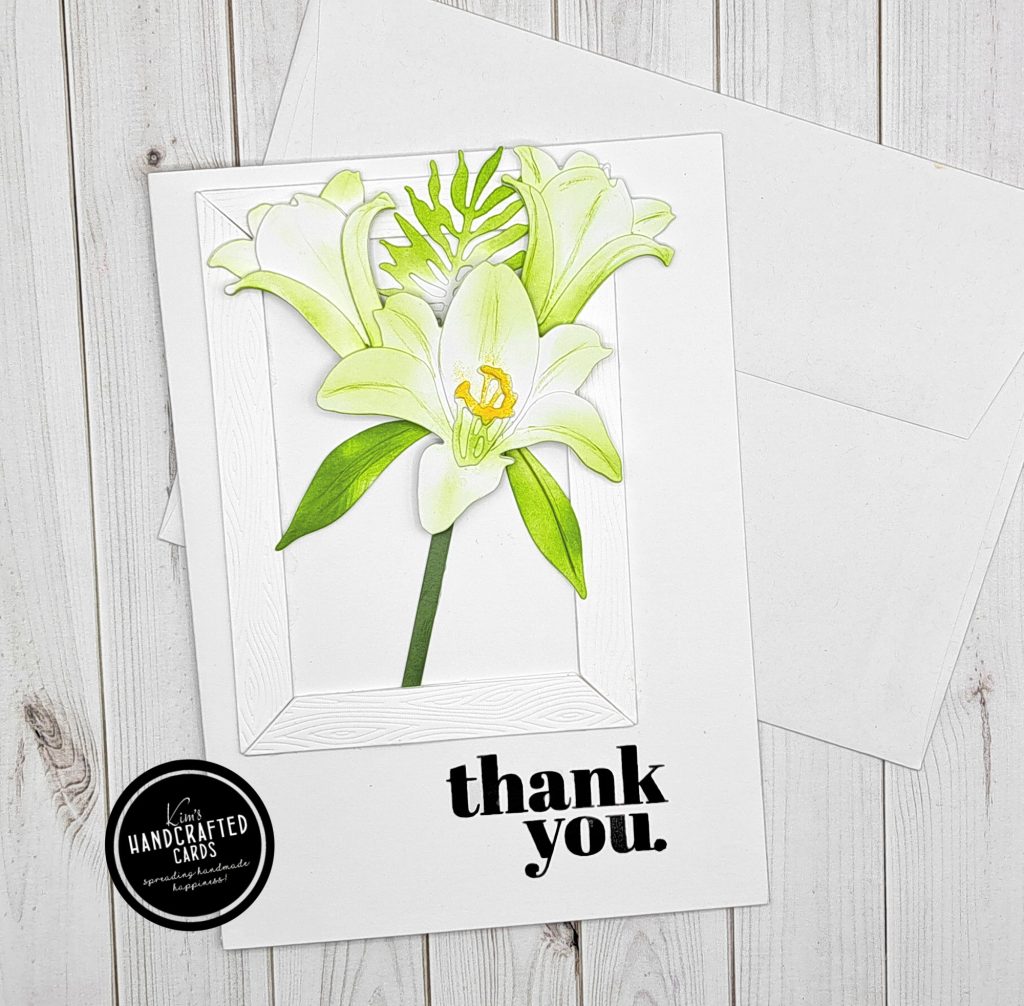
For the Easter Lily, I definitely wanted white but still add some color, so with a really light hand and masking, I added a little green to the centers of the petals with Simon’s “Celery” ink. I also added a little more green with my Prismacolor “Limepeel PC1005” colored pencil.
I also added Honey Bee Stamps Wood Builder frame die to frame the flower. I die cut those pieces twice for a little dimension so this card is not 1-layer too.
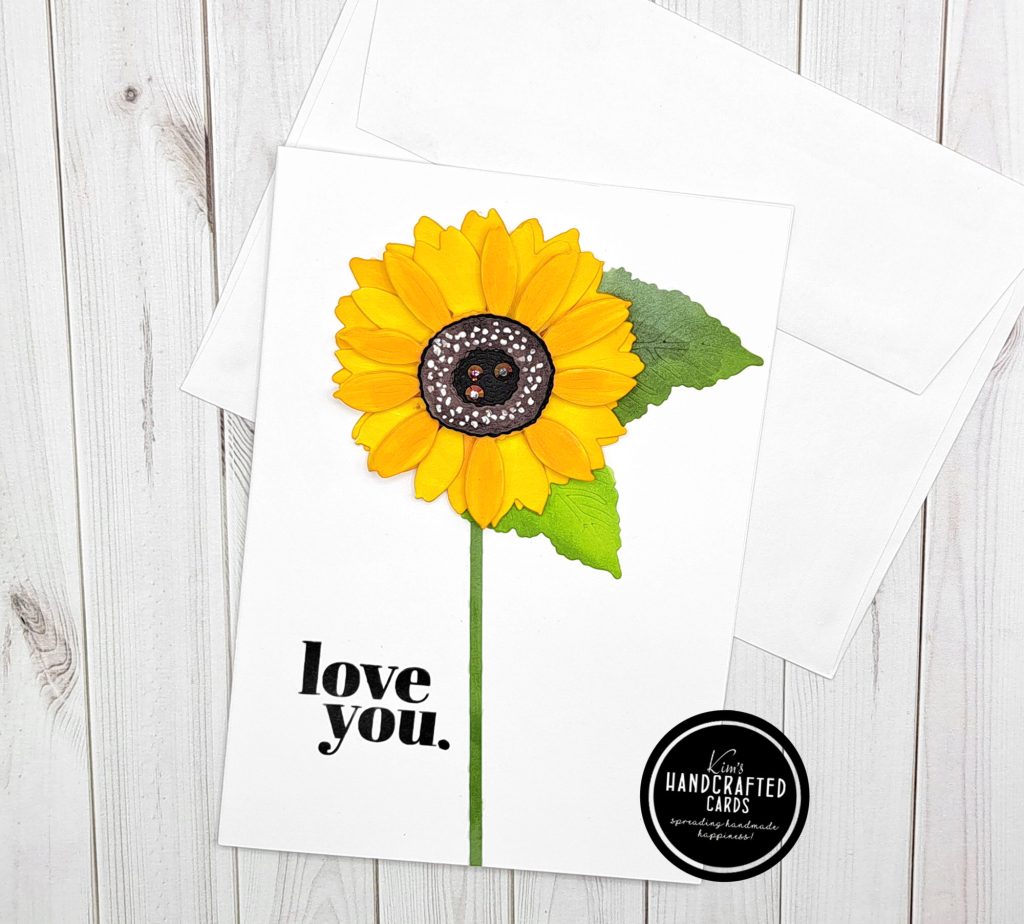
For the sunflower, I went with Simon’s “Sunbeam”, “Citrine” and “Lemonade”. For the center, I used Pinkfresh Studio’s “Espresso” and used my white gelly roll pen to draw. Added gemstones as well.
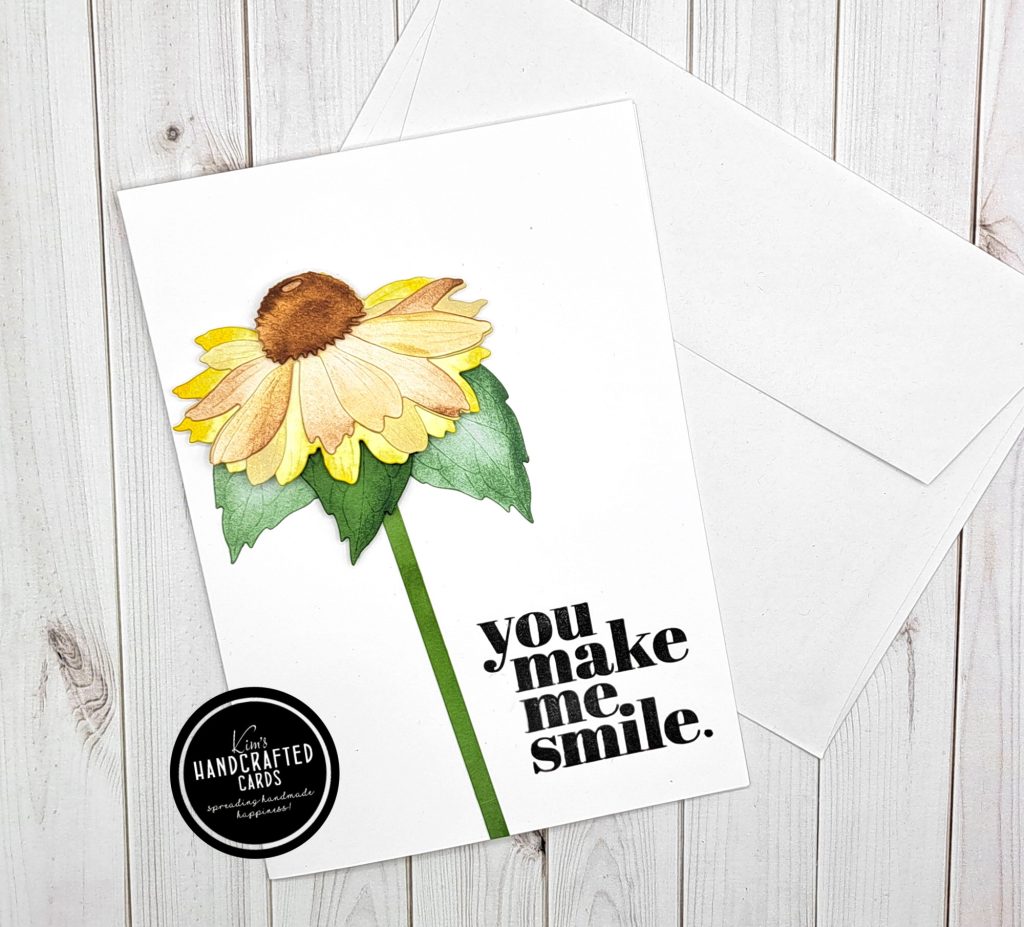
The coneflower is one of my favorites to color, I kept this lighther than the sunflower with a light hand and mixing “Lemonade” and “Sunbeam” Pawsitively Saturated Inks from Simon with a bit of Pinkfresh’s “Espresso” ink.
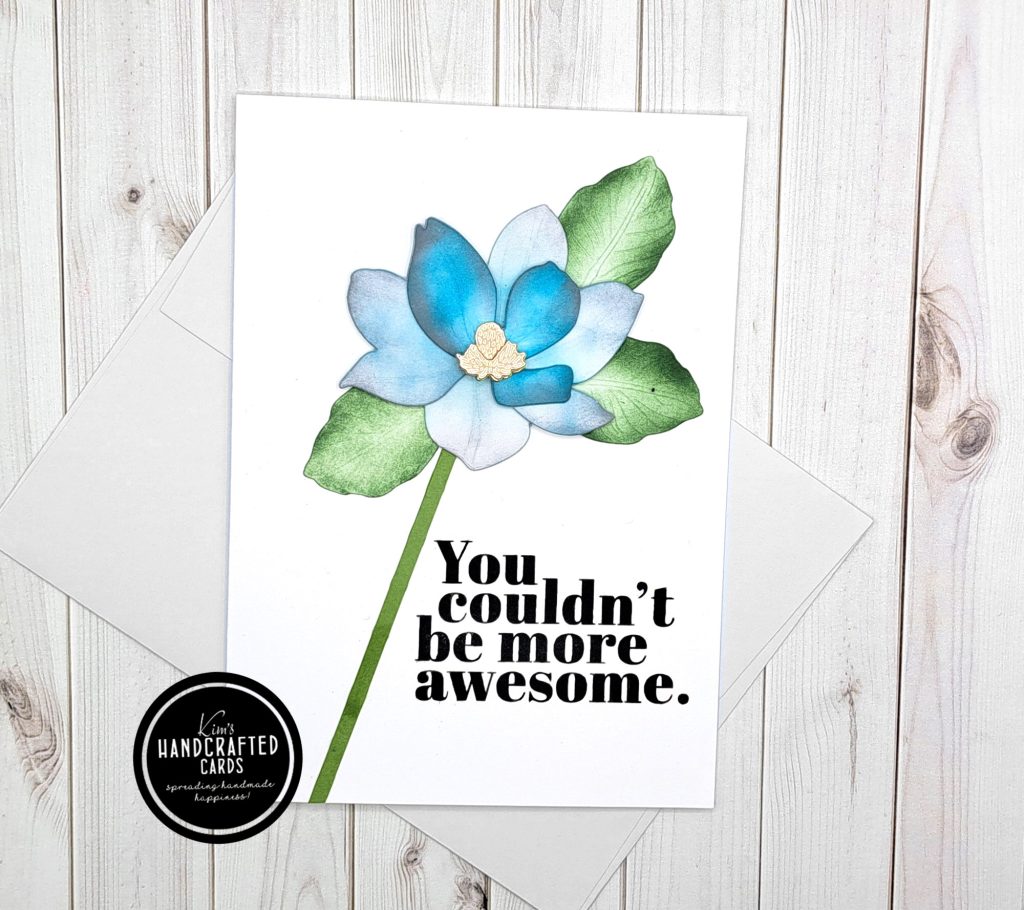
For the magnolia, I went with a combo of teal and blue using heavier hand for the top petals and lighter for the rest. Simon’s “Seafoam” and “Surf” was used for the light colors and “Ocean” for the top layers. The center was die cut with Simon’s gold Metallic cardstock.
I’m happy that I finished this project. Of course, I’d make some changes to my ink blending if I were to make some of these cards over again. However, I’m happy how they turned out. Tell me which one is your favorite!

- Honey Bee Stamps “Lovely Layers” Collection
- Honey Bee Stamps wood frame builder
- Pinkfresh Studio Inks
- Pinkfresh Studio Jewel mix
- Pinkfresh Studio “Espresso” ink
- Simon Says Stamp Pawsitively Saturated Inks Gradients #1
- Simon Says Stamp (cherry, watermelon) part of Trio #11 Pawsitively Saturated Inks
- Hammermill 100lb. Cardstock
- Waffle Flower Crafts “Additional Circles” Nested Dies
- Simon Says Stamp Exclusive “Thankful Flowers” Stamp Set
- Simon Says Stamp “All About You” Stamp Set, both stamp and die here
- Simon Says Stamp “Intense Black” ink pad
- Simon Says Stamp “Schoolhouse Red” cardstock
- Simon Says Stamp “Green Leaf” Cardstock
- Simon Says Stamp Gold Metallic Paper
- Prismacolor Colored Pencils 72-Set
- Blending Brushes, large size here, tiny size here
- Bearly Art Liquid Glue
- Gemini Jr. Embossing & Die Cutter here or here, get the new Gemini here
- Misti Stamp Positioner here, here, here or here
- Glad Press ‘N Seal (3-pack)
- Tim Holtz trimmer here (Ranger), here (Scrapbook.com) or here (AZ)
- White #10 Gelly Roll Pen
- White double-sided foam squares