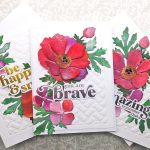
Hey Crafty friends! Today, I’m sharing 2 new cards I finished night before last using an old technique that I had struggled with which is distress resist. At the time, I was watching some YT video tutorials when something hit me to try this technique again with a background stamp that I so love! Plus, late last year I purchased 2 new Versamark Ink Pads.
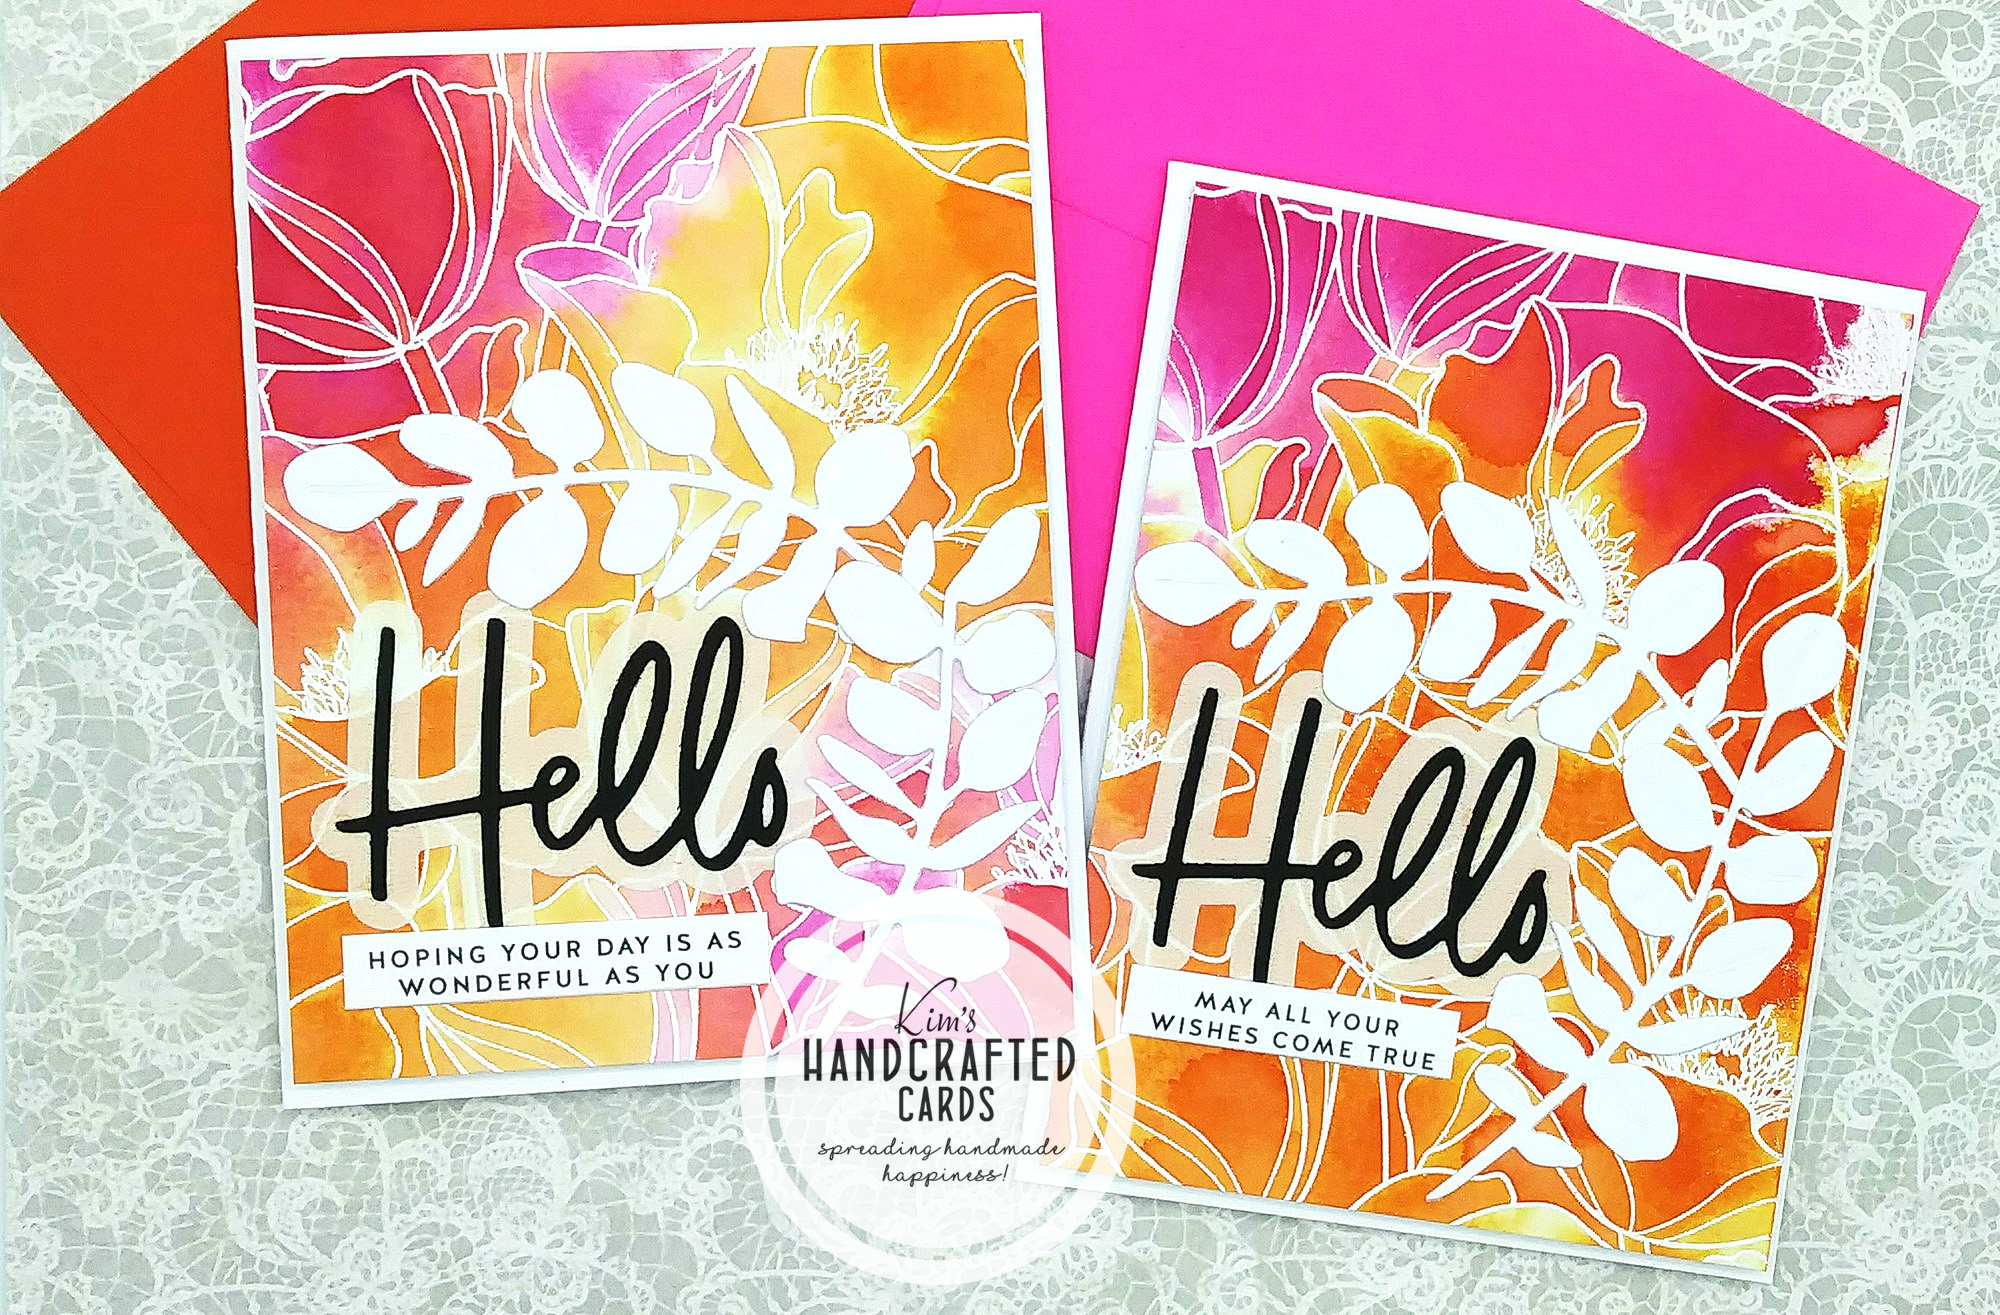
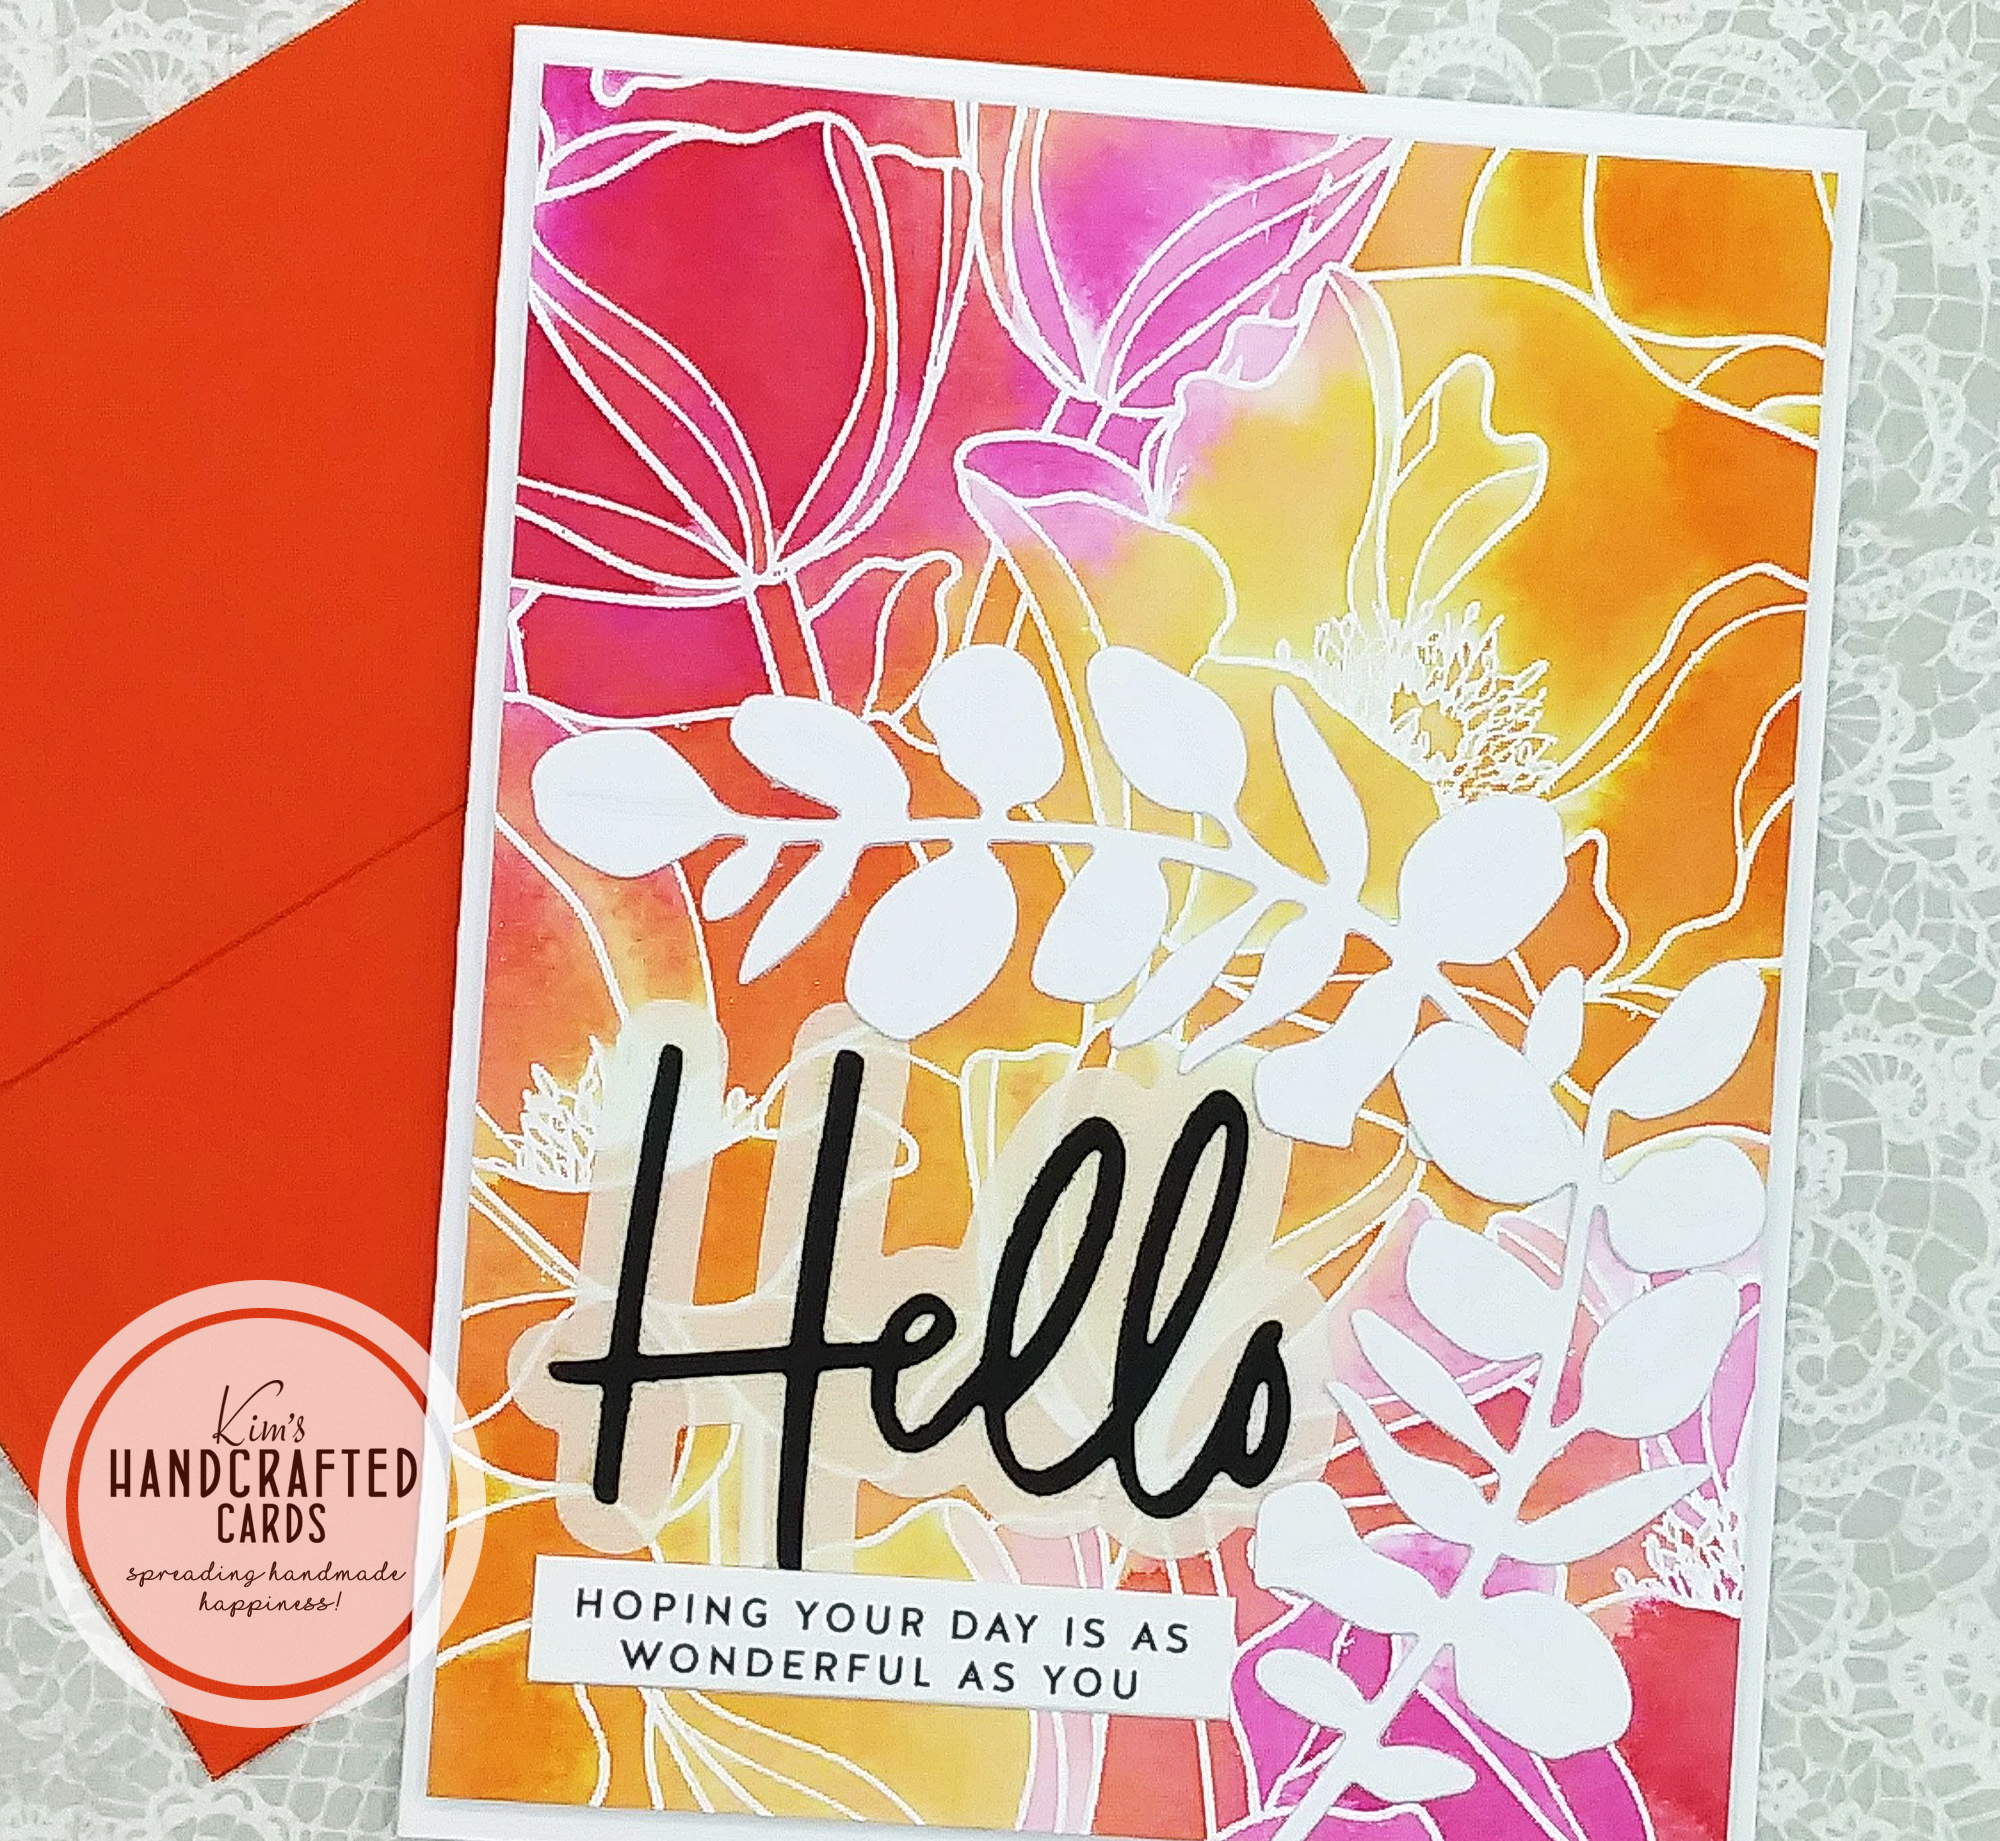
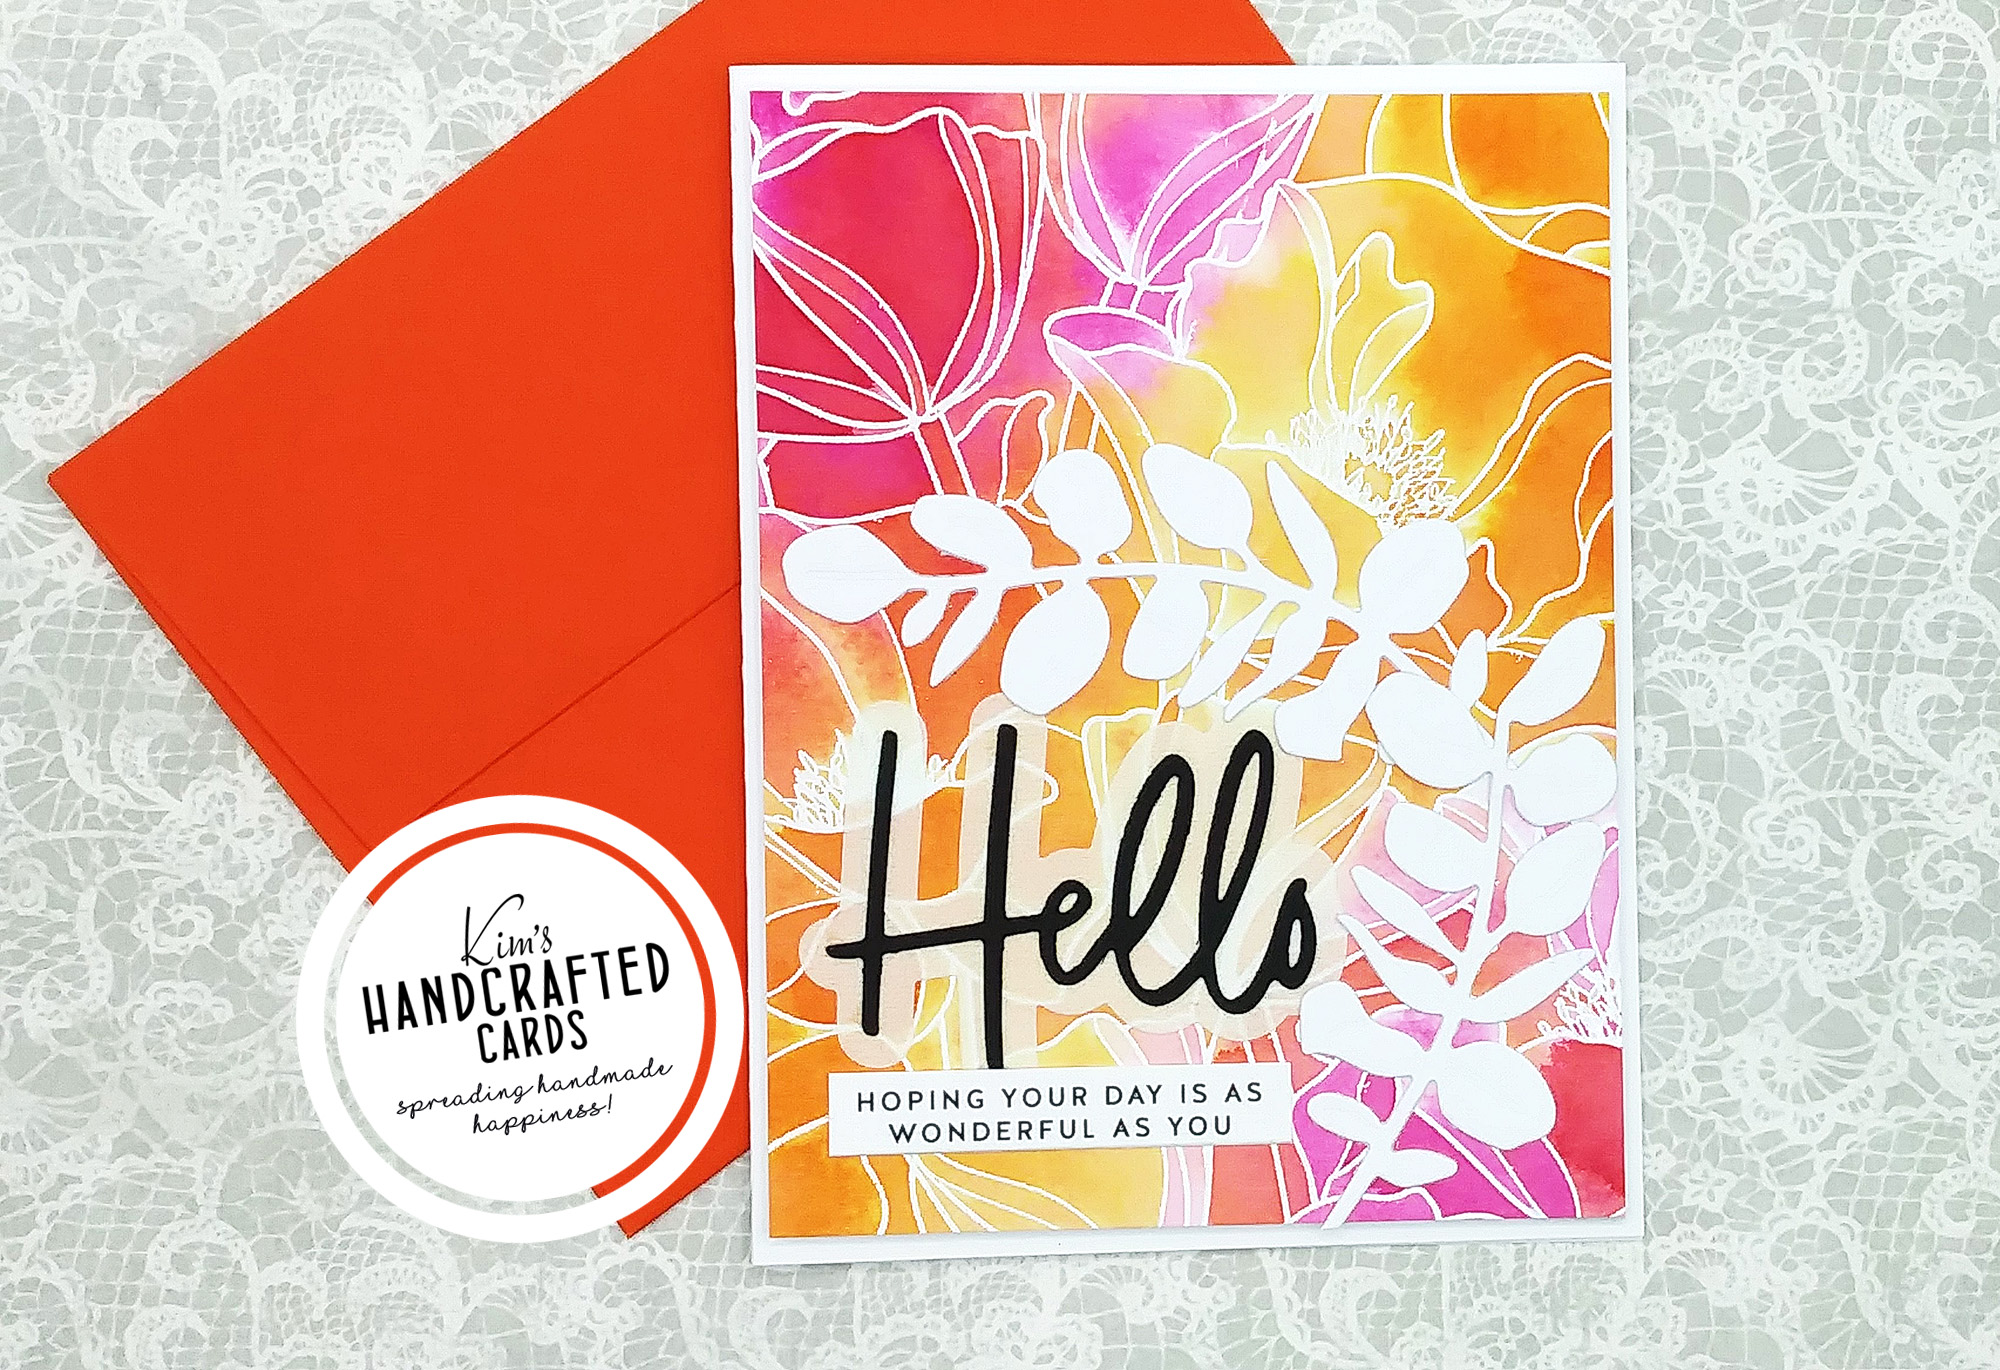
This technique is brilliant and it would be a staple design in my crafting if I can master it. So, I first decided on the colors to use. I went with Distress Traditional inks in “Spiced Marmalade” and “Picked Raspberry“. I love this color combo and for my background, I used Simon Says Stamp “Poppies”. It’s a cling stamp that is just gorgeous!
For watercolor paper, I used Tim Holtz Watercolor paper on the smooth side, conditioned it with my anti-static powder tool and with my new Versamark ink pad, stamped my image. I stamped twice to be sure I got a good impression on the paper.
From there, I white heat embossed it using Gina K. Designs’ Fine White Embossing Powder. I buffed off any extra powder with my Microfiber towel. After that, I applied the direct ink pad to the paper placing the colors in different areas of the images. Then, I generously sprayed both panels with water and set them aside to dry. I was so blown away, the images came out beautifully! I have a couple of theories why I didn’t have success with this technique before which are at the bottom of this post. Moving on, I began working on my sentiments.
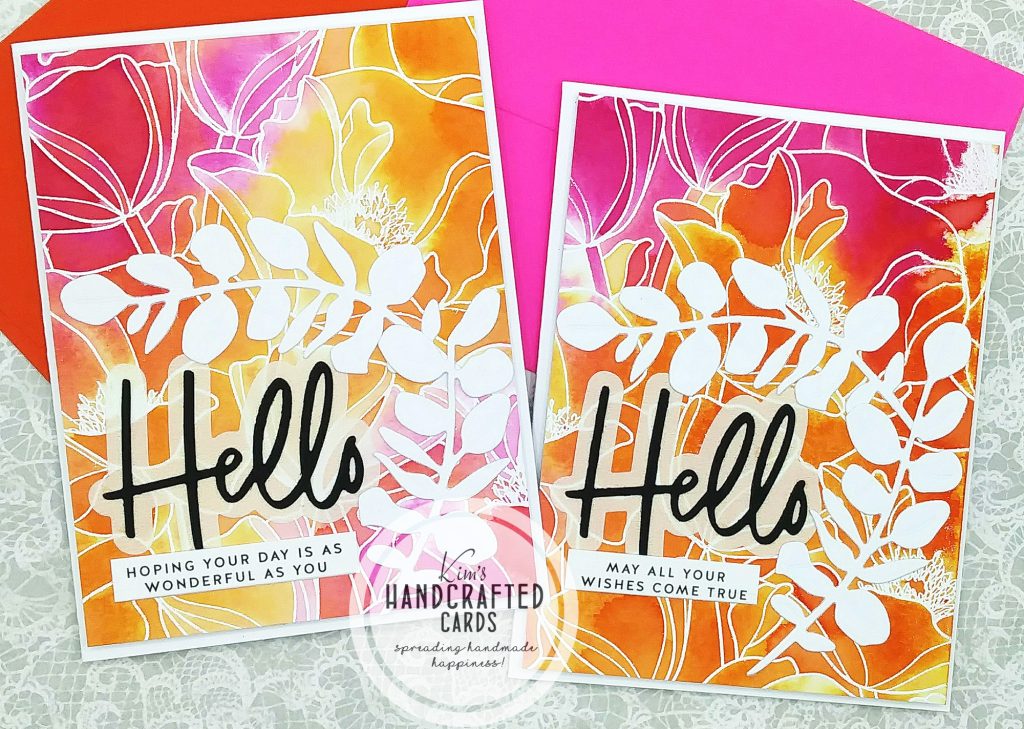
I so love Pinkfresh Studio’s Word Dies so I picked the “Hello“. I die cut the letters on black cardstock. I wanted the shadow to be on vellum so that the background design would not get too covered up. I have Lawn Fawn’s Pearlescent Vellum in my stash so I went with that. It sorta takes on the color it’s on top of and it’s stunning.
Decided these needed some encouraging Birthday messages so chose Simon Says Stamp sentiment strips for my secondary sentiments.

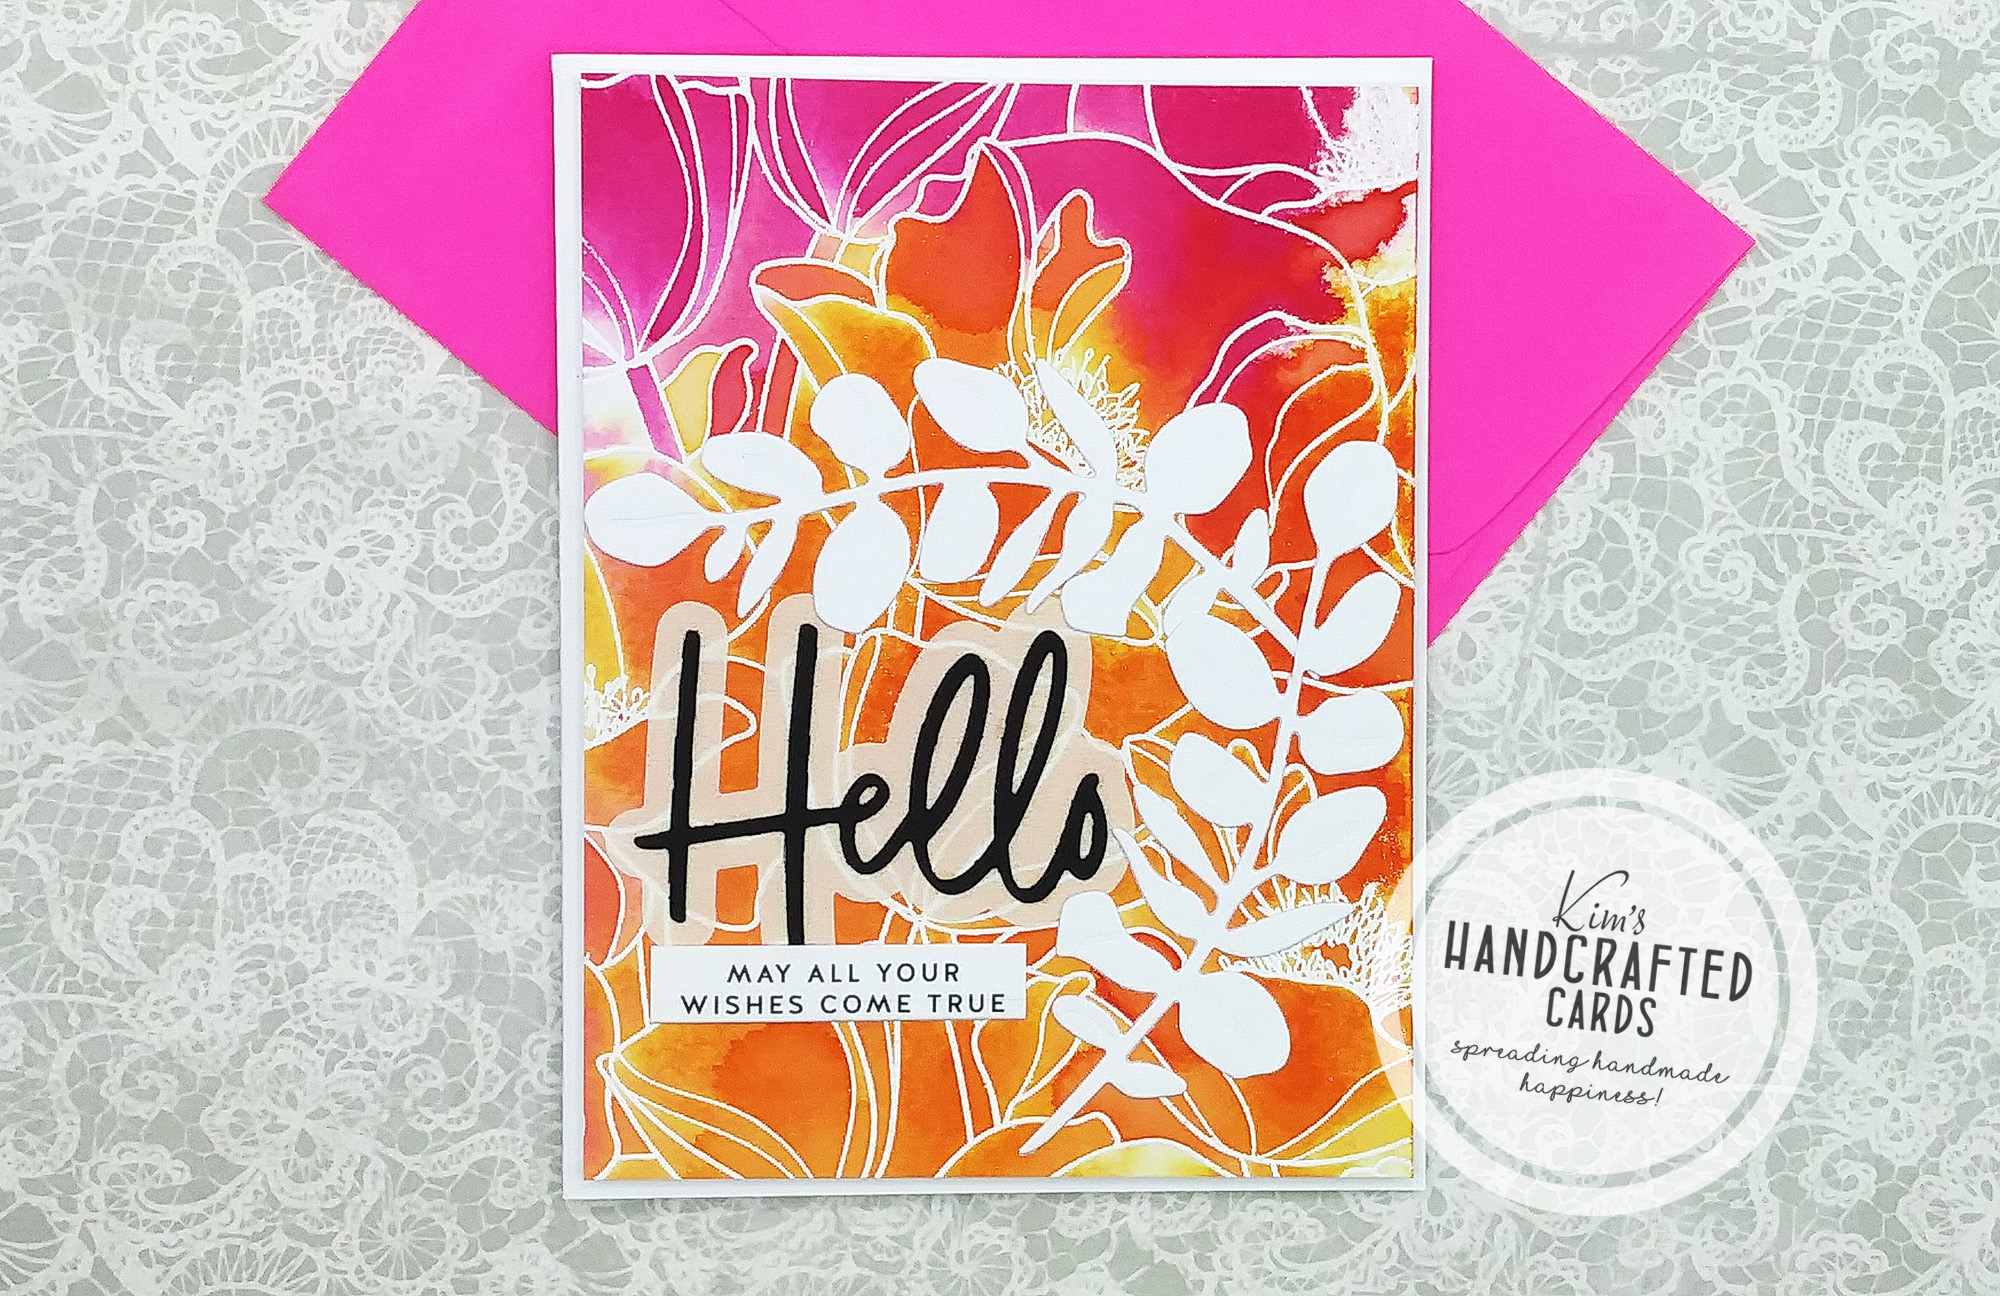
To put the cards together, I glued down the “Hello” sentiment first and then the sentiment strips.
And to add more interest, I die cut a few leaves from Honey Bee Stamps’ “Greenery” Lovely Layers Die set and glued them to frame my sentiments.
I am IN LOVE with how these cards turned out! I wish you could see them in real life!
Where I was Going Wrong with Distress Resist
Every technique requires having good products and understanding the process. So, I have a couple of ideas why my first round didn’t come out as desired:
- Wasn’t getting good impressions when stamping the image. And, that could have been that my Versamark ink pad had dried out to the point it needed to be replaced. When I got the new ink pad and worked with it, I noticed it was really sticking to my cling stamp.
- Wasn’t getting the embossing powder over my entire image. If you’re a cardmaker you understand what I’m saying. It’s hard to see the stamped image since it’s on white watercolor paper, even under bright light. It’s hard to see if the powder covered the entire image. After I stamped my image, I took more time examining the paper and heat embossed several times just to be sure and that worked.
Distress Resist is now a staple technique in my crafting and one of my very favorite ways to make backgrounds for cards!

- Simon Says Stamp “Poppies” Cling Background Stamp
- Gina K. Designs Fine White Embossing Powder
- EK Tools Anti-static Powder Tool
- VersaMark embossing ink
- Wagner Heat Gun
- Tim Holtz Distress Watercolor Paper
- Distress Picked Raspberry and Spiced Marmalade Inks
- Distress Spray bottle
- Pinkfresh Studio Essentials “Classic Word Dies”
- Honey Bee Stamps “Greenery” Lovely Layers Dies Set here or here
- Simon Says Stamp Send Happiness “Birthday” sentiment strips
- Bearly Art Liquid Glue
- Lawn Fawn Pearlescent Vellum