It’s so good to start feeling better! Being sick is absolutely no fun and I’ve been struggling for about 2 weeks with a nasty virus. And what better way to celebrate being among the land of the living than to see to a YT video that inspired me to make Christmas cards?!
Can’t take credit for this card design! I was watching Jennifer McGuire’s video, “New! Easy & Unique Pop-up Display Cards”. She made some pretty cards that pop up when you take them out of an envelope and she made them in different sizes and orientations.
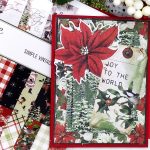
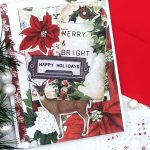
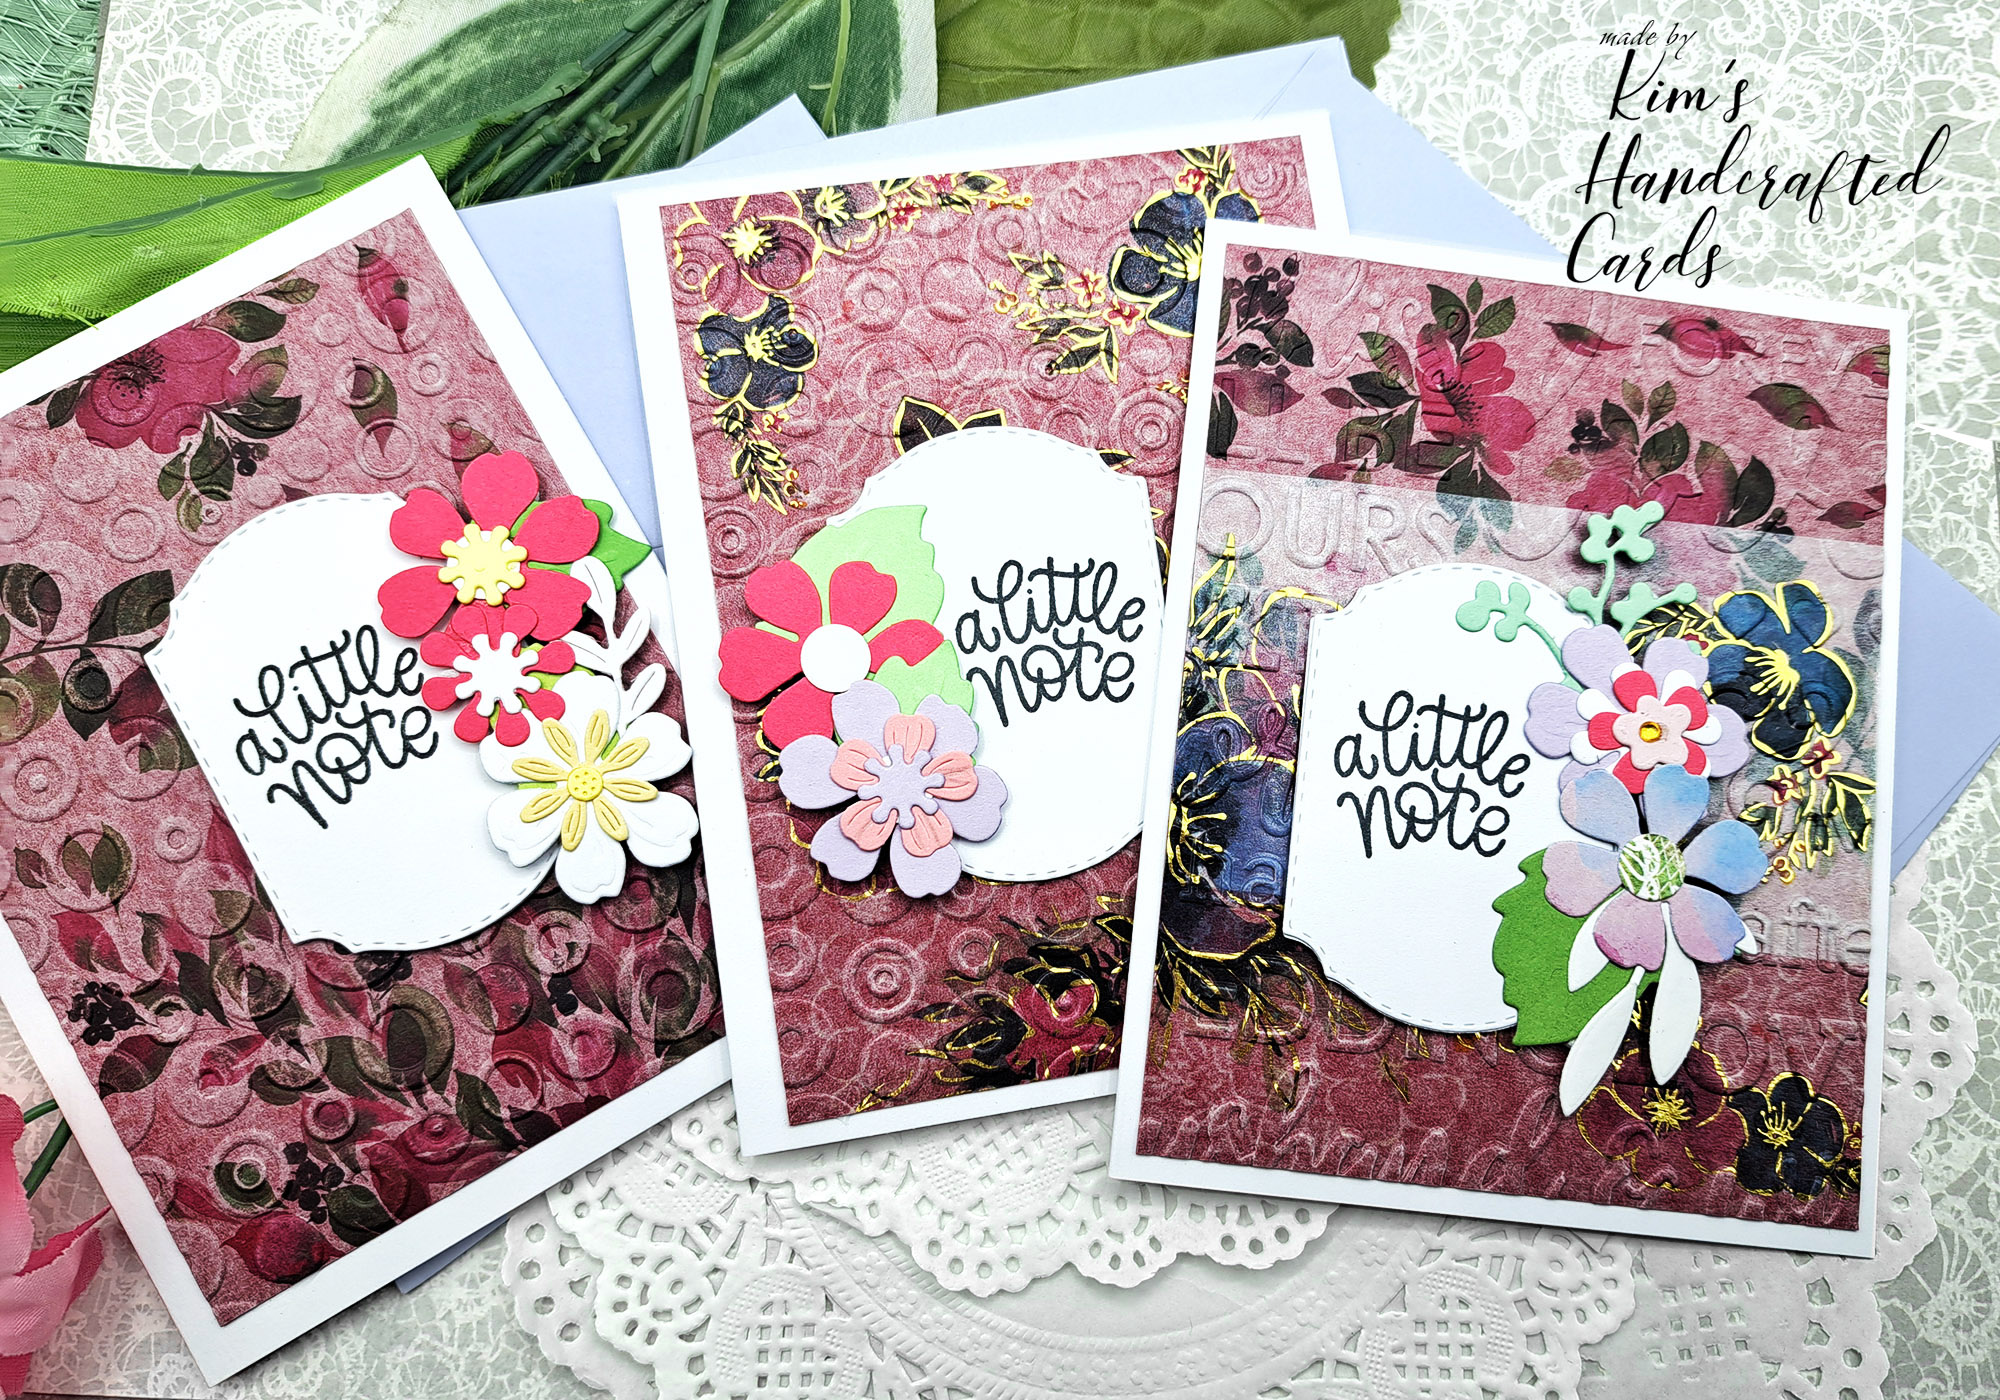
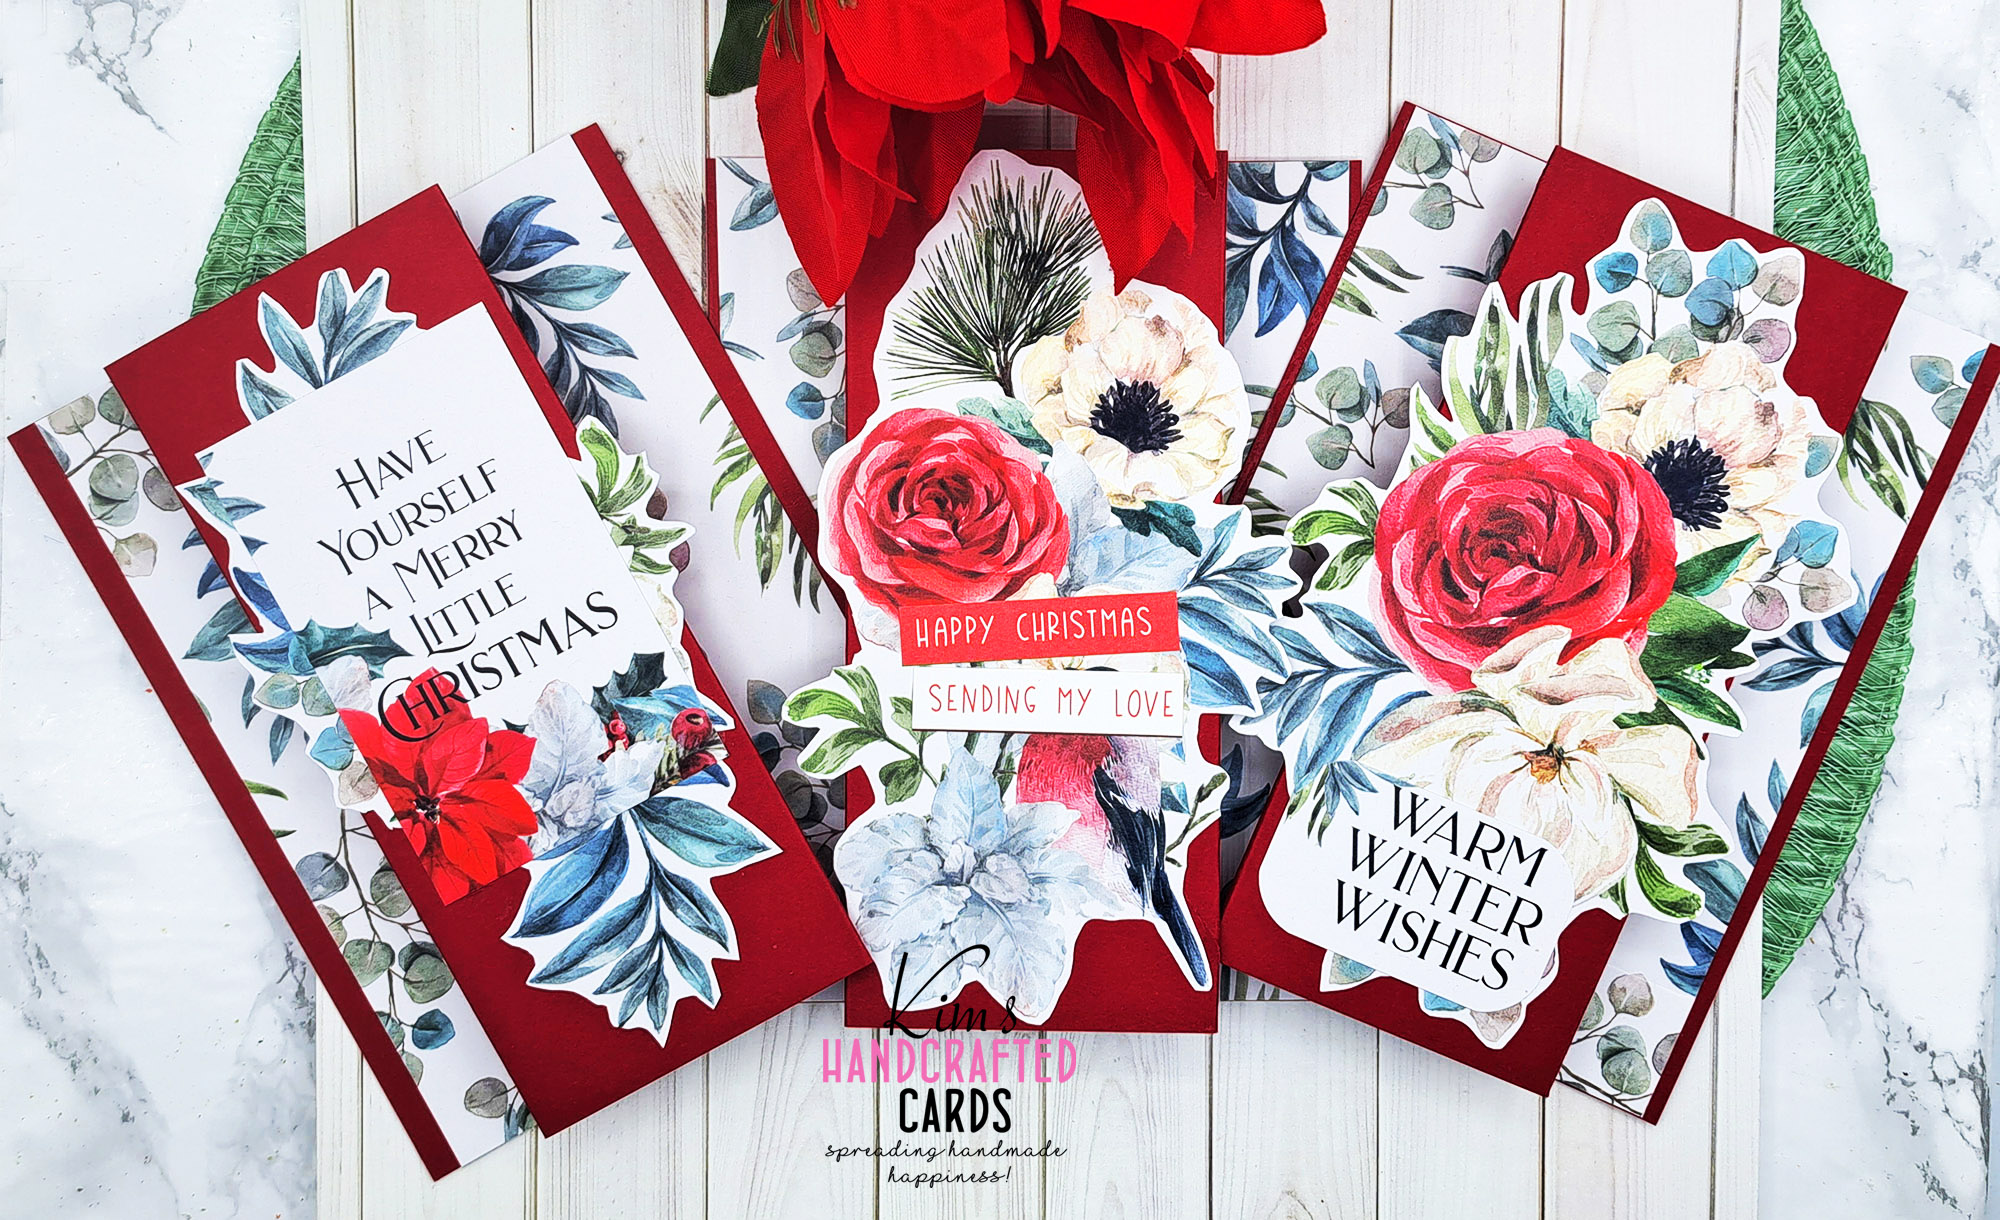
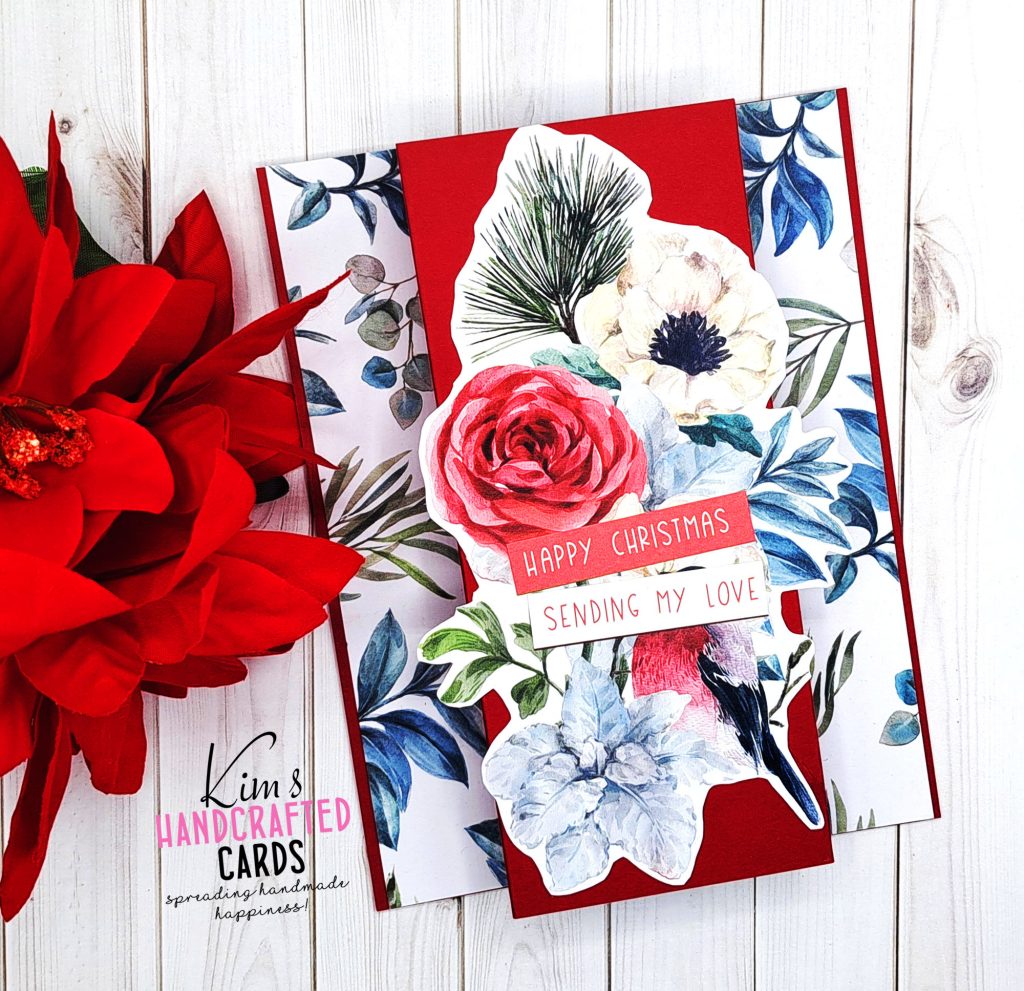
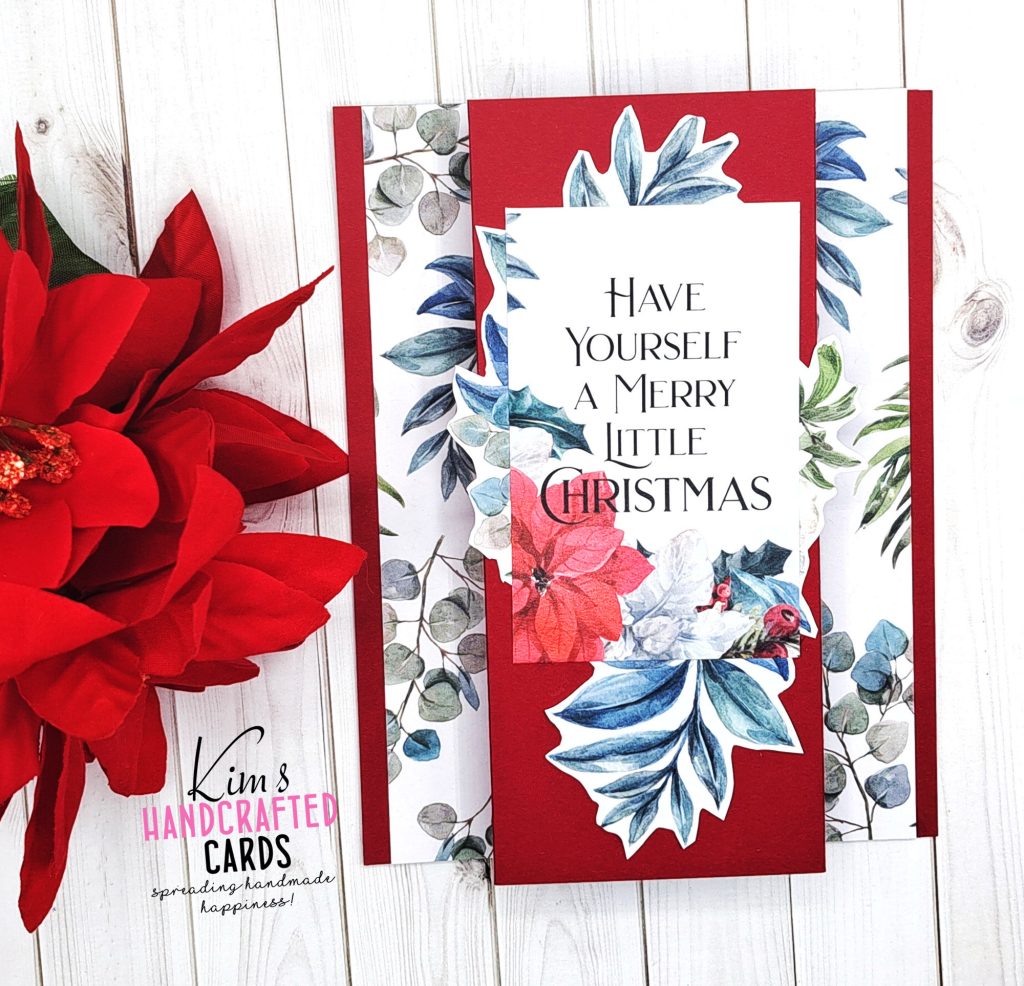
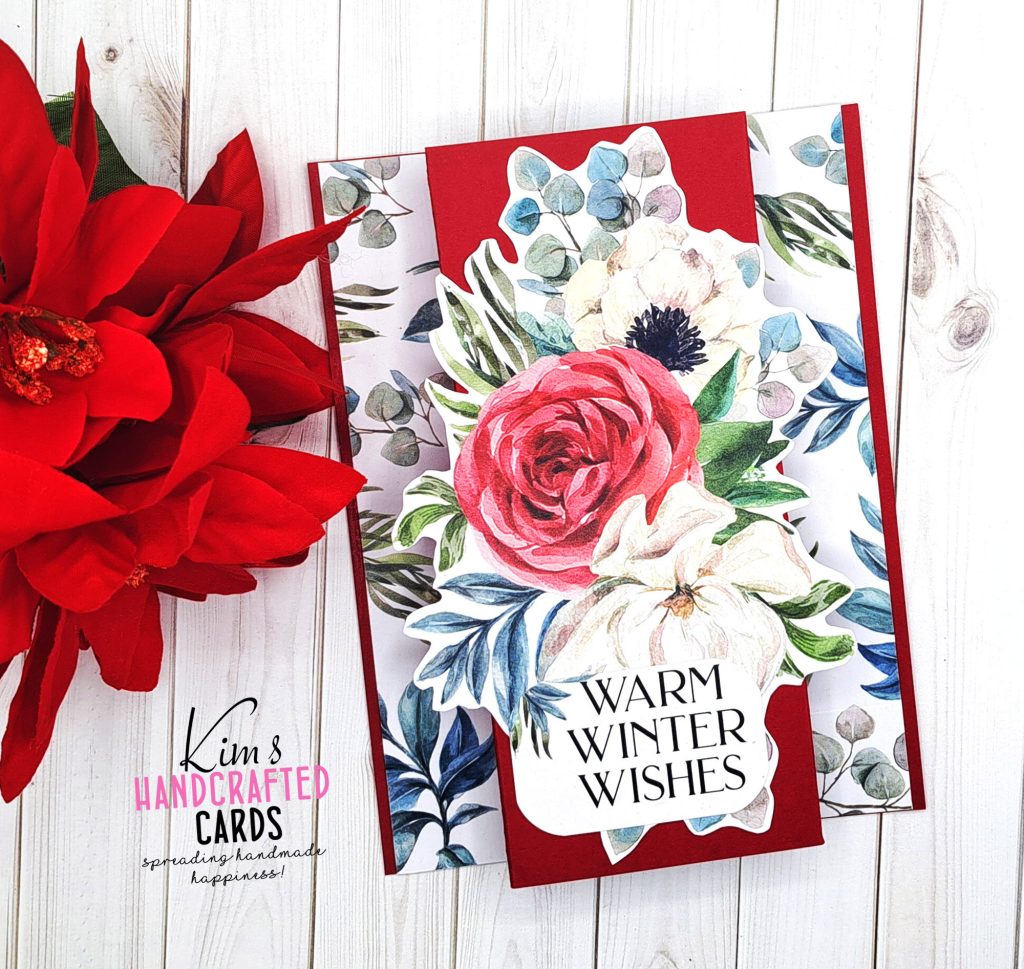
I wasn’t feeling well enough to do a lot of ink blending, stenciling or stamping but I remembered that I had this 12″ x 12″ Christmas collection from Paper Rose called, “Winter Blooms” and I hadn’t used it yet! I also added a couple of sentiment strips from “Rustic Christmas” (another paper pack) by Simple Stories.
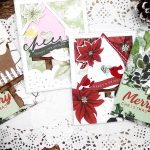
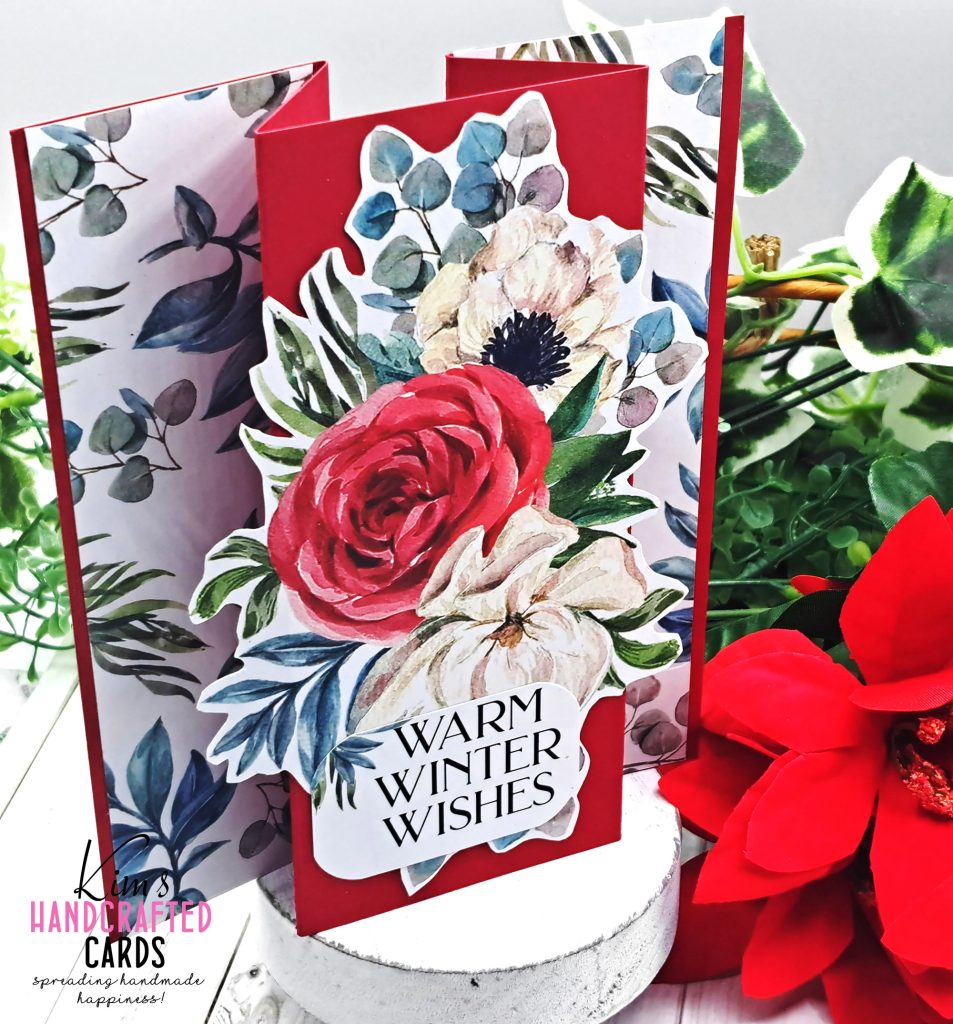
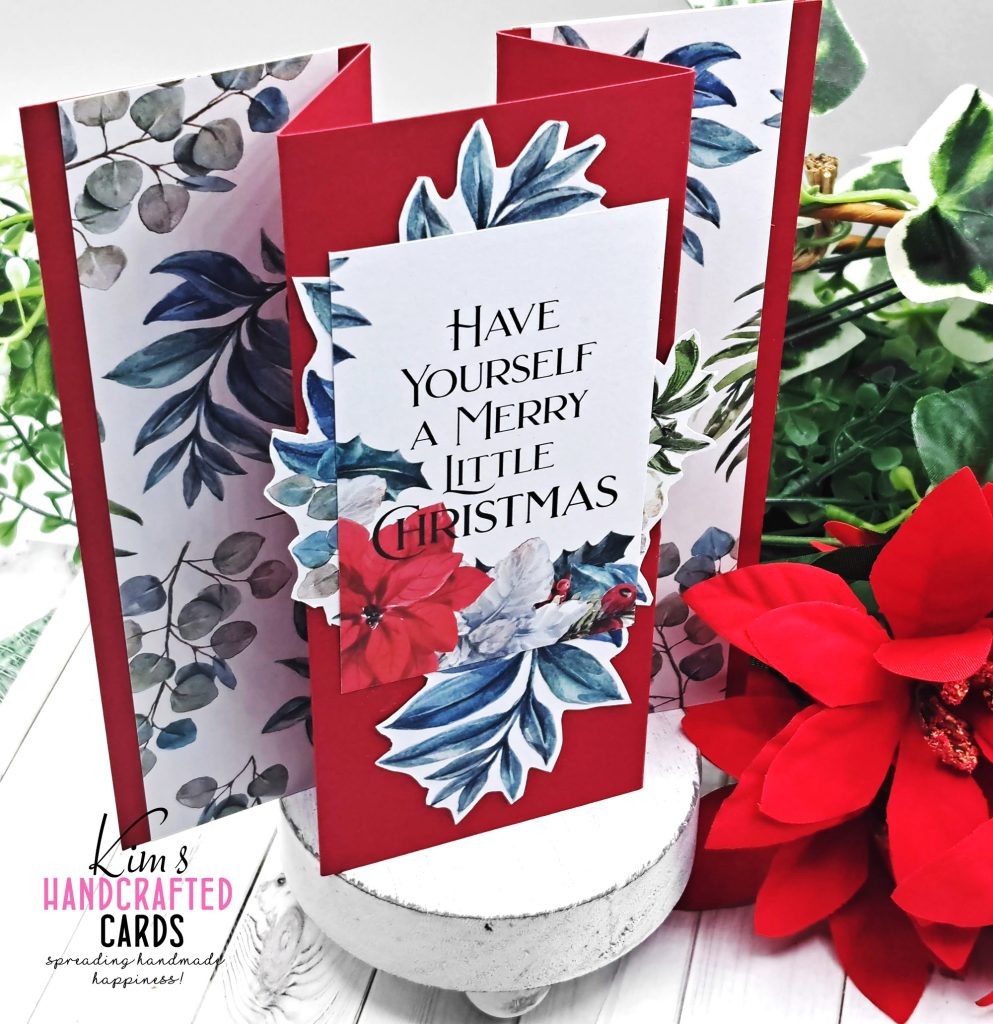
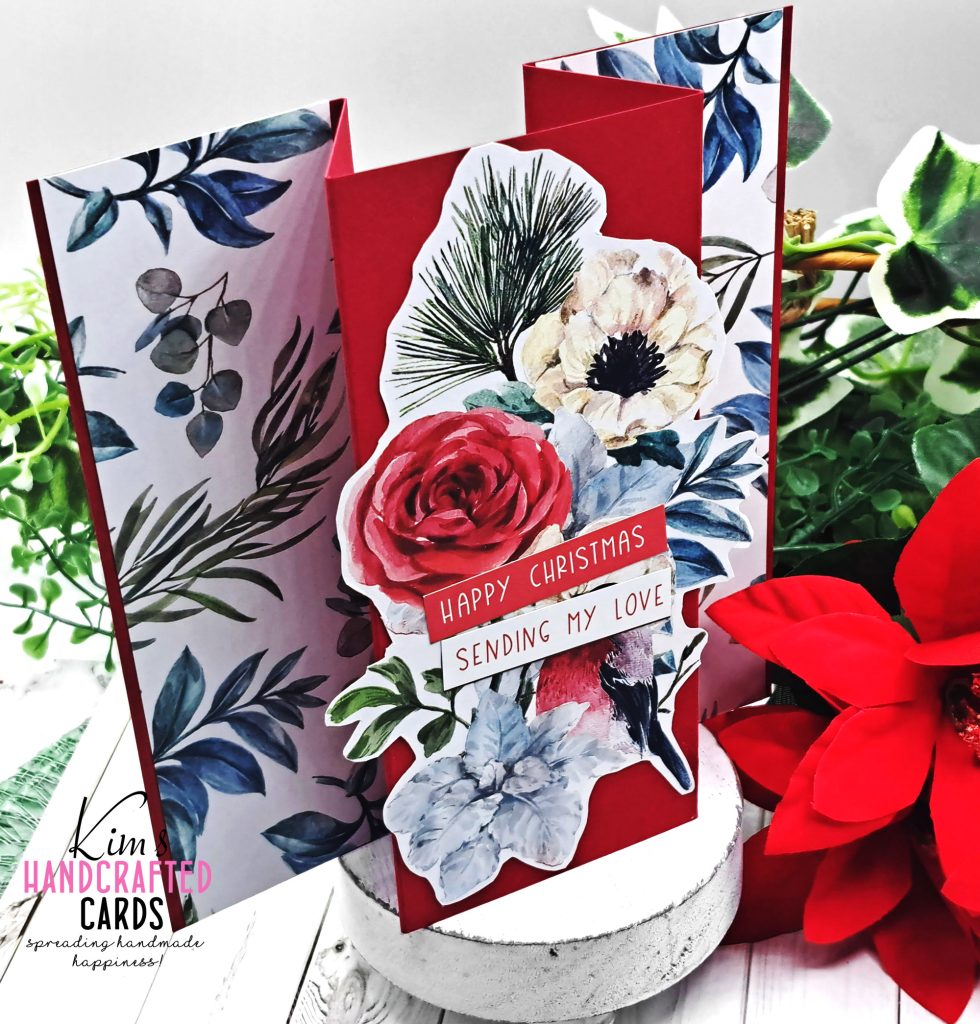
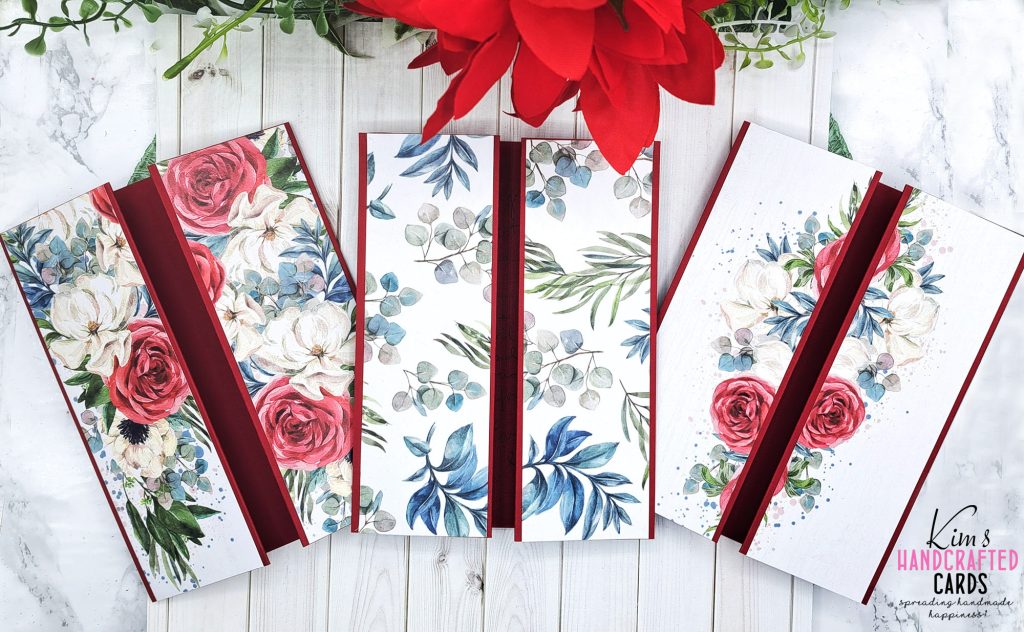
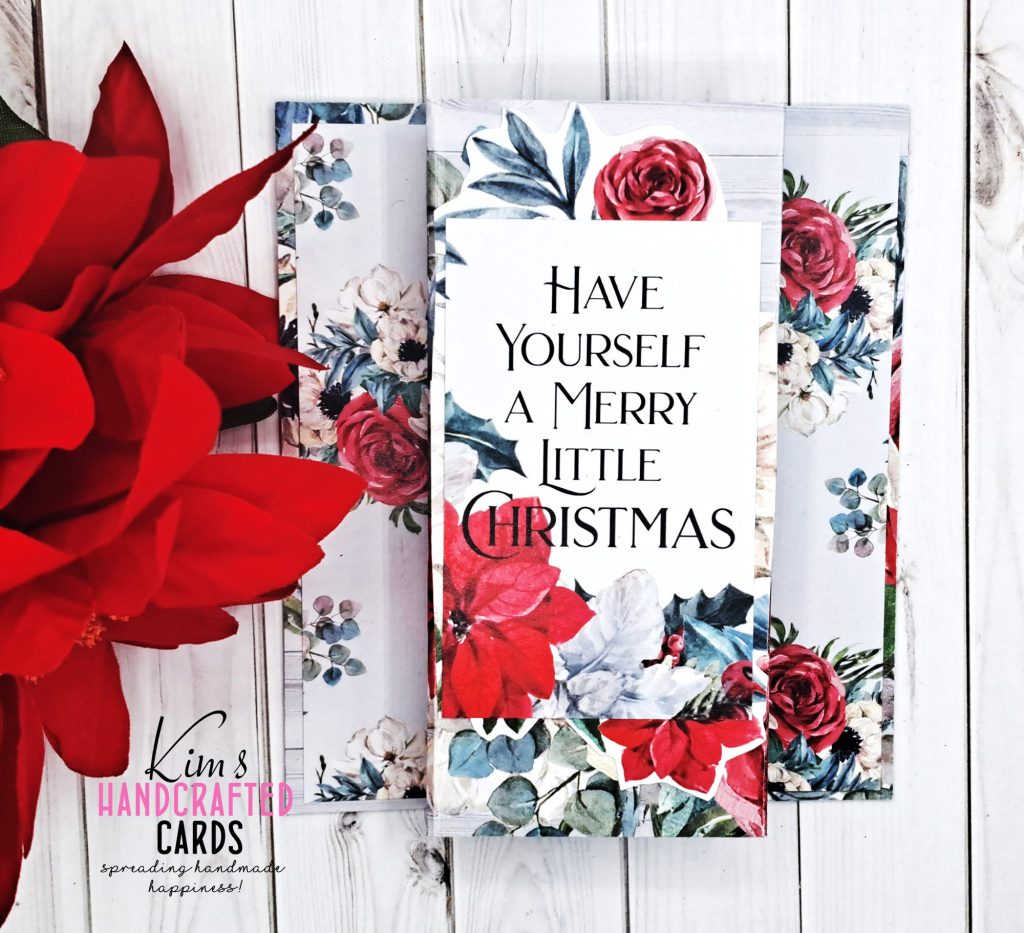
After I learned how to construct the cardbases for the pop-up feature, I went a lil crazy and made 3 cards + 1 bonus card! And get this?, the 3 cards are 5″ x 7″ size! I hardly ever make large cards but there was a good reason and I’ll explain in a bit. Let me first show you some pics of the cards standing up so you can see how it pops up.
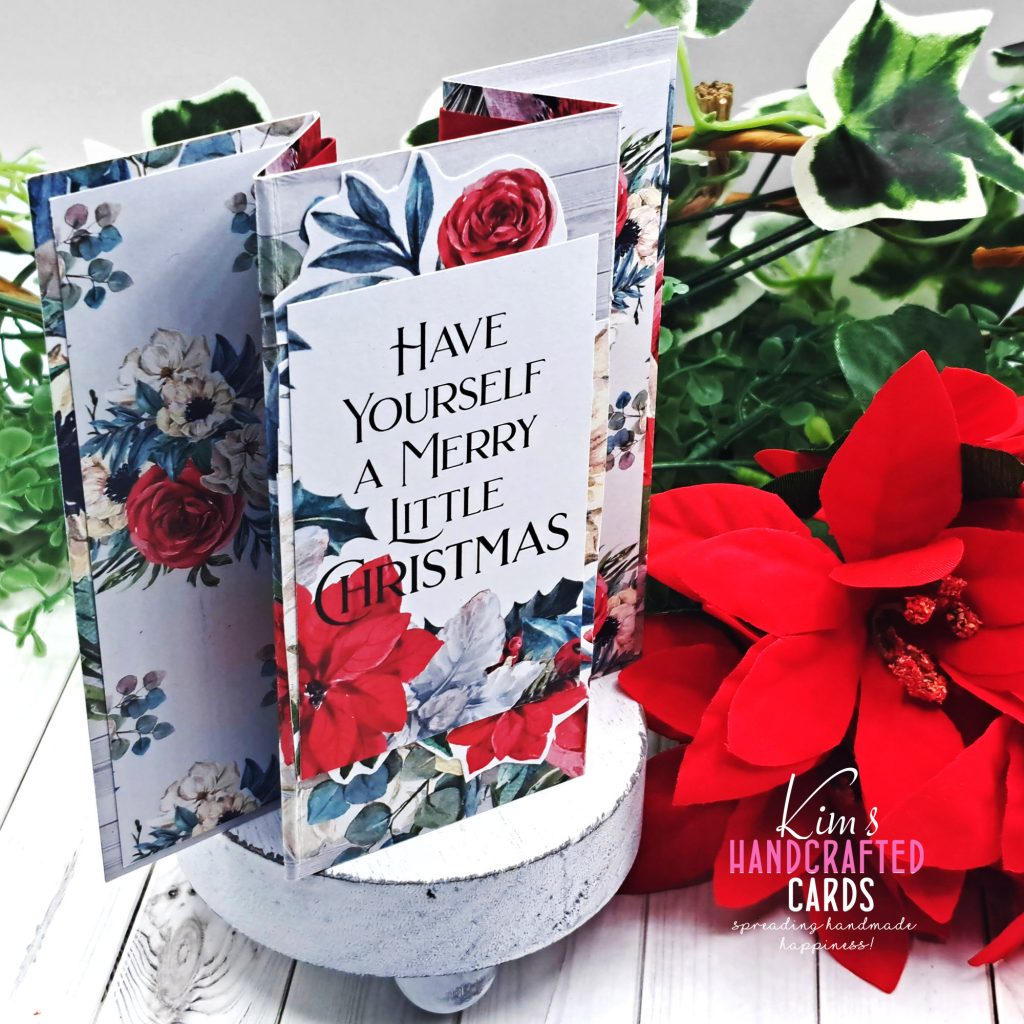
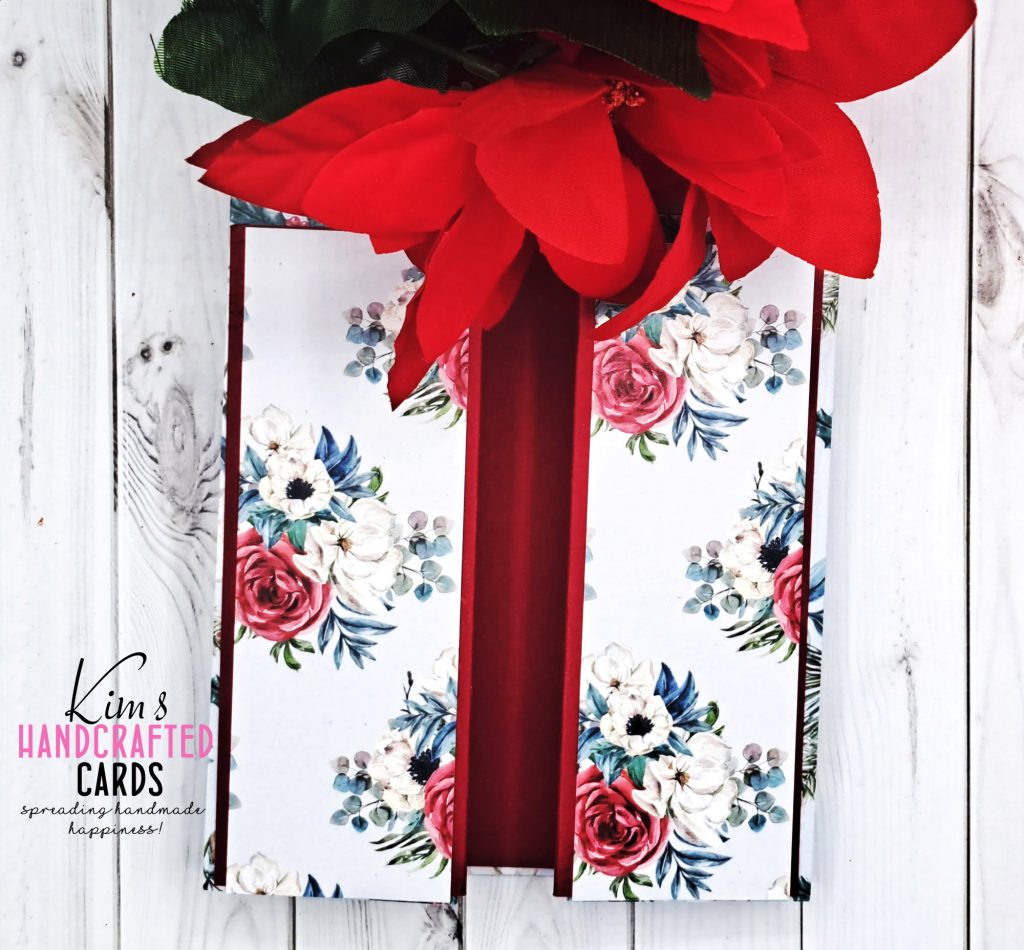
The last card is the bonus card and it’s a regular A2 size card.
Aren’t they gorgeous?!
I LOVE these cards so much! If you haven’t made a pop-up display card, watch Jennifer’s video. She’ll go over where to make your score marks and the dimensions for decorating the panels. I’ll just talk about why I made 5″ x 7″ cards and give you the dimensions I used to decorate my panels.
First thing I did was trim my “Schoolhouse Red” cardstock by Simon Says Stamp to 5-1/2″ length x 9″ width for the A2 card and 7″ length x 11″ width for the 5″ x 7″ card.
When I was working with the 12″ x 12″ pack, there’s a couple of sheets that have large, beautiful florals and you can cut them out. I think you can put them through the Brother Scan ‘N Cut, but guess what I did? Yep! I fussy cut all the flower clusters from 1 sheet and ended up with 3 of them. I was so proud of myself cause I’m not great at fussy cutting, but I took my time because I was determined to have these flowers for the center of my cards.
After cutting them out, I noticed how large they are so they wouldn’t fit on an A2 size card. So glad Jennifer made 5 “x 7” display size in her video cause that’s what I went with and it worked perfectly!
Basically constructing the card bases gives you a total of 6 panels, 3 on the front and 3 on the back. The center panel is the widest. I decided to write my personal message to the recipient (one of these cards is going to a great friend) on the back center panel. That leaves 5 panels to decorate.
I knew the florals would go in the center so I trimmed down the pattern papers to decorate the side panels and also decorated the back panels which I think makes the cards look really finished!
Dimensions I used for trimming the panels:
- 5″ x 7″ card – trimmed the panels at 2-1/4″ x 7″
- 4-1/4″ x 5-1/2″ (A2) – trimmed the panels at 1-3/4″ x 5-1/4″
I absolutely love making cards that have a 3D effect, check out other specialty cards I made here! Below are pics of the back of the cards. Love, love this collection!
This is a terrific way to use up a paper pack collection! And as a paper crafter, I have a lot of pattern papers and sometimes it just sits in the drawer.
This post is probably my last one for Christmas 2023. I’m gearing up for 2024! So, if I don’t post anything before end of this month, I wish you a very BLESSED Christmas and Happy New Year!

Some of the links to the products I used are affiliate links which means that when you shop with them, I’ll receive a small commission at no extra cost to you. Your support helps me run my small crafty business. Thank you so much!
- Paper Rose Winter Blooms 12 x 12 Collection
- Simple Stories Simple Vintage Rustic Christmas
- Simon Says Stamp “Schoolhouse Red” Cardstock
- EK Tools Precision Scissors (great for fussy cutting)
- Paper Trimmer: Tim Holtz here (Ranger), here (Scrapbook.com) or here (AZ)
- Scor-Buddy Scoreboard
- Teflon bone folder (I bought mine on AZ in 2018, no longer available), but here’s a similar one from Honey Bee Stamps here
- Bearly Art Liquid Glue
- Accents 100 lb. White Cardstock
- Glassboard Craft Mat → Use my Code → KIMCARDS20 at checkout to save 20% Off!
- Craft Reverse Tweezers by EK Tools (great for picking up die cut pieces)
- Mini White Wood Risers (2-pack) – AZ