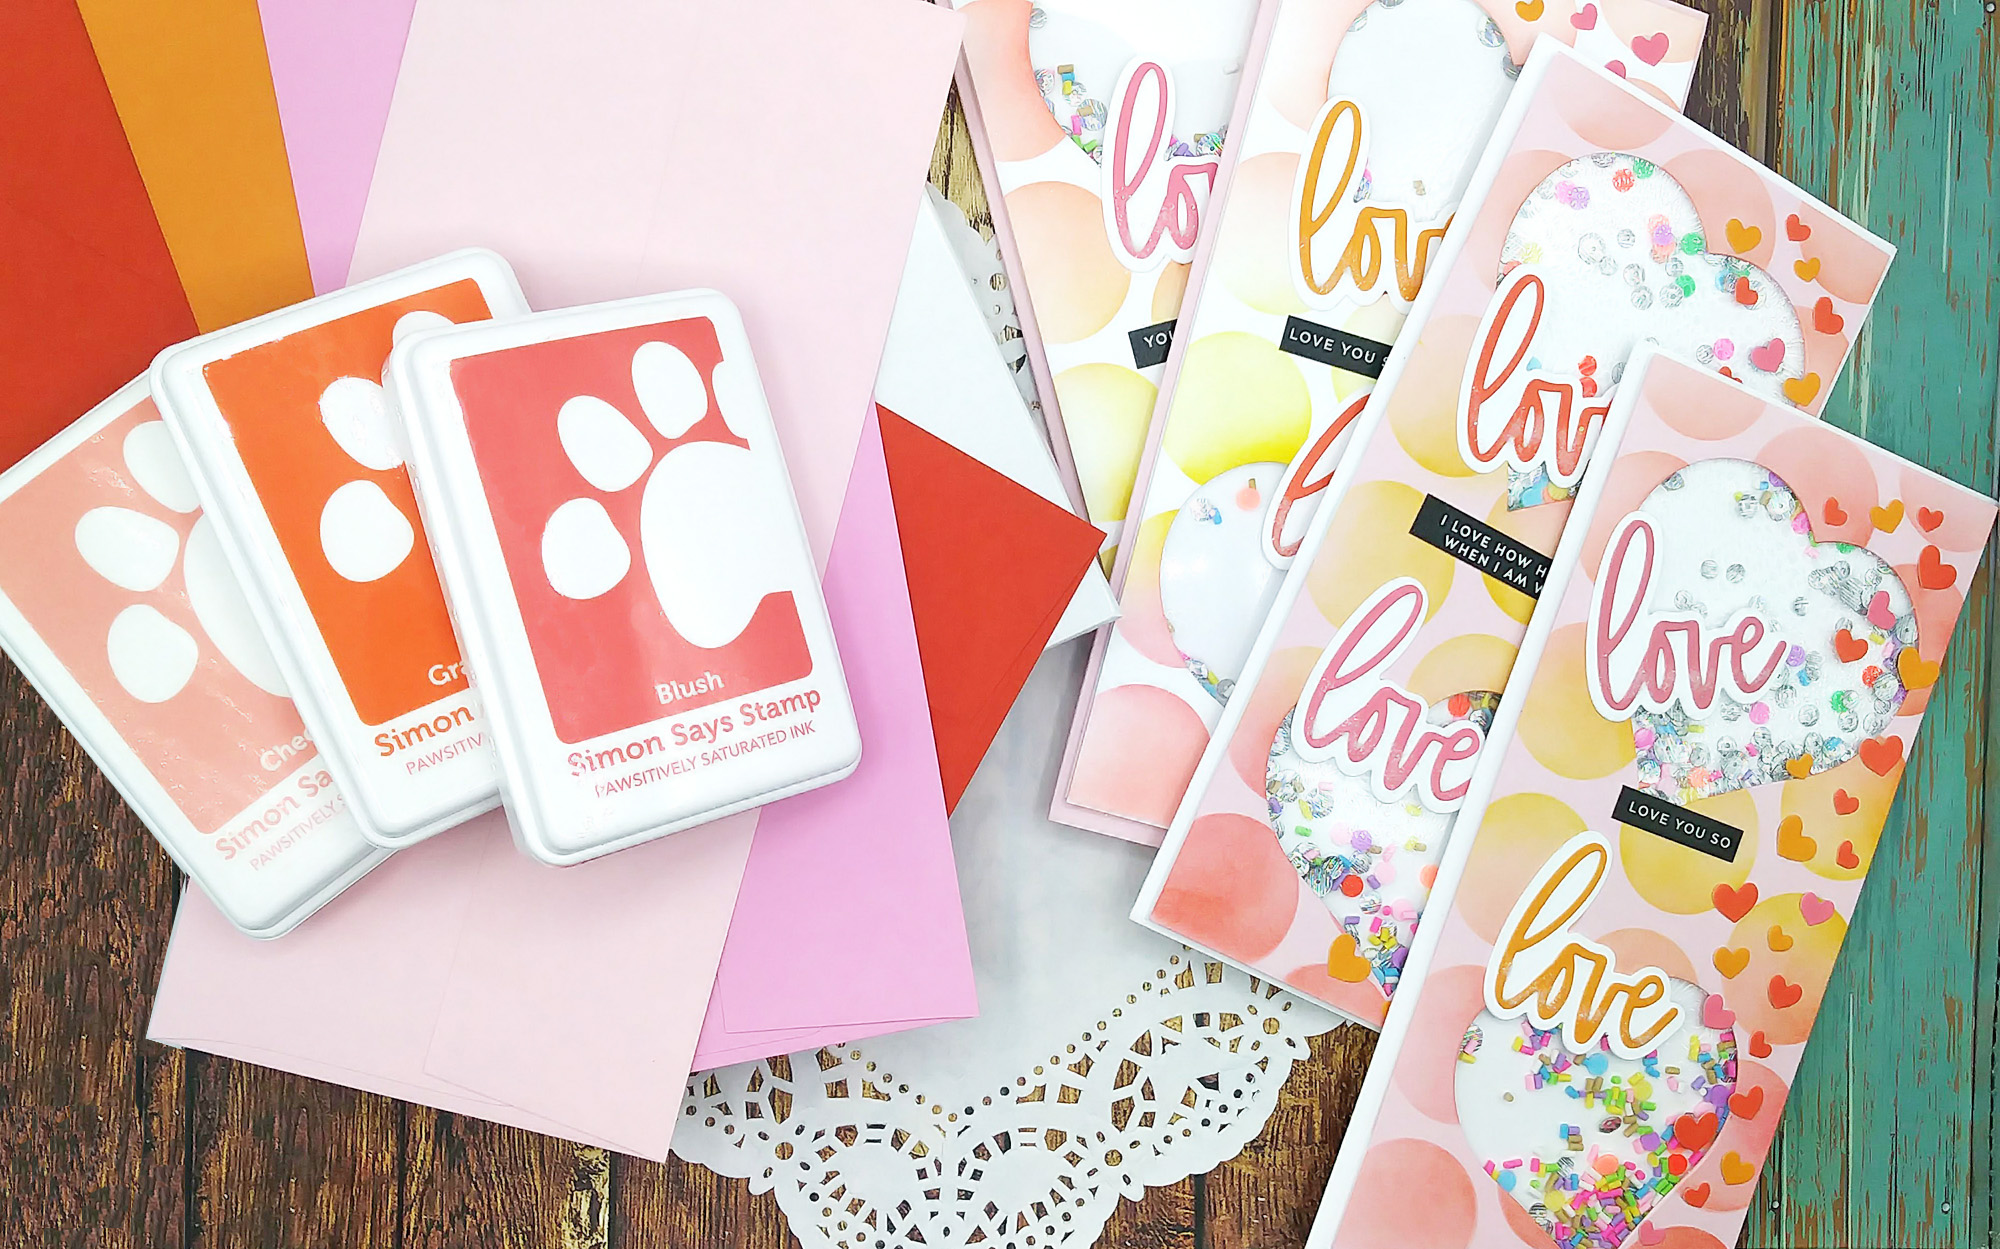
Two things that I’ve never done in my cardmaking are: (1) never made a vertical slimline card before and; (2) never made a vertical slimline shaker card before LOL! Well, not anymore!
I got inspired by Nina from Simon Says Stamp’s birthday card design on their YT channel. She used Simon’s balloons die for her shaker card. You can watch the video here. Anyway, I really want to stretch myself a bit this year and make some card designs I haven’t done. Since Valentine’s Day is coming up, I wanted to use my heart dies to make shakers.
Making the Card Bases
But, I wanted to step it up and so decided to make slimline cards but I’ve always leaned towards landscape (horizontal) orientation. So, to make my card bases for vertical orientation, I used my Martha Stewart scoring board (you need a 12 x 12 score board for this step) and some 8-1/2″ x 11″ white cardstock. I scored the paper horizontally at the 5-1/2″ mark and folded it with my bone folder. Then I trimmed it to 4″ so my card bases measures 4″ x 8-1/2″.
There’s many sizes you can make for slimline, I’ve seen 3-1/2″ x 8-1/2″ and 4″ x 9″. As long as the card can fit into a #10 business size envelope, you’re good to go!
These cards uses a lot of cool goodies from Simon Says Stamp starting with my stenciling and ink blending for the backgrounds. I used the “I love big dots” stencil (it’s a large stencil perfect for slimline cards) and their Pawsitively Saturated Inks and WOW, I just love the ink blending with those pads 🙂
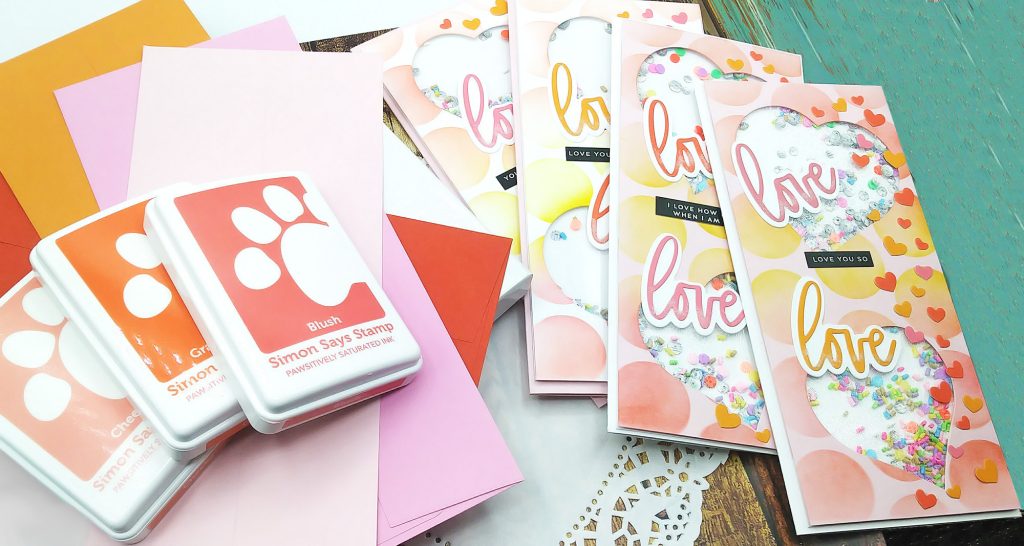
I used trios of colors: (Blush/Grapefruit/Cheeky), (Peachy, Mandarin, Pucker) and (Lemonade, Sunbeam, Cirtrine)
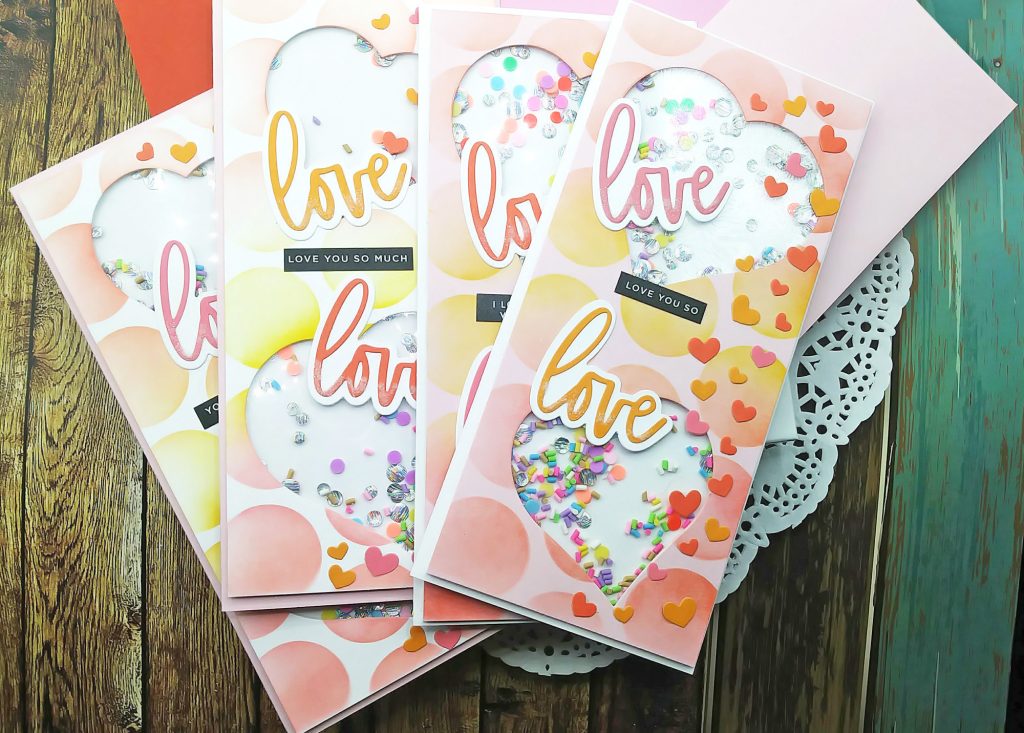
For the heart die cutting, I took 2 sizes from my nested heart die set in my stash and die cut the panels. I used the 2 mid-sized hearts because I needed to leave room for sentiments.
I used foam adhesive on the back of my acetate to build my shaker walls and filled them with goodies from Spellbinders and Nuvo.
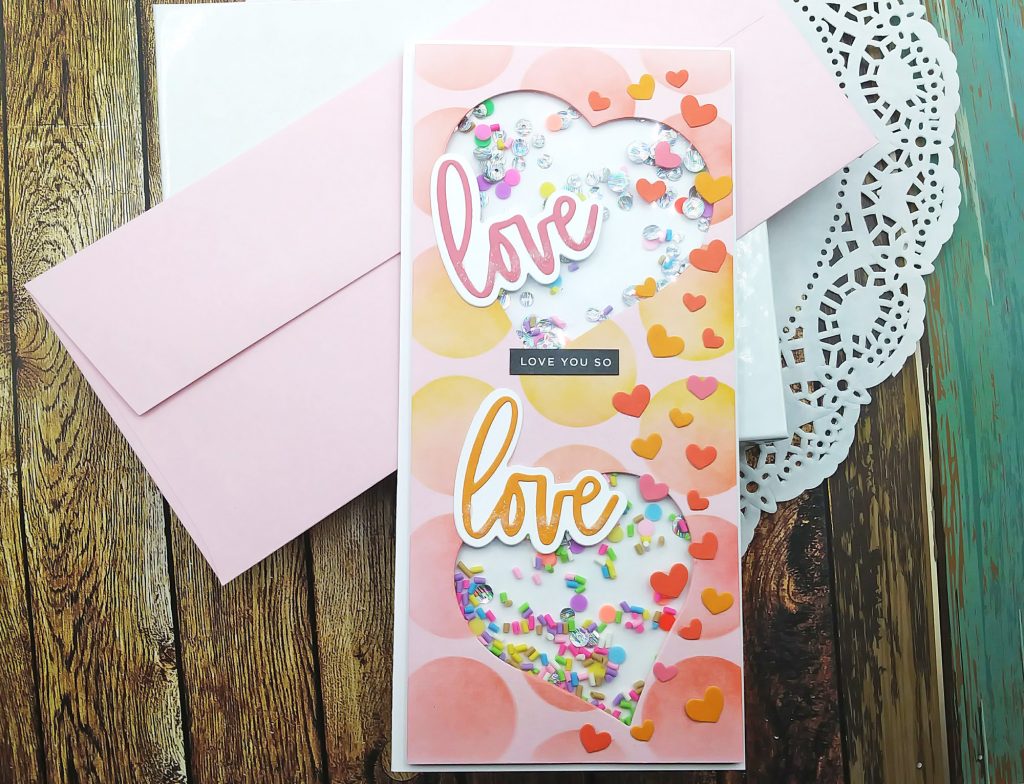
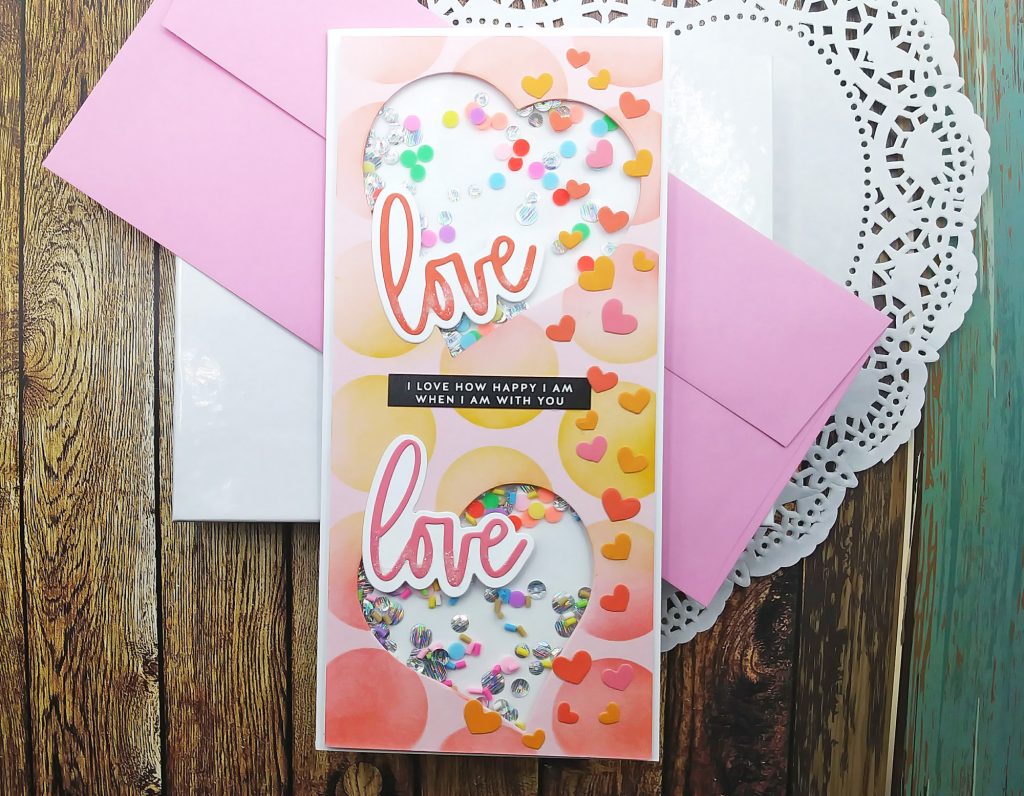
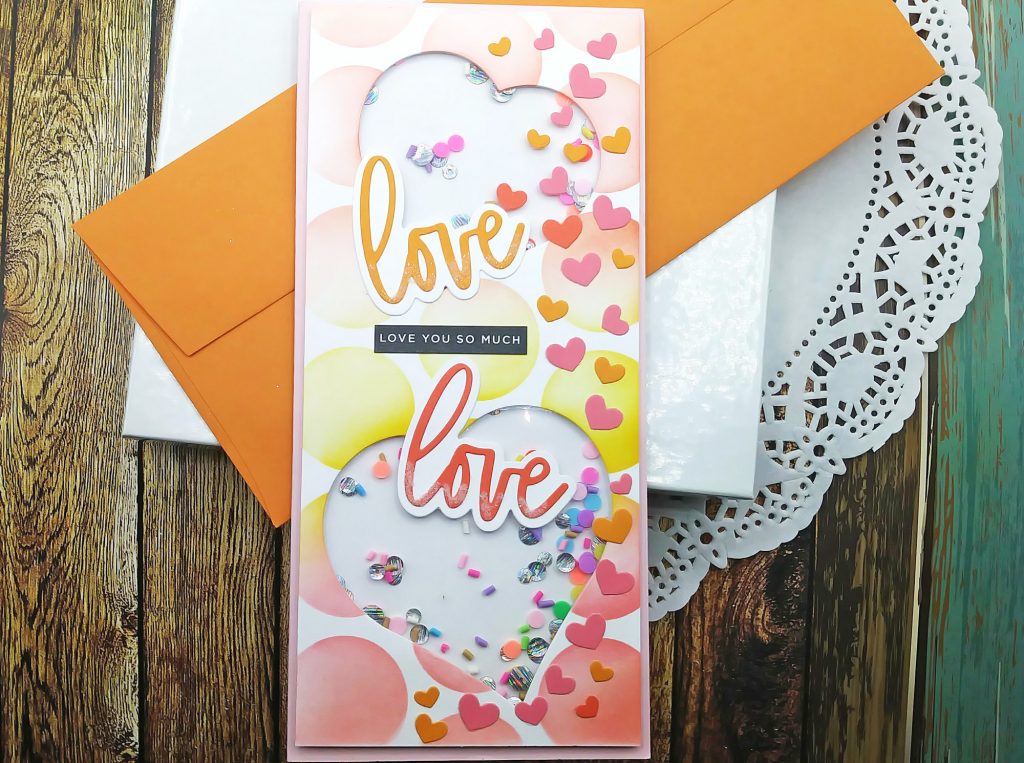

I die cut the “Love” sentiment from Pinkfresh Studio with Scrapbook.com‘s colored cardstock (“Sherbet” and “Florals”) several times and the outline in white cardstock and for the secondary sentiment, I used Simon’s Reverse love sentiment strips.
One thing I’ve always loved about making cards is how wonderful to mix and match products from many of my favorite brand companies.
After I adhered my sentiments, I still felt like the cards needed something else so that’s when I brought out Simon’s “Party Heart” dies which I’ve used so many times but they are just perfect additions to any card so I die cut a bunch of them again with Scrapbook.com’s cardstock and I glued all down the right side of the cards.
For my final touches, I added glitter to the bottom of the “Love” word die using Tombow’s Aqua Mono Liquid Glue (it’s a clear glue) and Distress Glitter. When I went to grab some envelopes, I saw the pack I purchased last year from Picket Fence Studios. These slimline envelopes are so pretty and they matched all my cards perfectly. Love how these turned out!

- Simon Says Stamp “I Love Big Dots” stencil
- Simon Says Stamp “Pawsitively Saturated Inks – Collection #1” for Collection #2 inks, click here
- Heart Nested Dies
- Simon Says Stamps “Mini Hearts Party” die
- Spellbinders Sweet Sprinkles
- Pinkfresh Studio Essentials “Classic Word” Dies
- CZ Designs Reverse “Love you” sentiment strips
- Simon Says Stamp “All things Happy” Reverse sentiment strips
- Picket Fence Slimline “Rainbow” Envelopes
- Tombow Aqua Mono Liquid Glue
- Martha Stewart Scoring Board (not available), but this one is similar
- Scrapbook.com Smooth Cardstock Collections
- Distress Glitter